This tutorial guides you through starting to create your Digital CV.
Go to navigate.uk.com
1. Introduction
You will learn how to enter personal information, employment history, education, and certifications to build a professional CV.
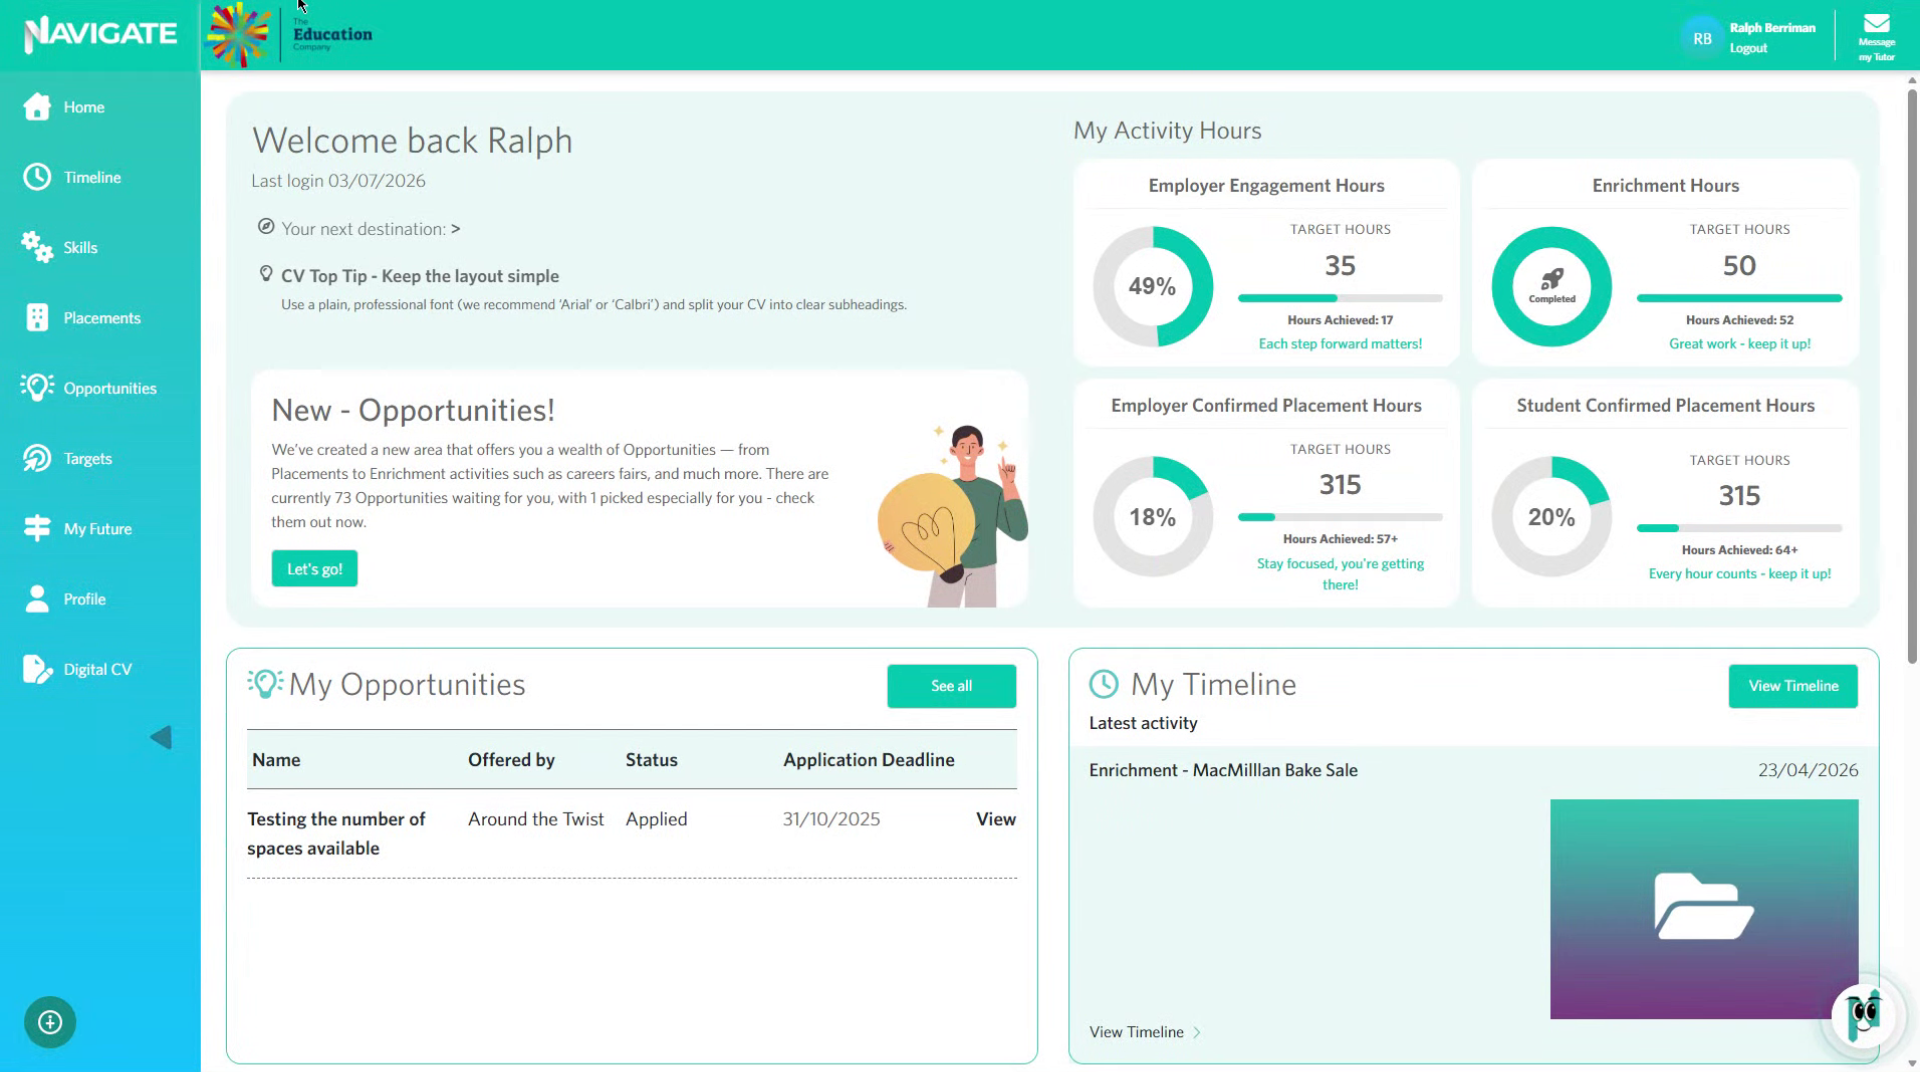
2. Access Digital CV Module
Click "Digital CV" to open the Digital CV module.
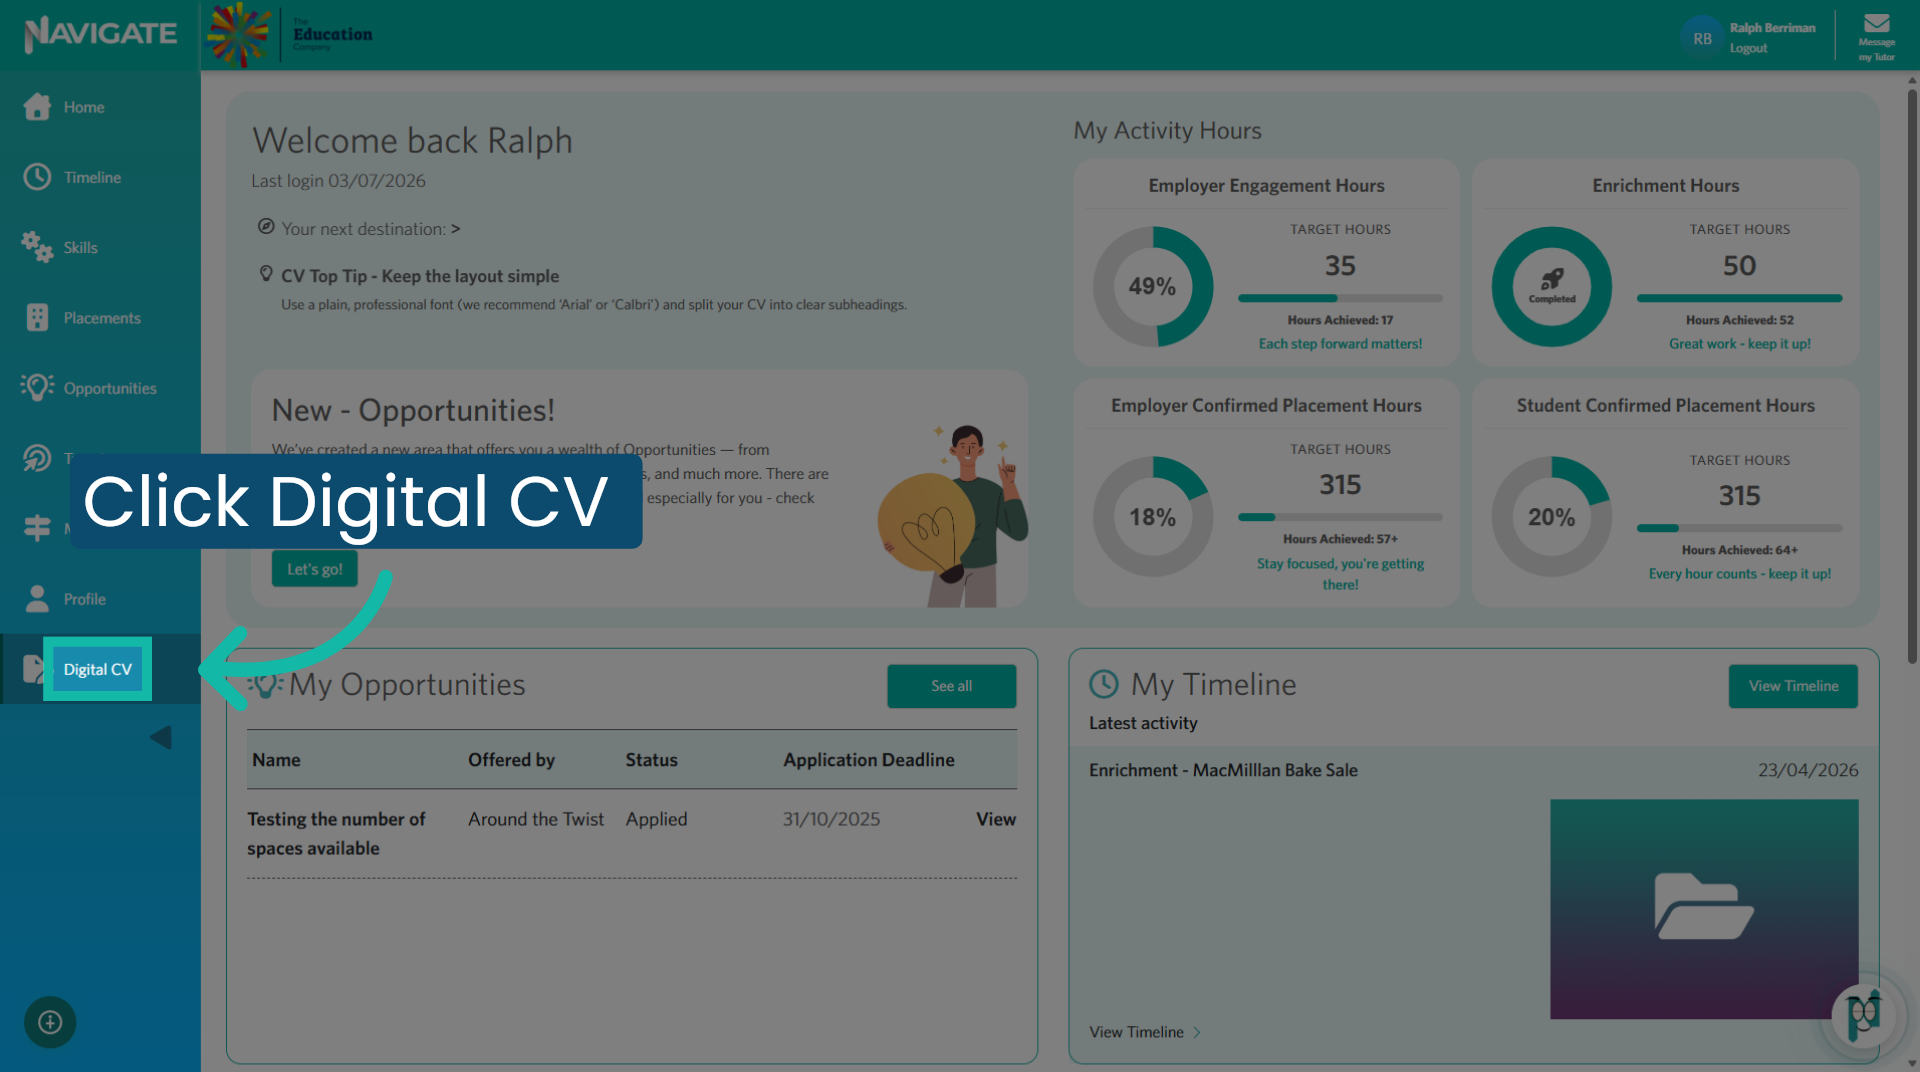
3. Start Adding CV Details
Click "Not Started - Add now" to begin adding information to your CV introduction.
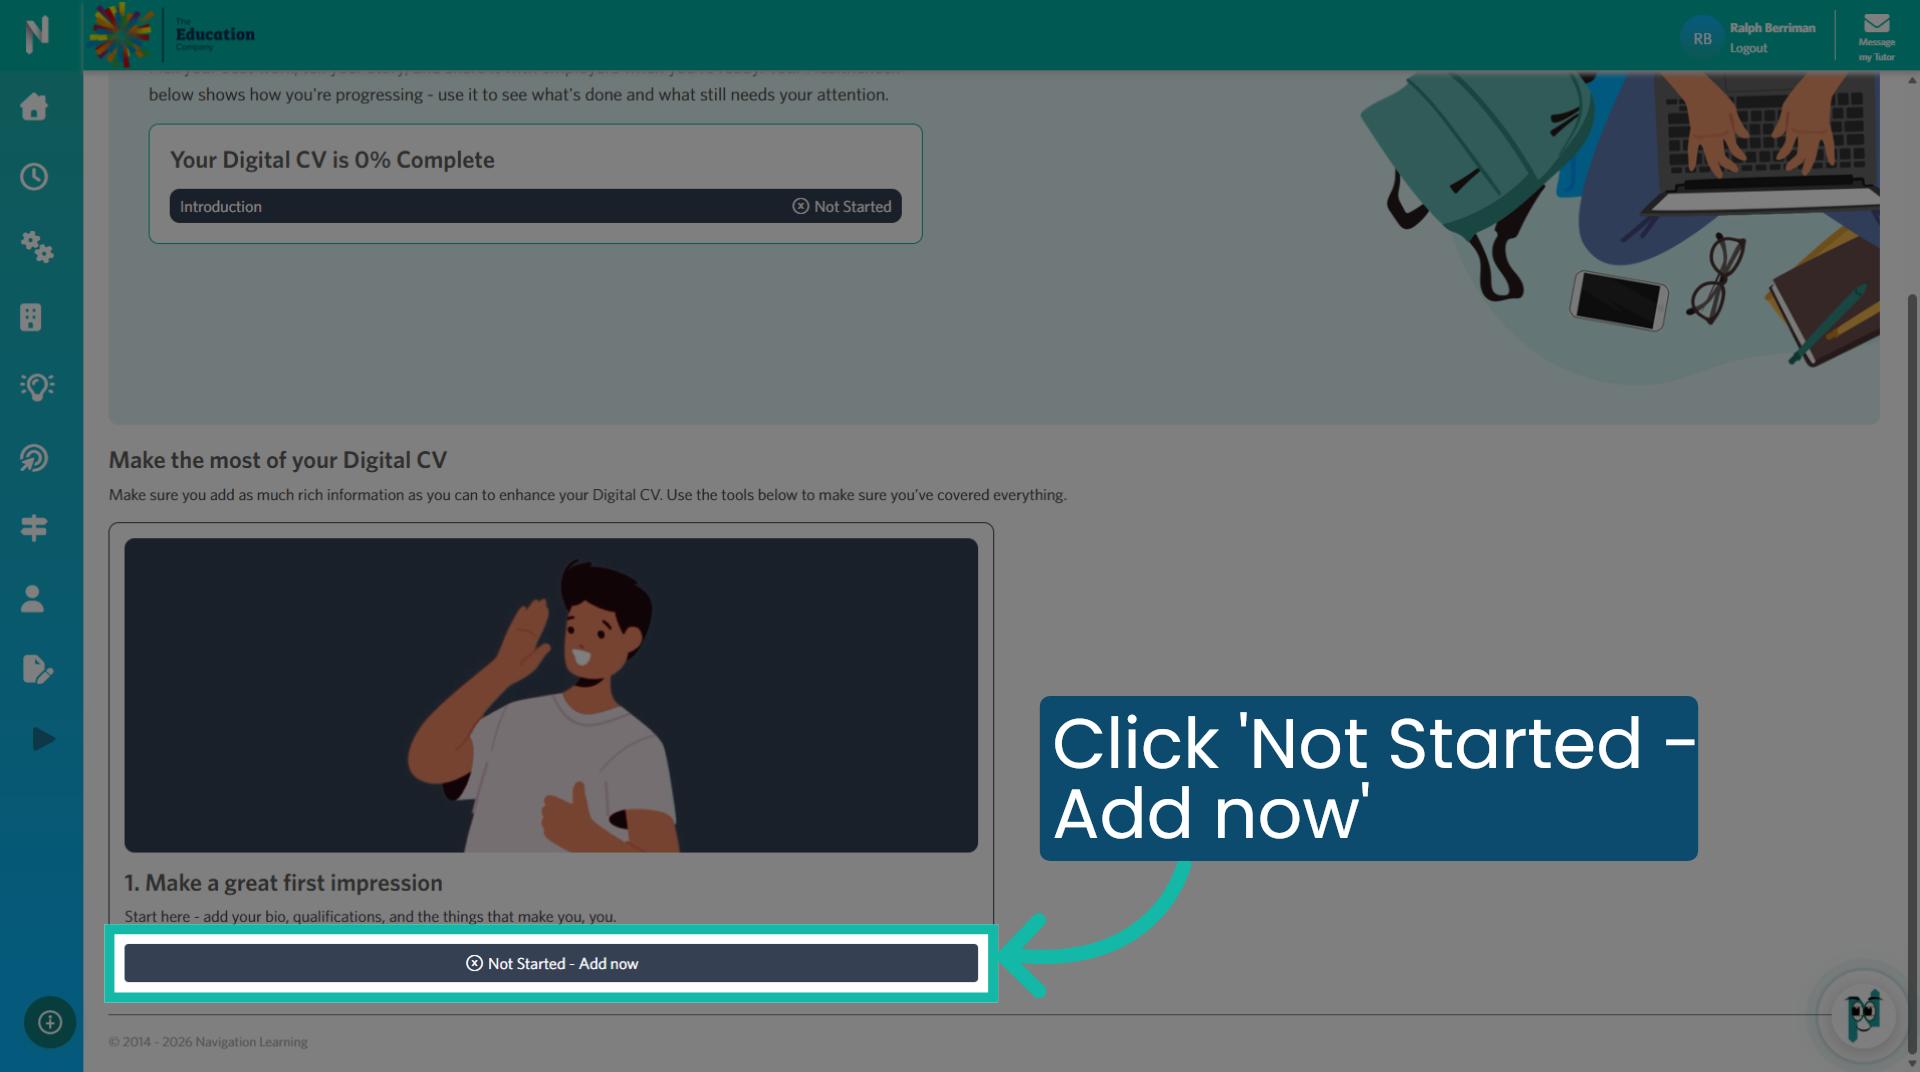
4. Your Details
Add your name, mobile phone number, personal email address, and, if applicable, a link to your professional social media profile or LinkedIn account.
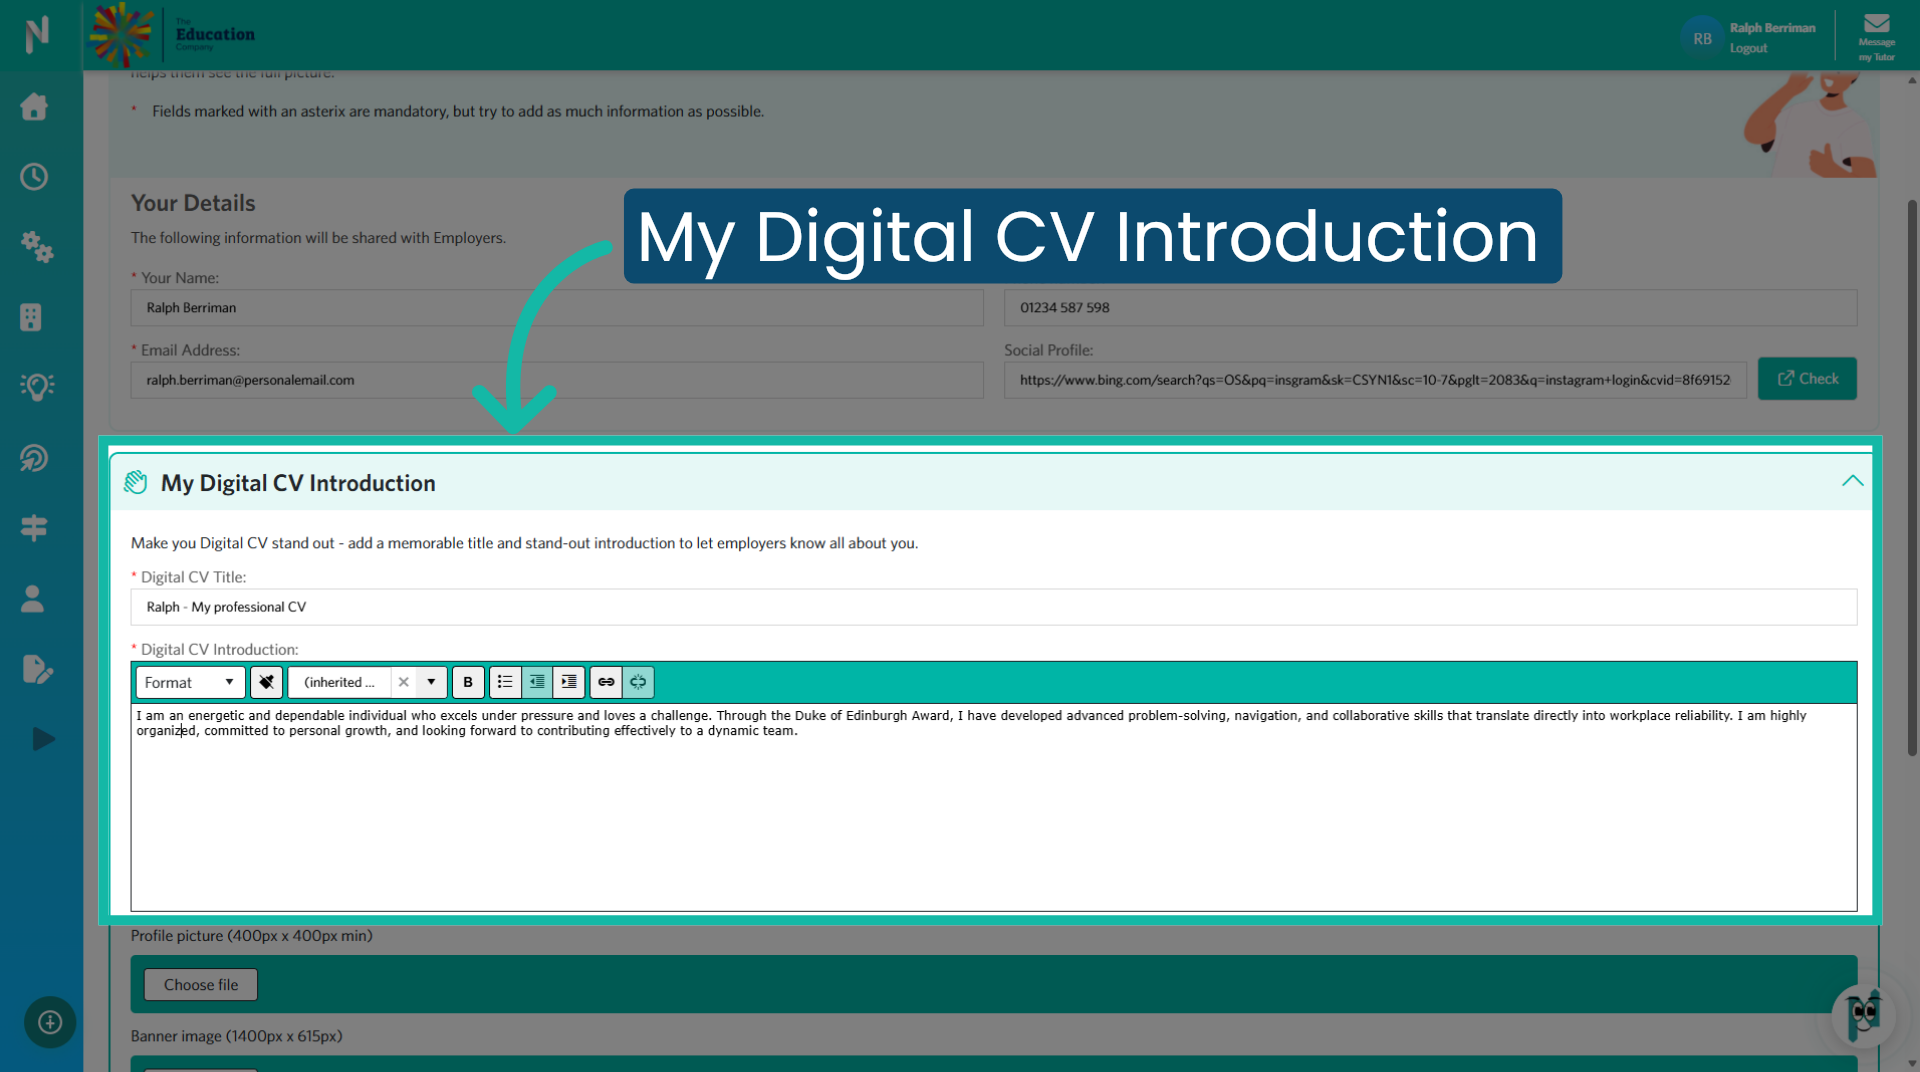
5. My Digital CV Introduction
Begin by giving your CV a title, and add a brief paragraph about yourself. This captures the employer's attention, providing an engaging overview of your key skills and goals, helping them see you as the ideal candidate and encouraging them to read further.
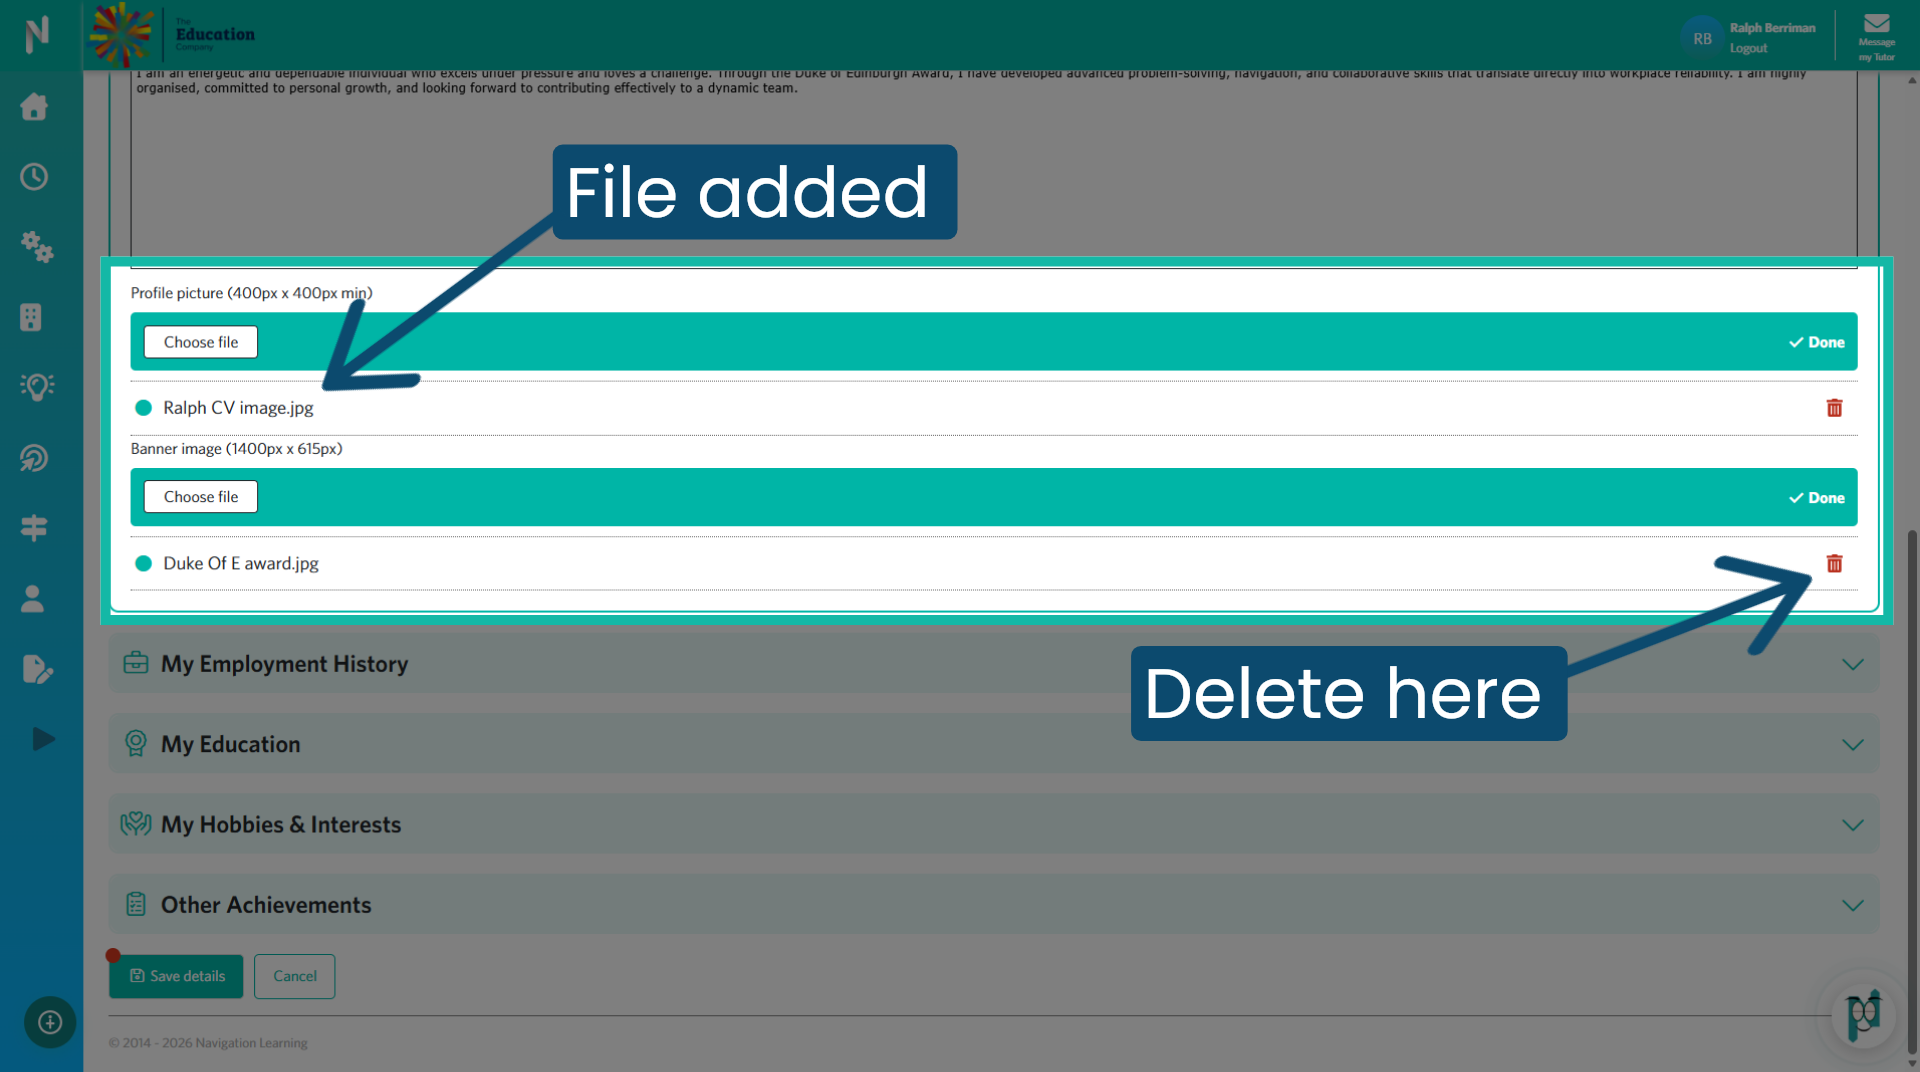
6. Add images
Select a professional profile picture and a banner image. You can change these at any time.
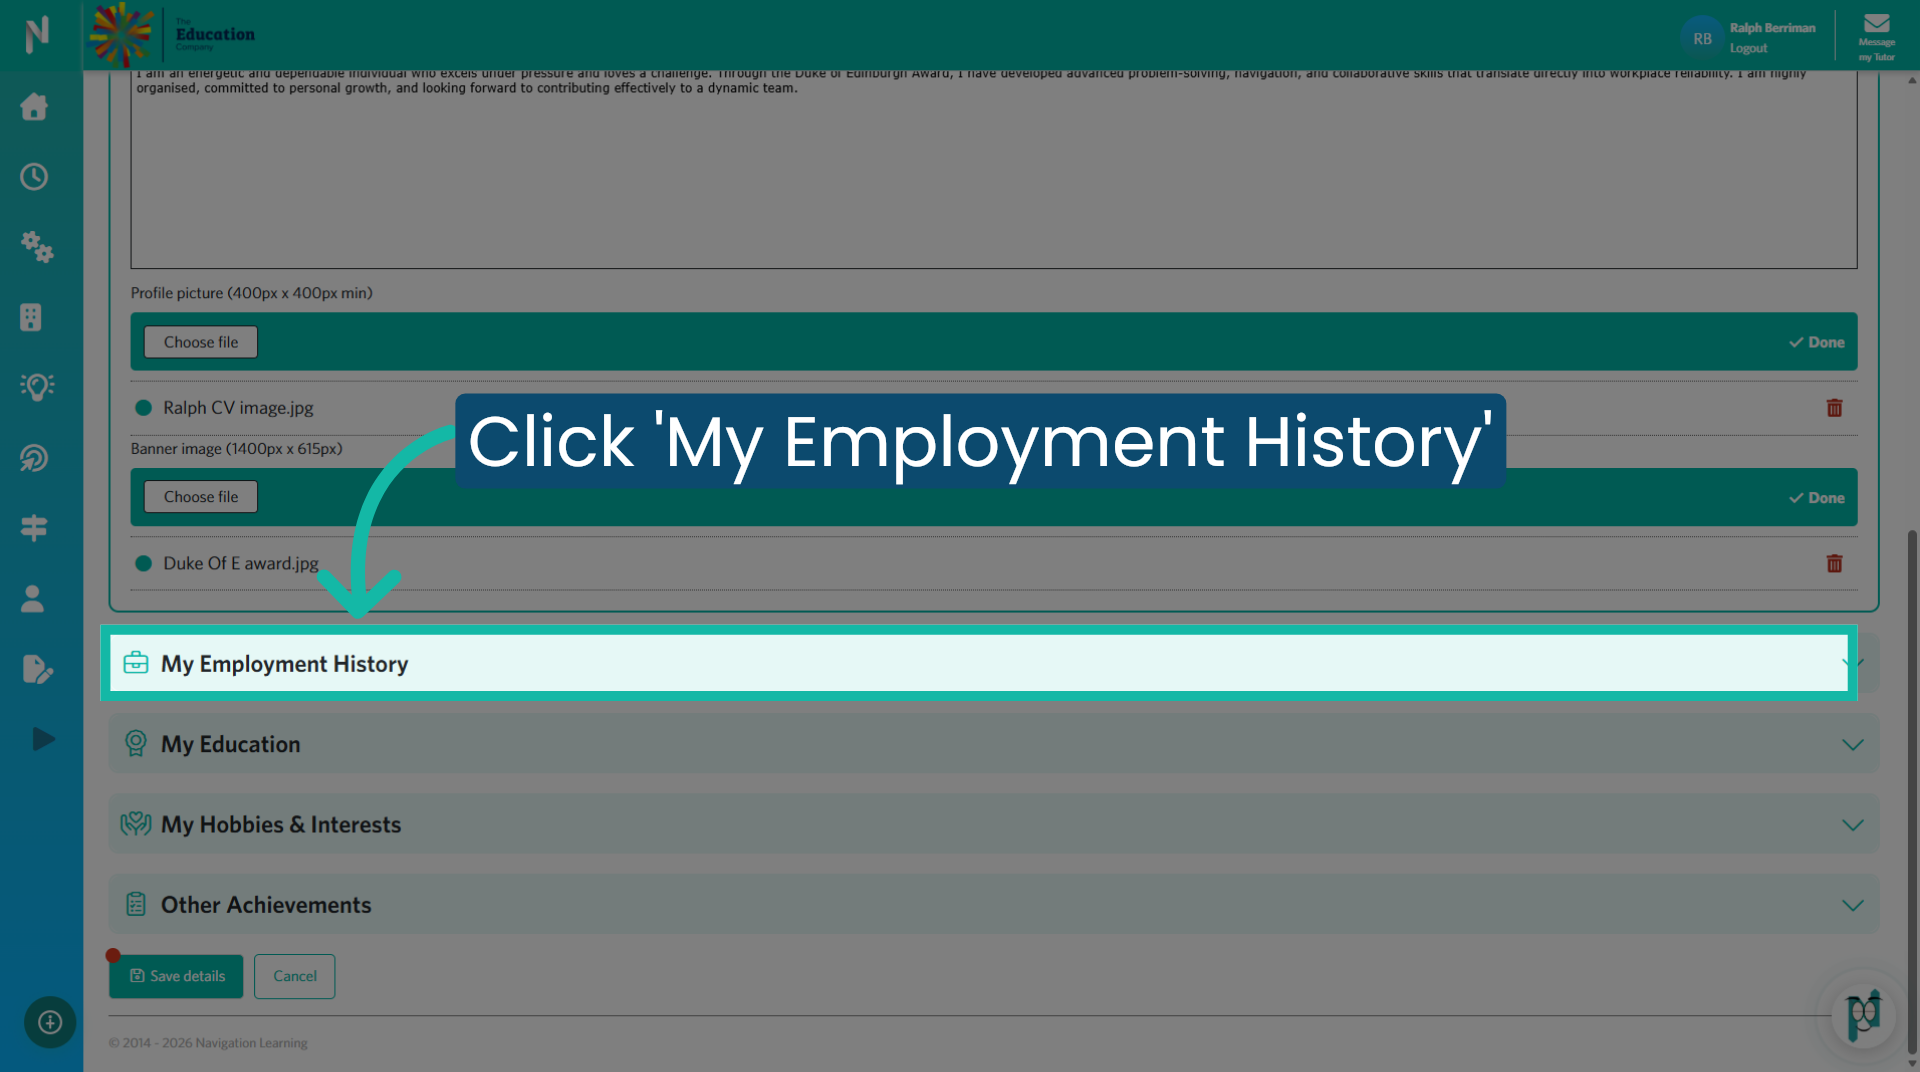
7. Open Employment History
Click "My Employment History" to begin adding any previous employment. If you have not held a job, you can include any 'work experience' gained during school.
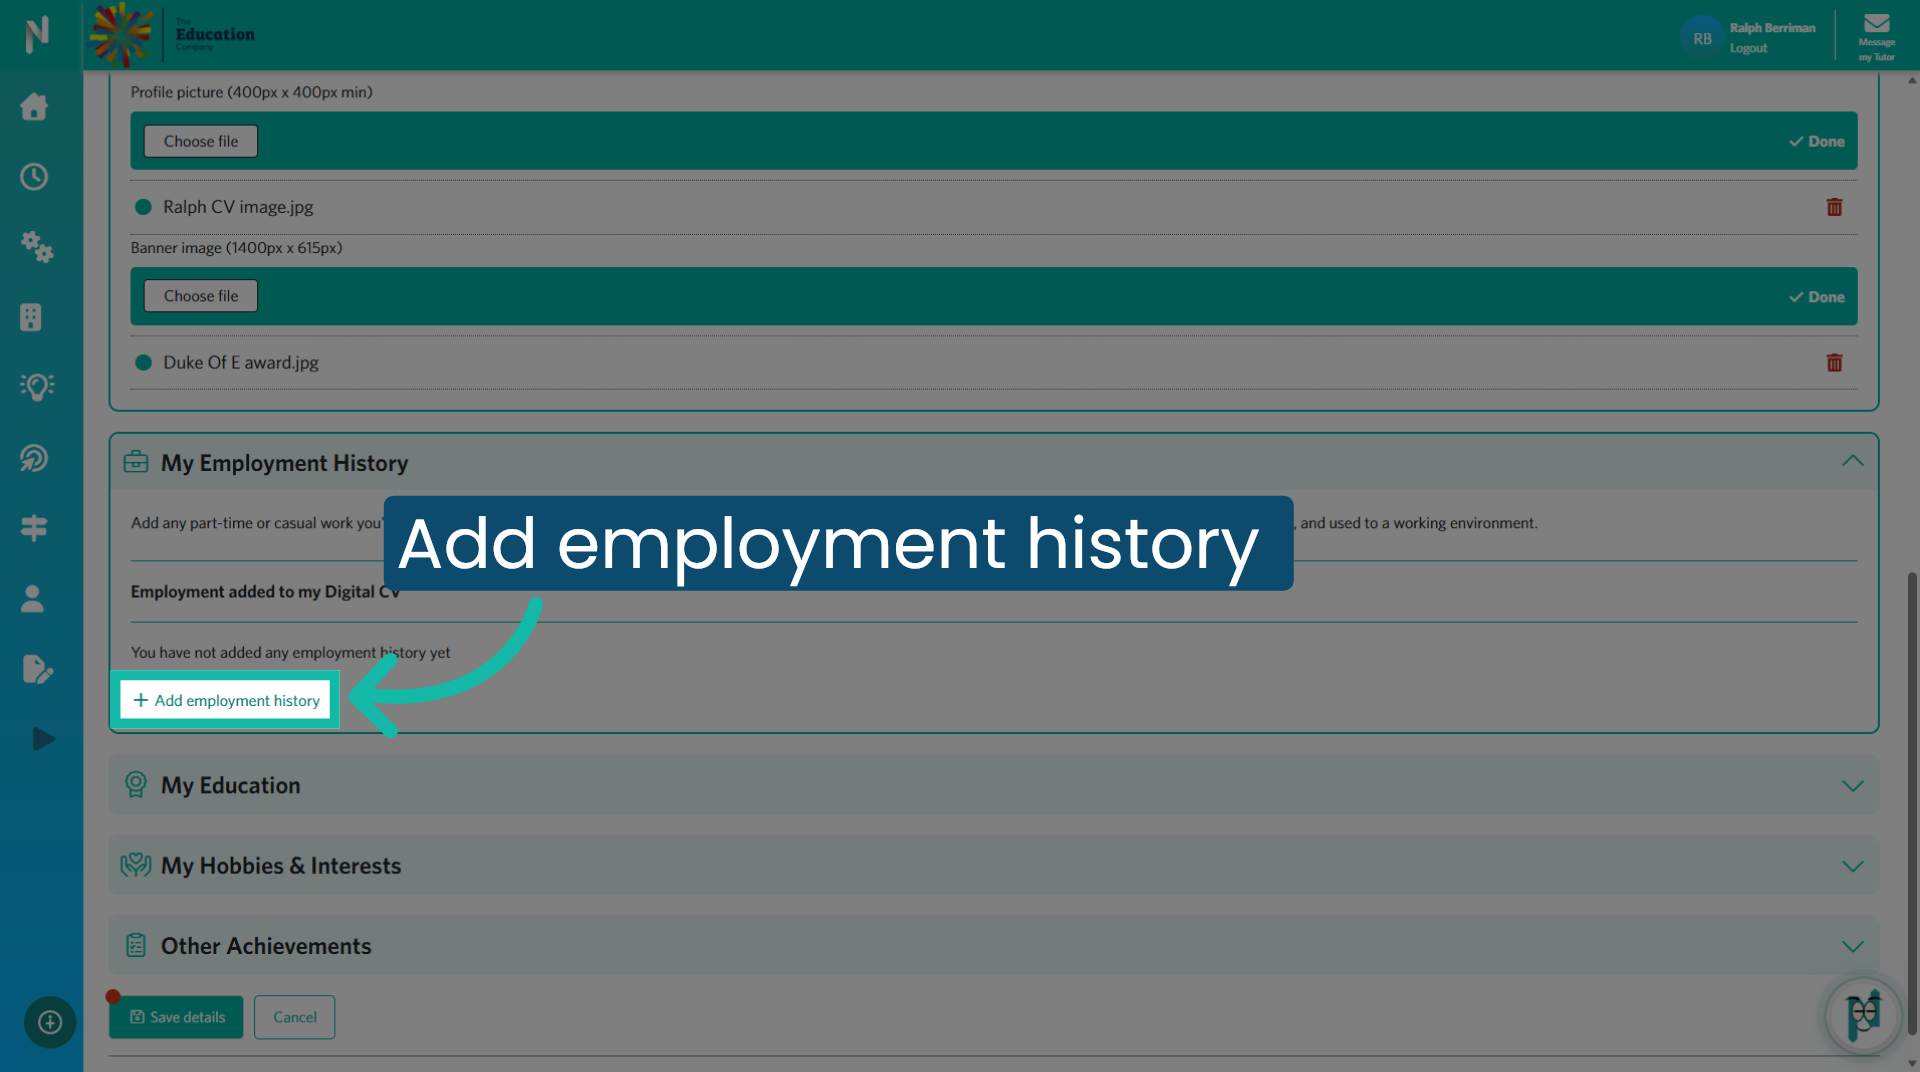
8. Add Employment History
Click "Add employment history" to add any valuable employment history.
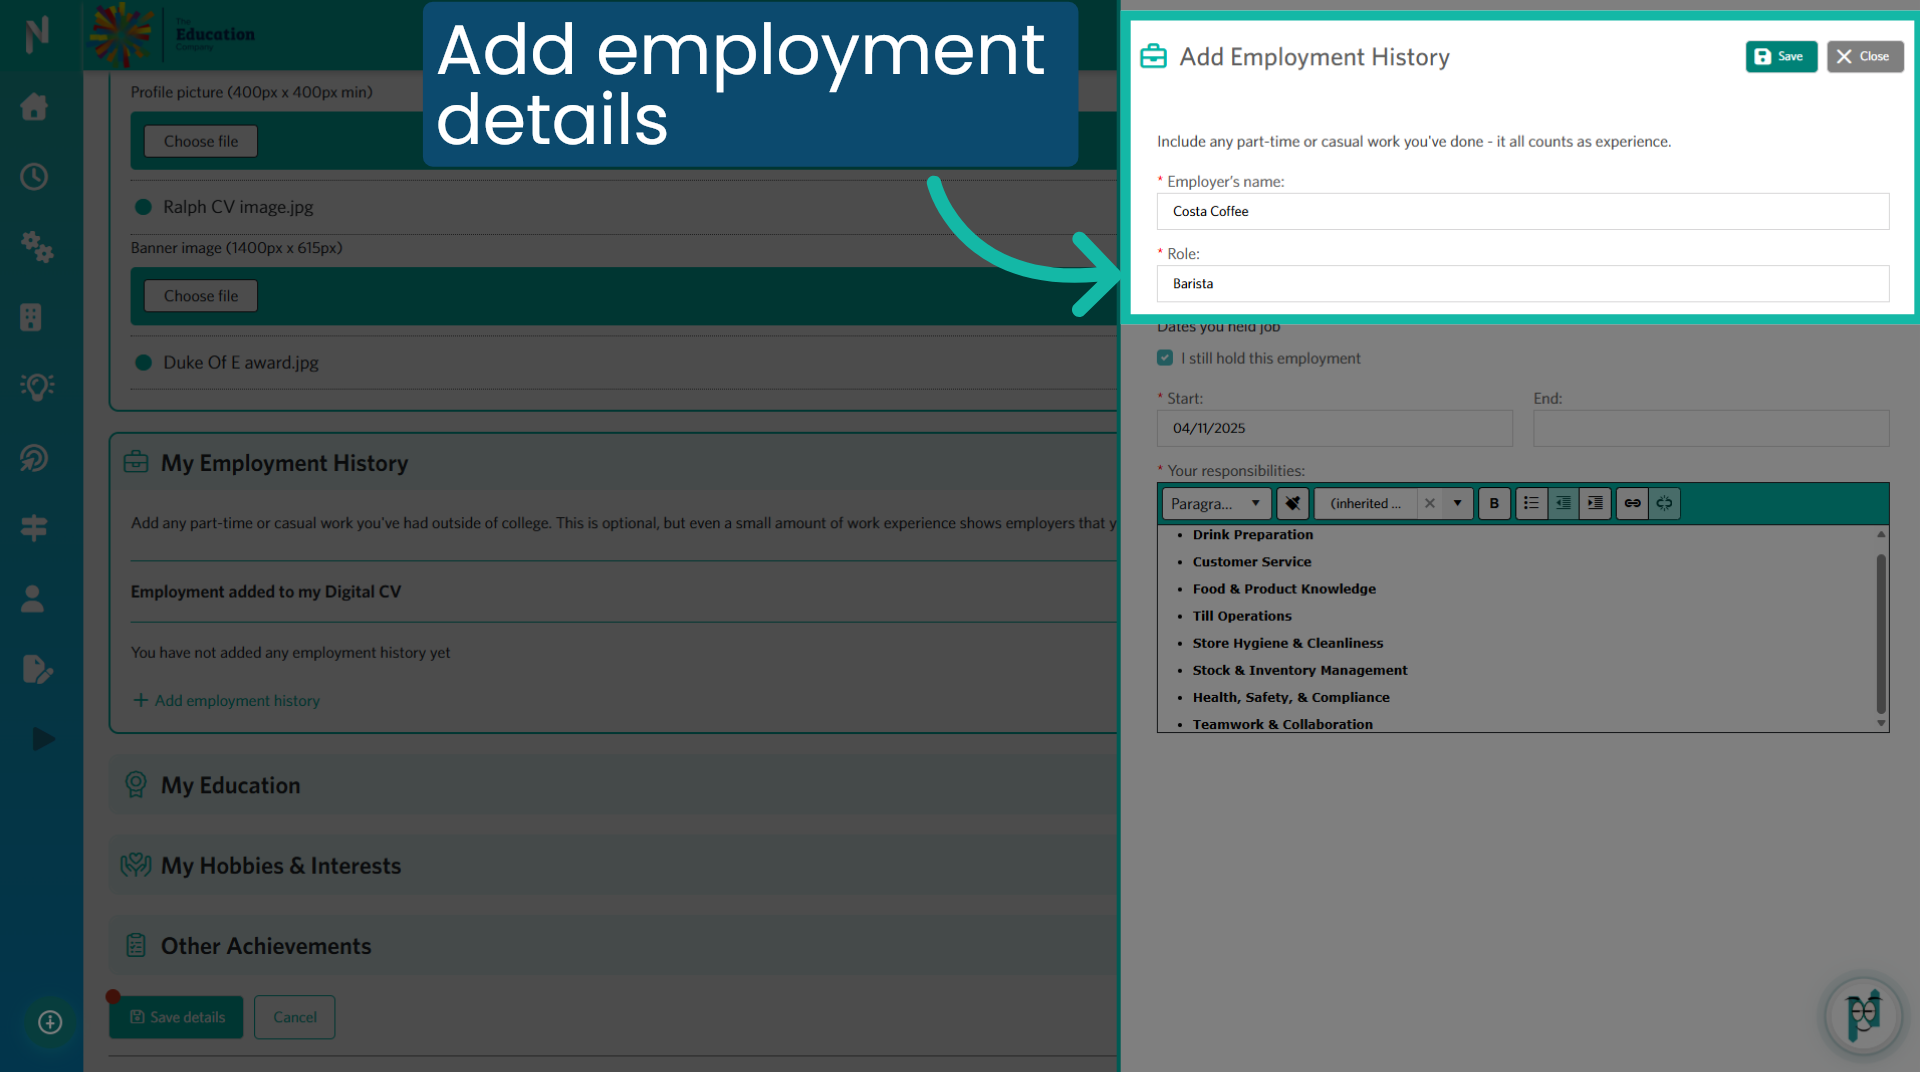
9. Add Employment Details
Begin by adding the Employers name and the title of the role you held.
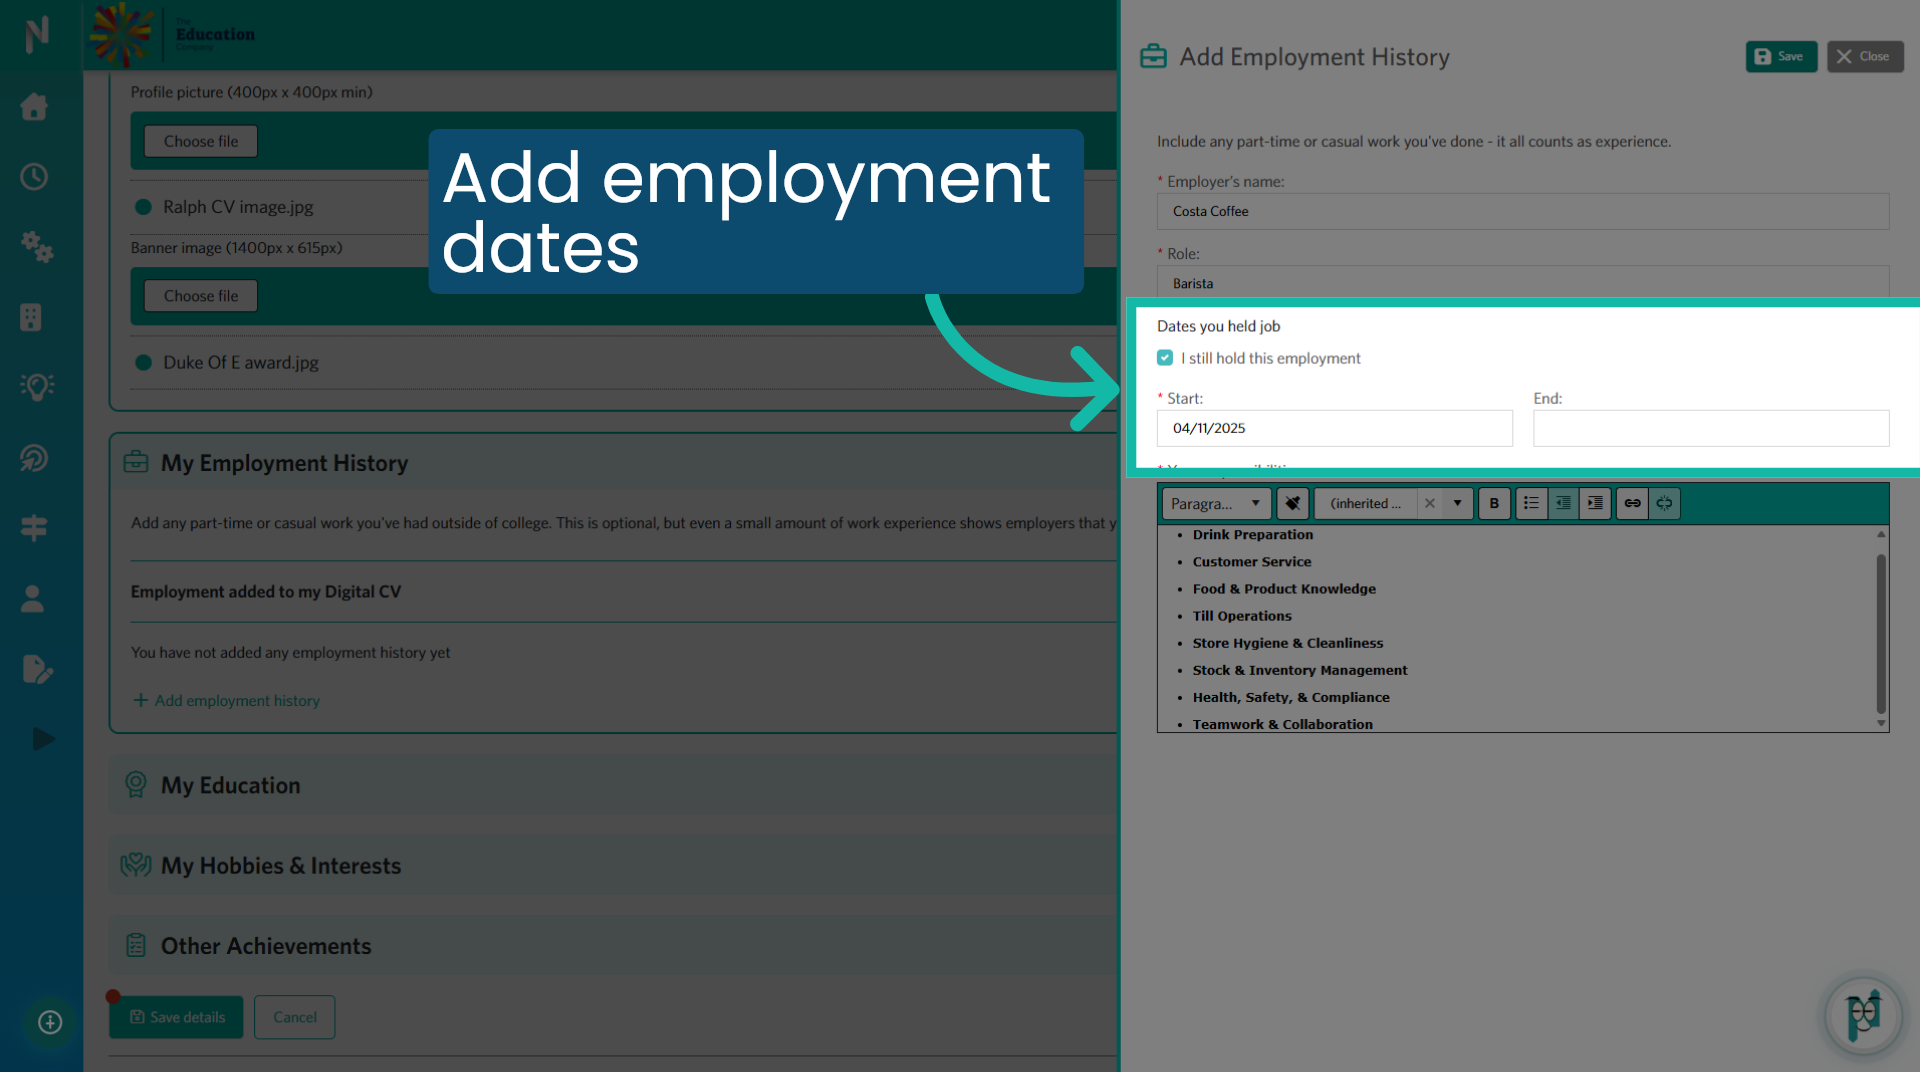
10. Add Employment Dates
Add the date you began your role and the date you finished it. If you are currently employed there, leave the end date blank and check the box to indicate that 'I still hold this employment.'
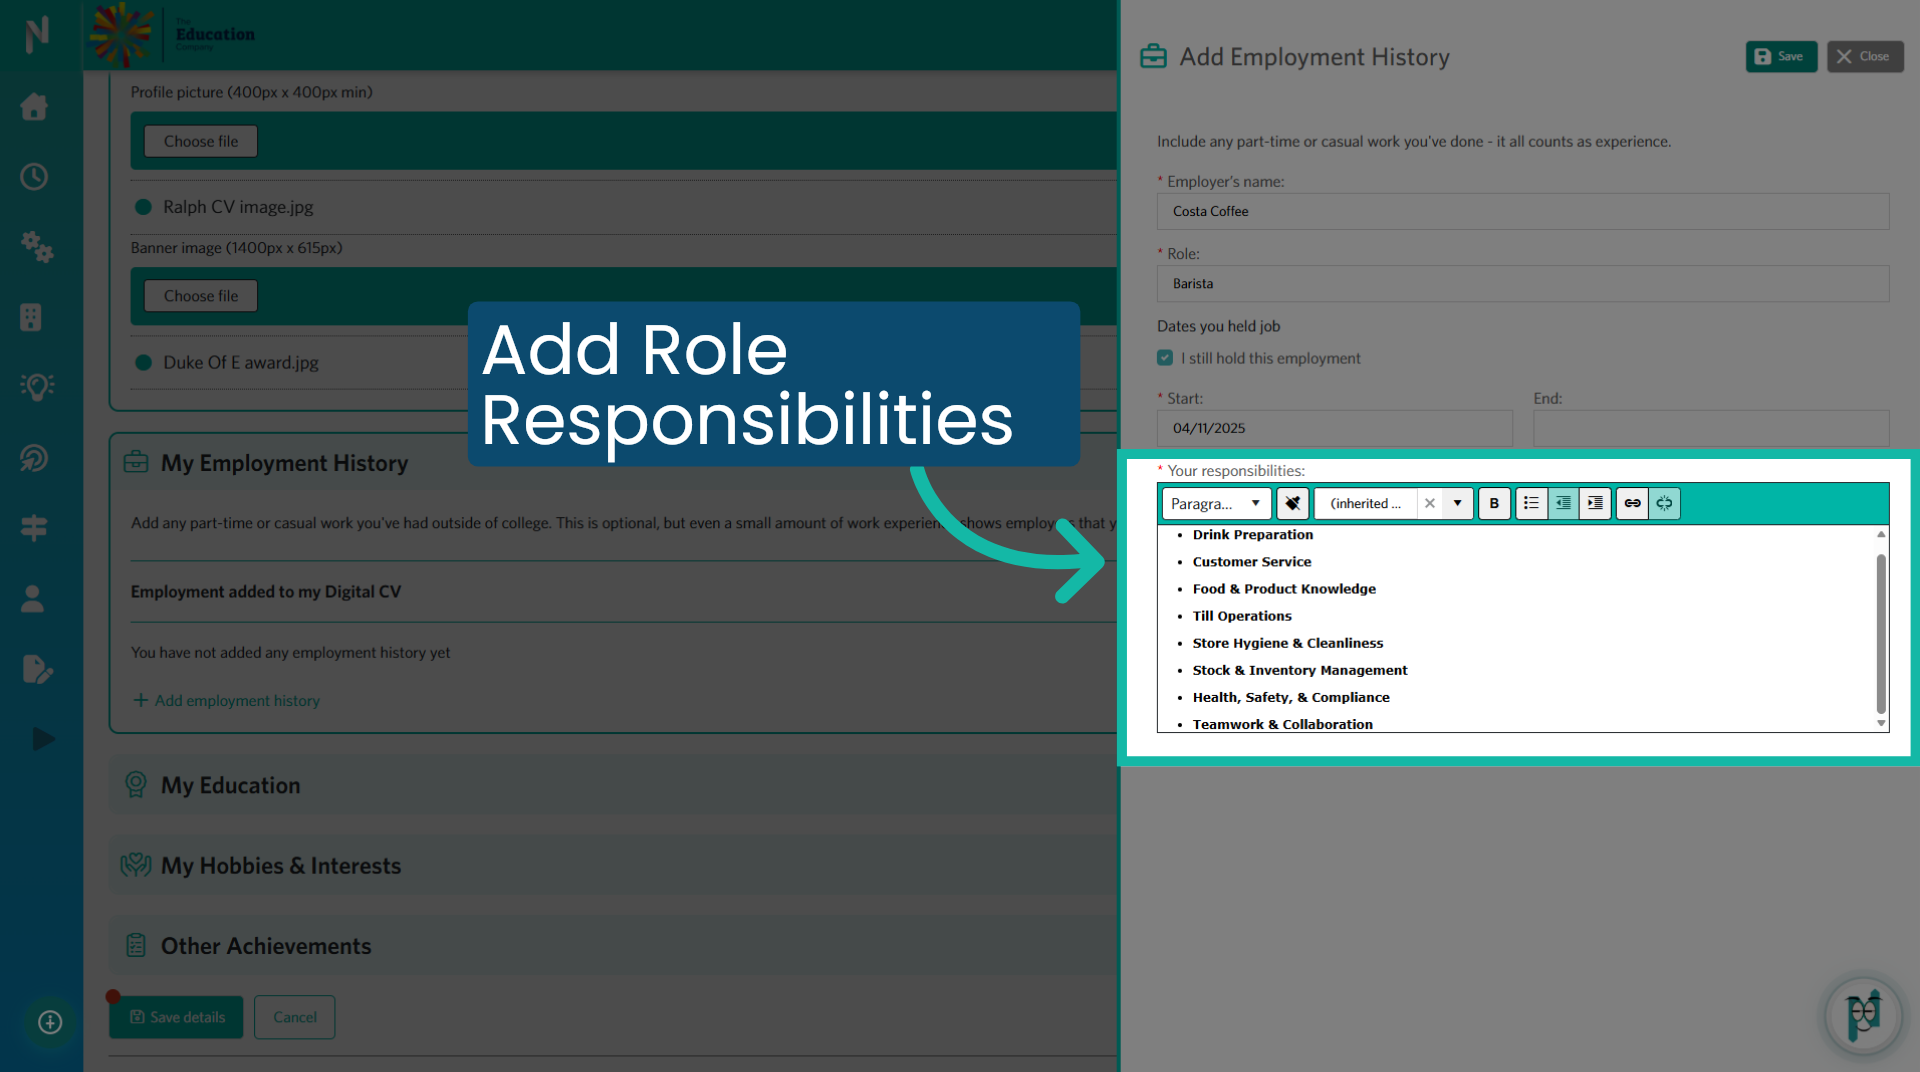
11. Add Role Responsibilities
Use this box to detail the responsibilities you held in your job. It serves as an excellent opportunity to inform the reader about any employability or technical skills you gained or develeoped in the role.
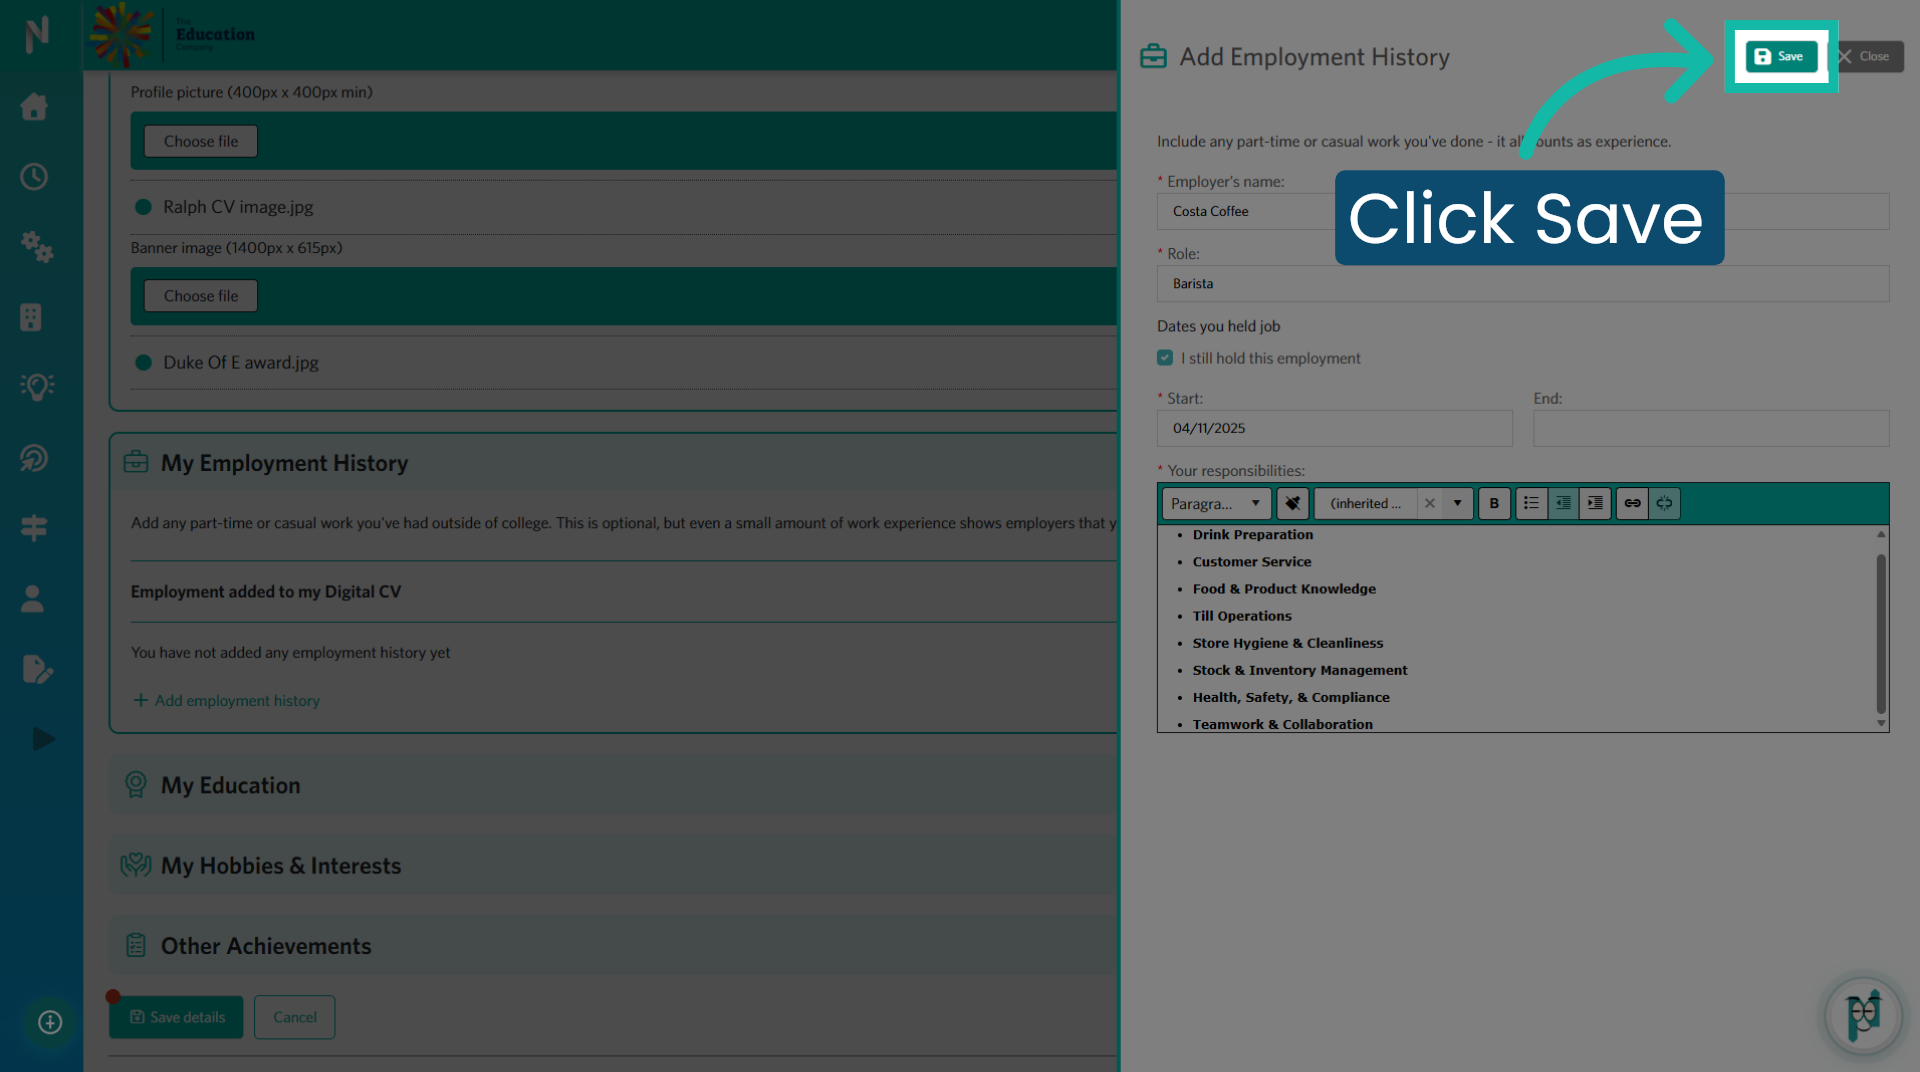
12. Save
Click "Save" to store your employment history details.
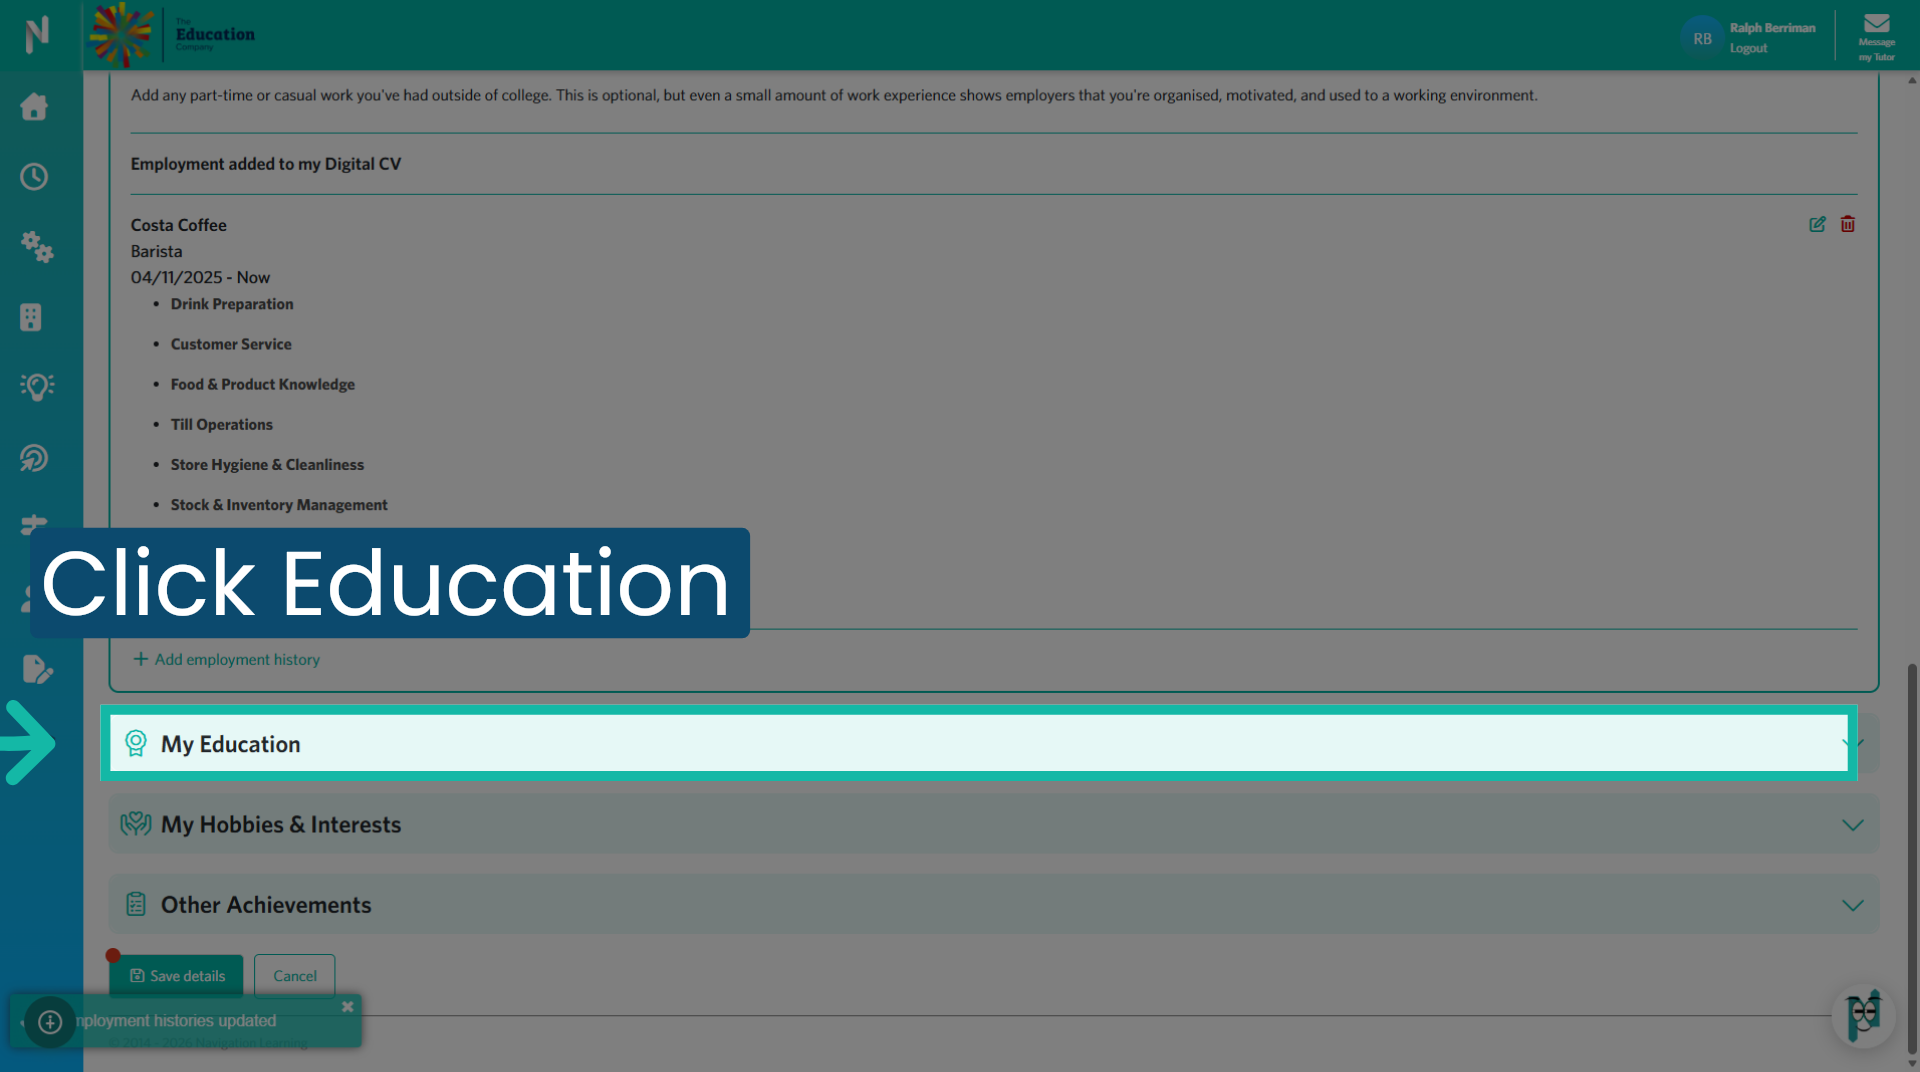
13. Open My Education
Click "My Education" to add your academic qualifications. If you do not have any qualifications yet, don't worry; you can add them over time.
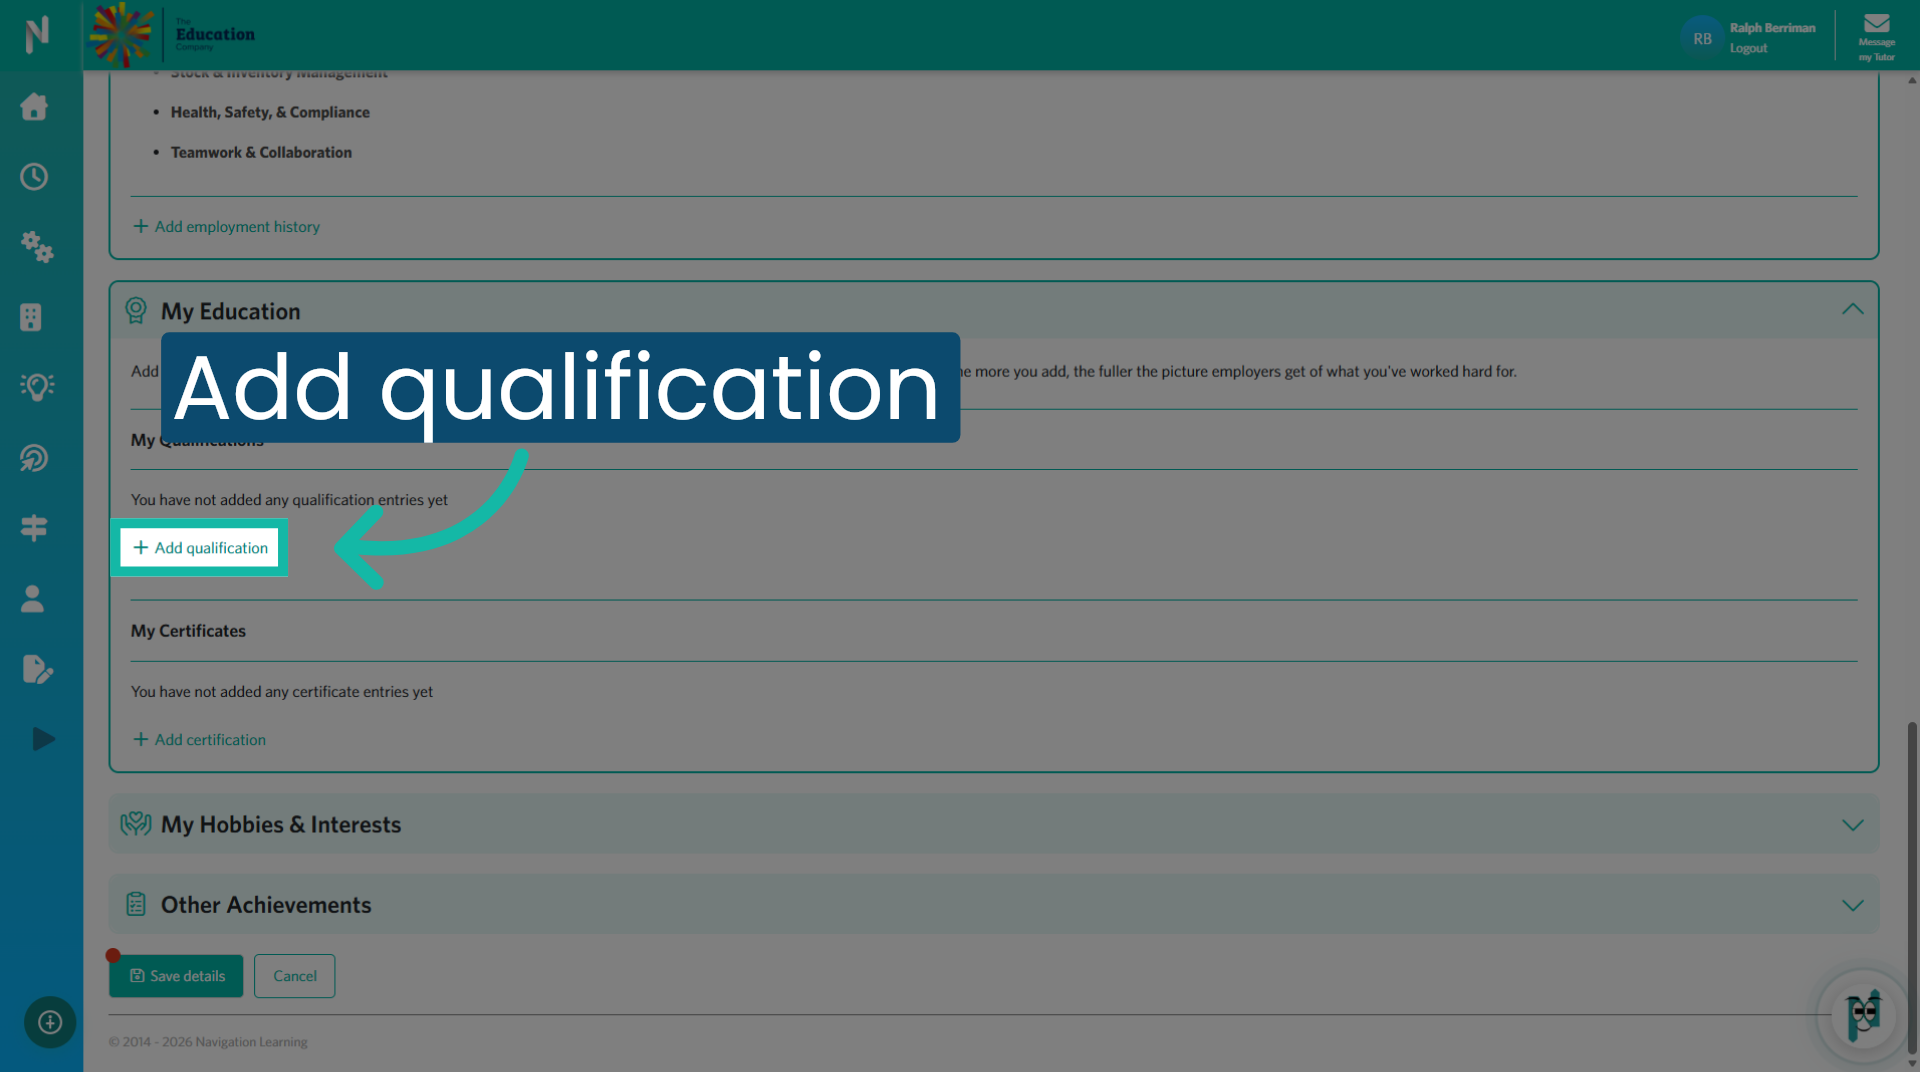
14. Add Qualification
Click "Add qualification" to add a qualification.
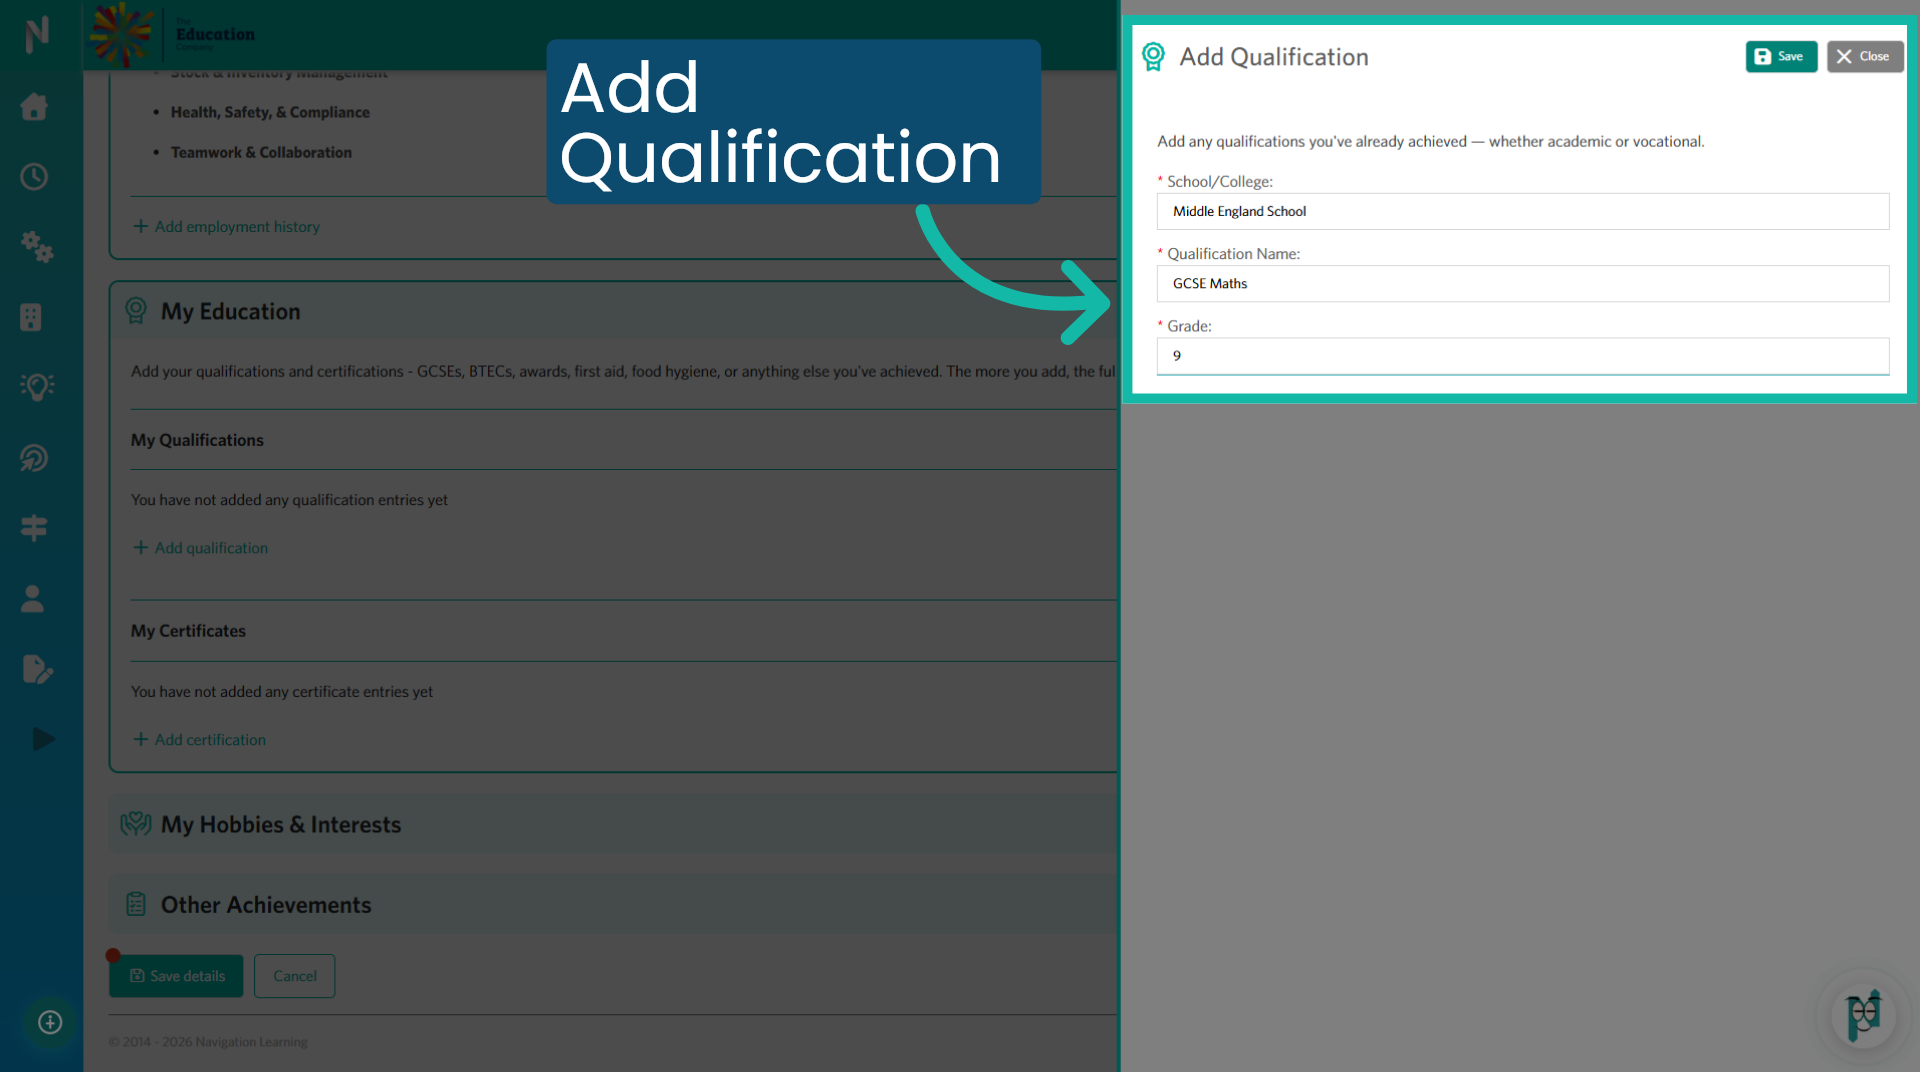
15. Add Qualification details
Start by entering the name of the School or College where you obtained this qualification. Next, include the qualification name and the grade you gained. For instance, G.C.S.E Maths, Grade 9.
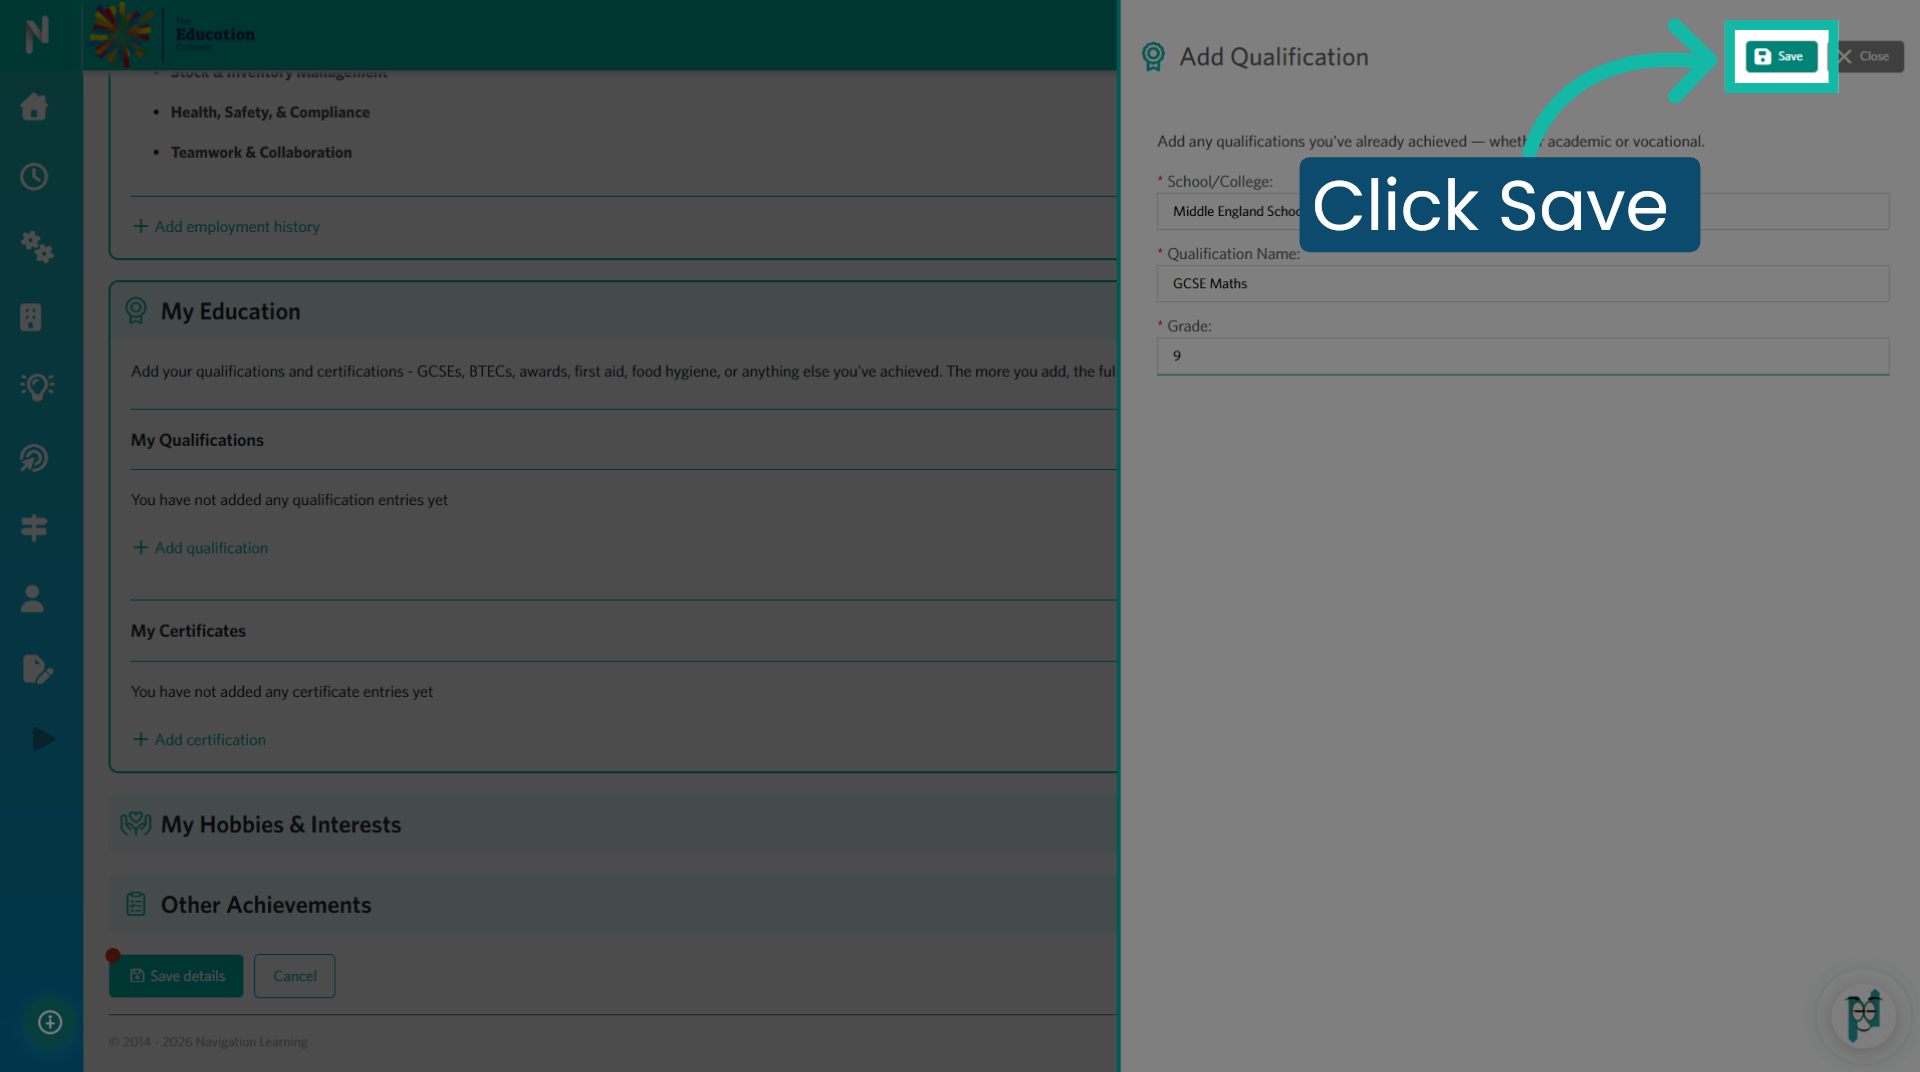
16. Save
Click "Save" to store your qualification details.
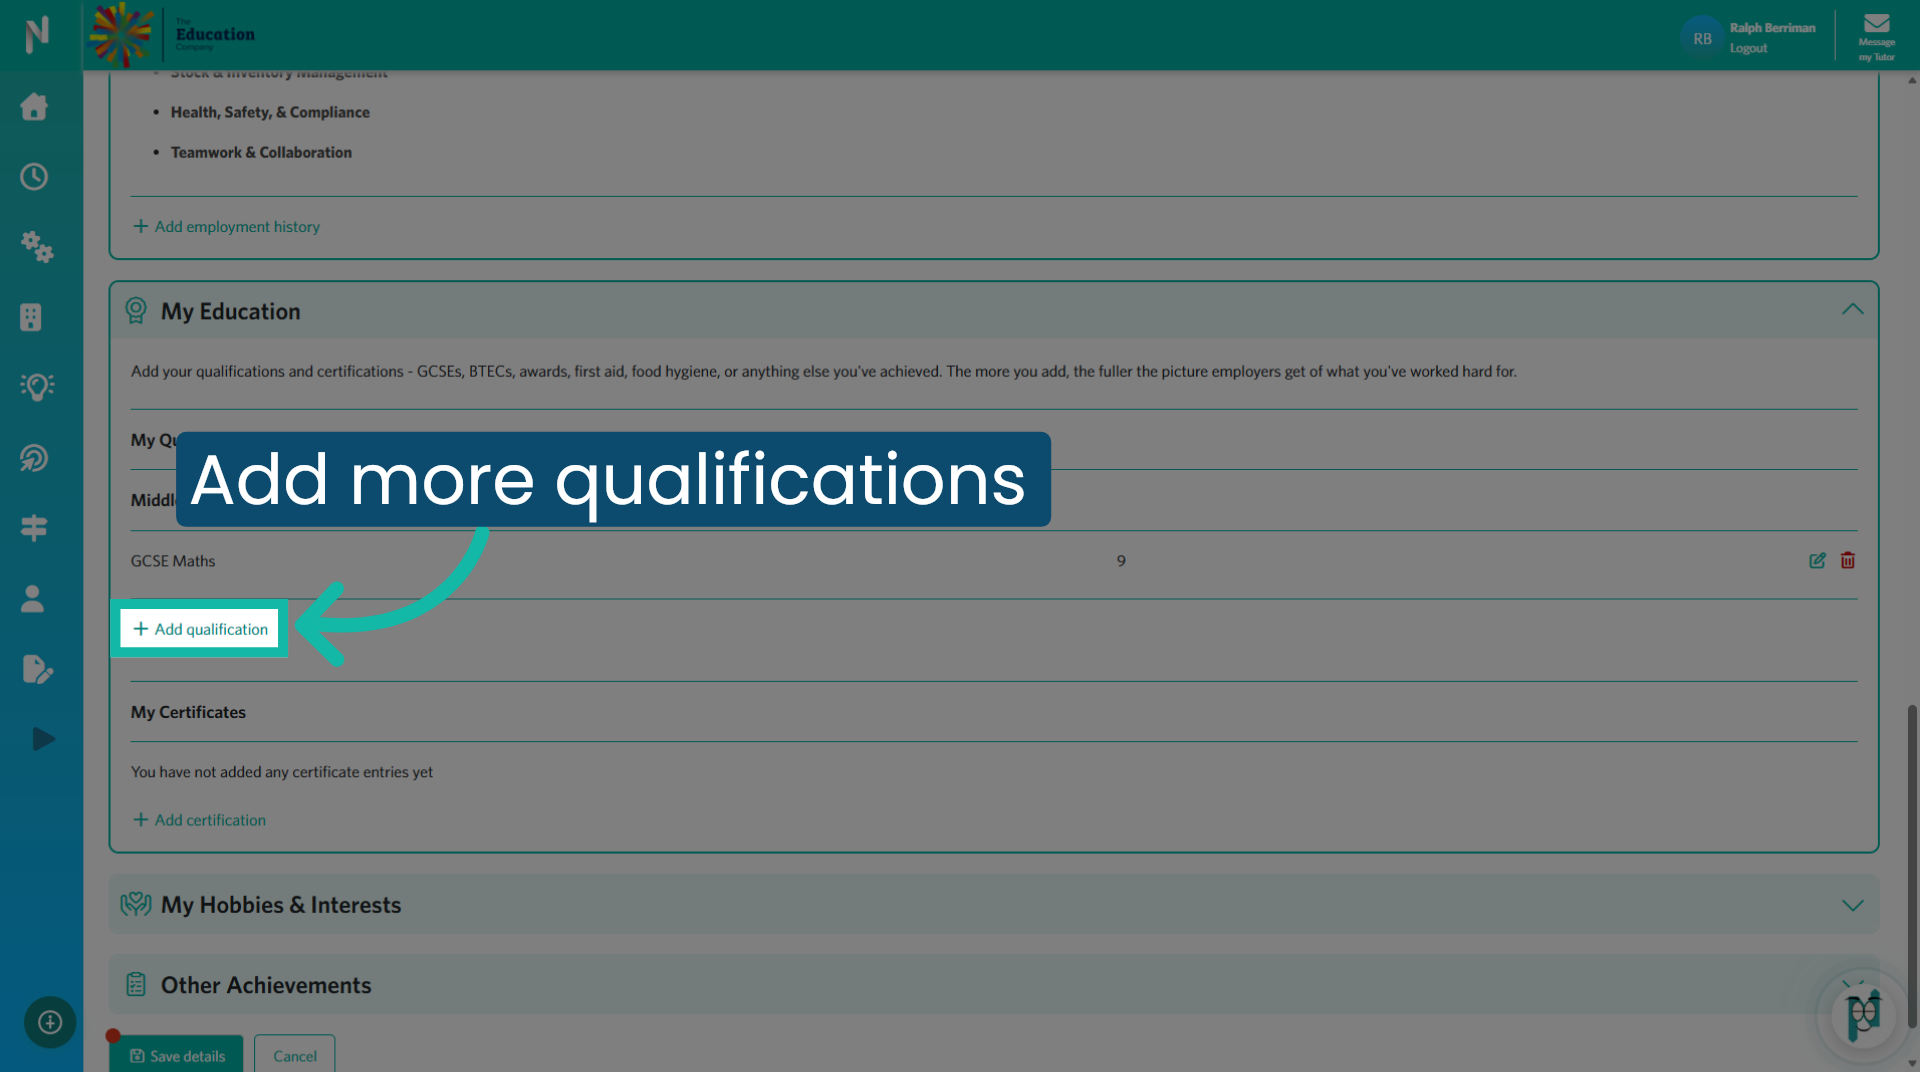
17. Add Another Qualification
Click "Add qualification" to add more qualifications.
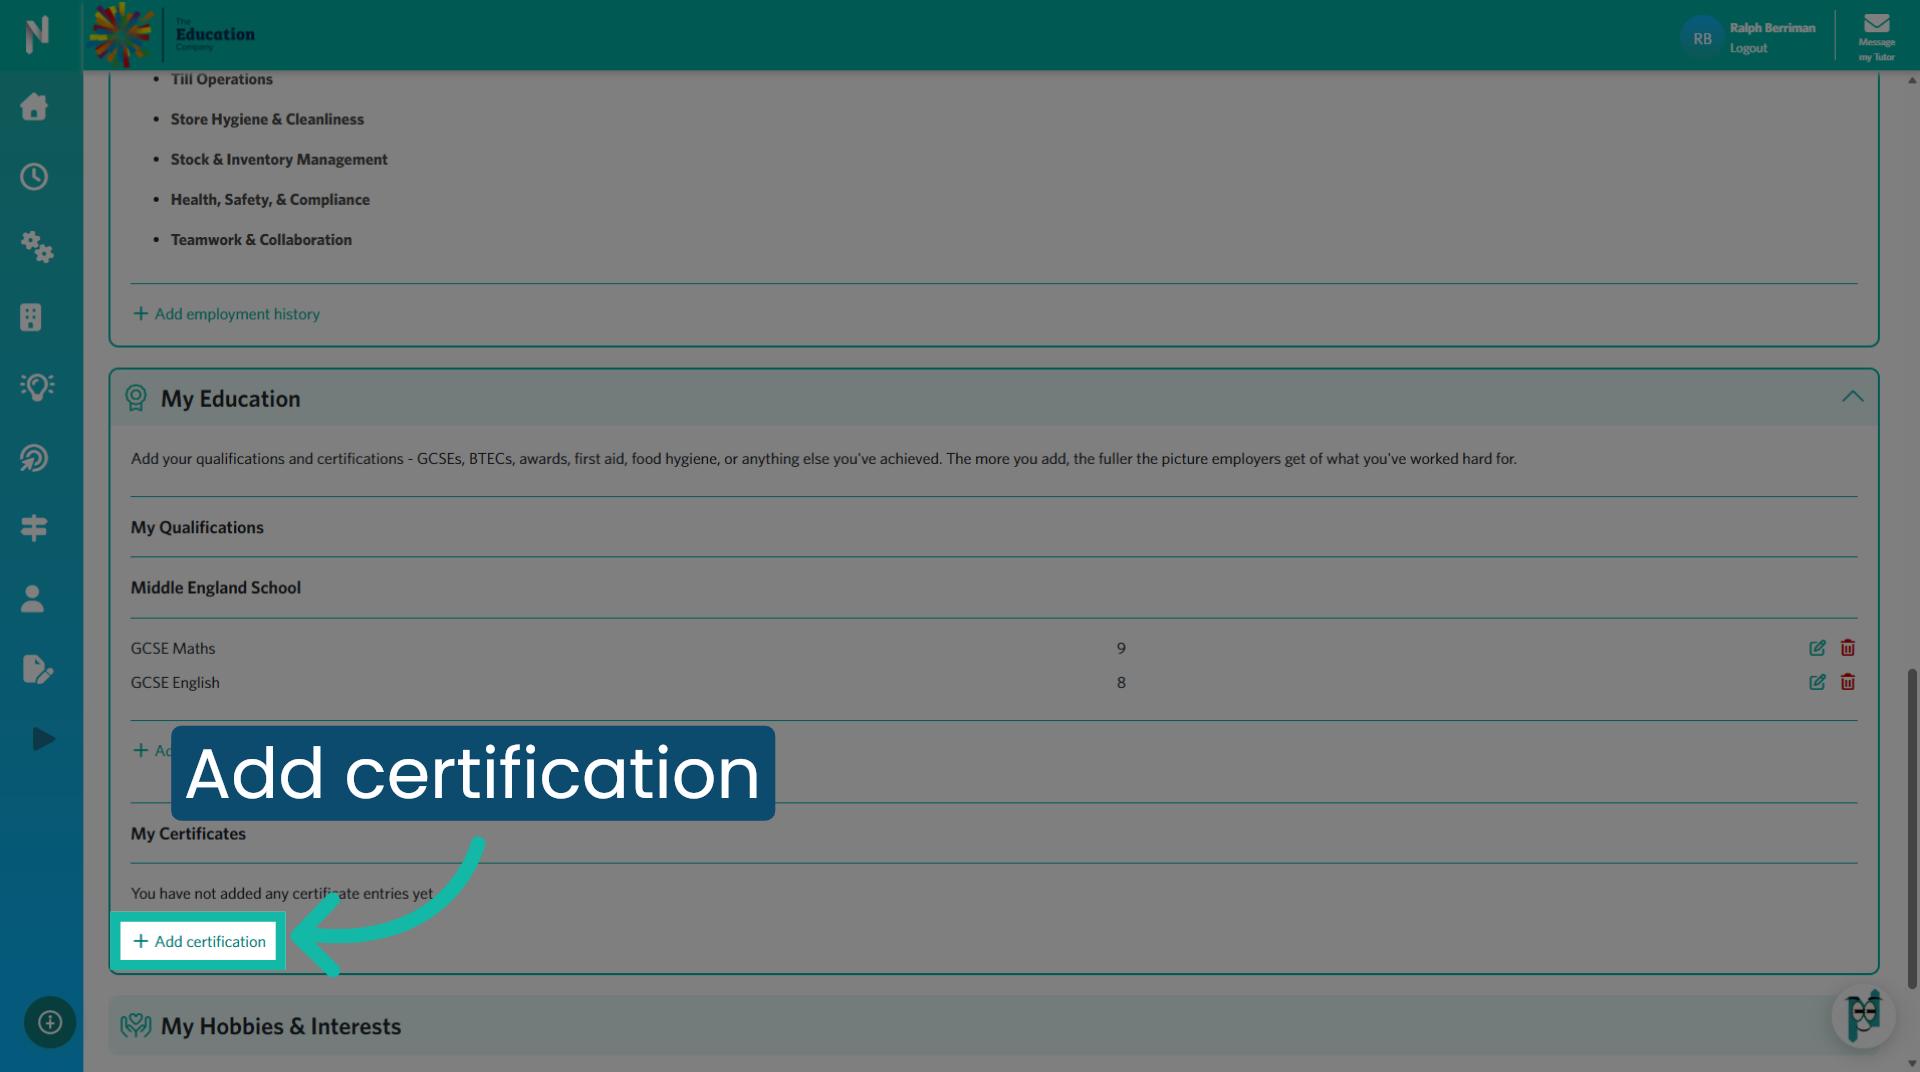
18. Add Certification
Click "Add certification" to include professional certificates gained.
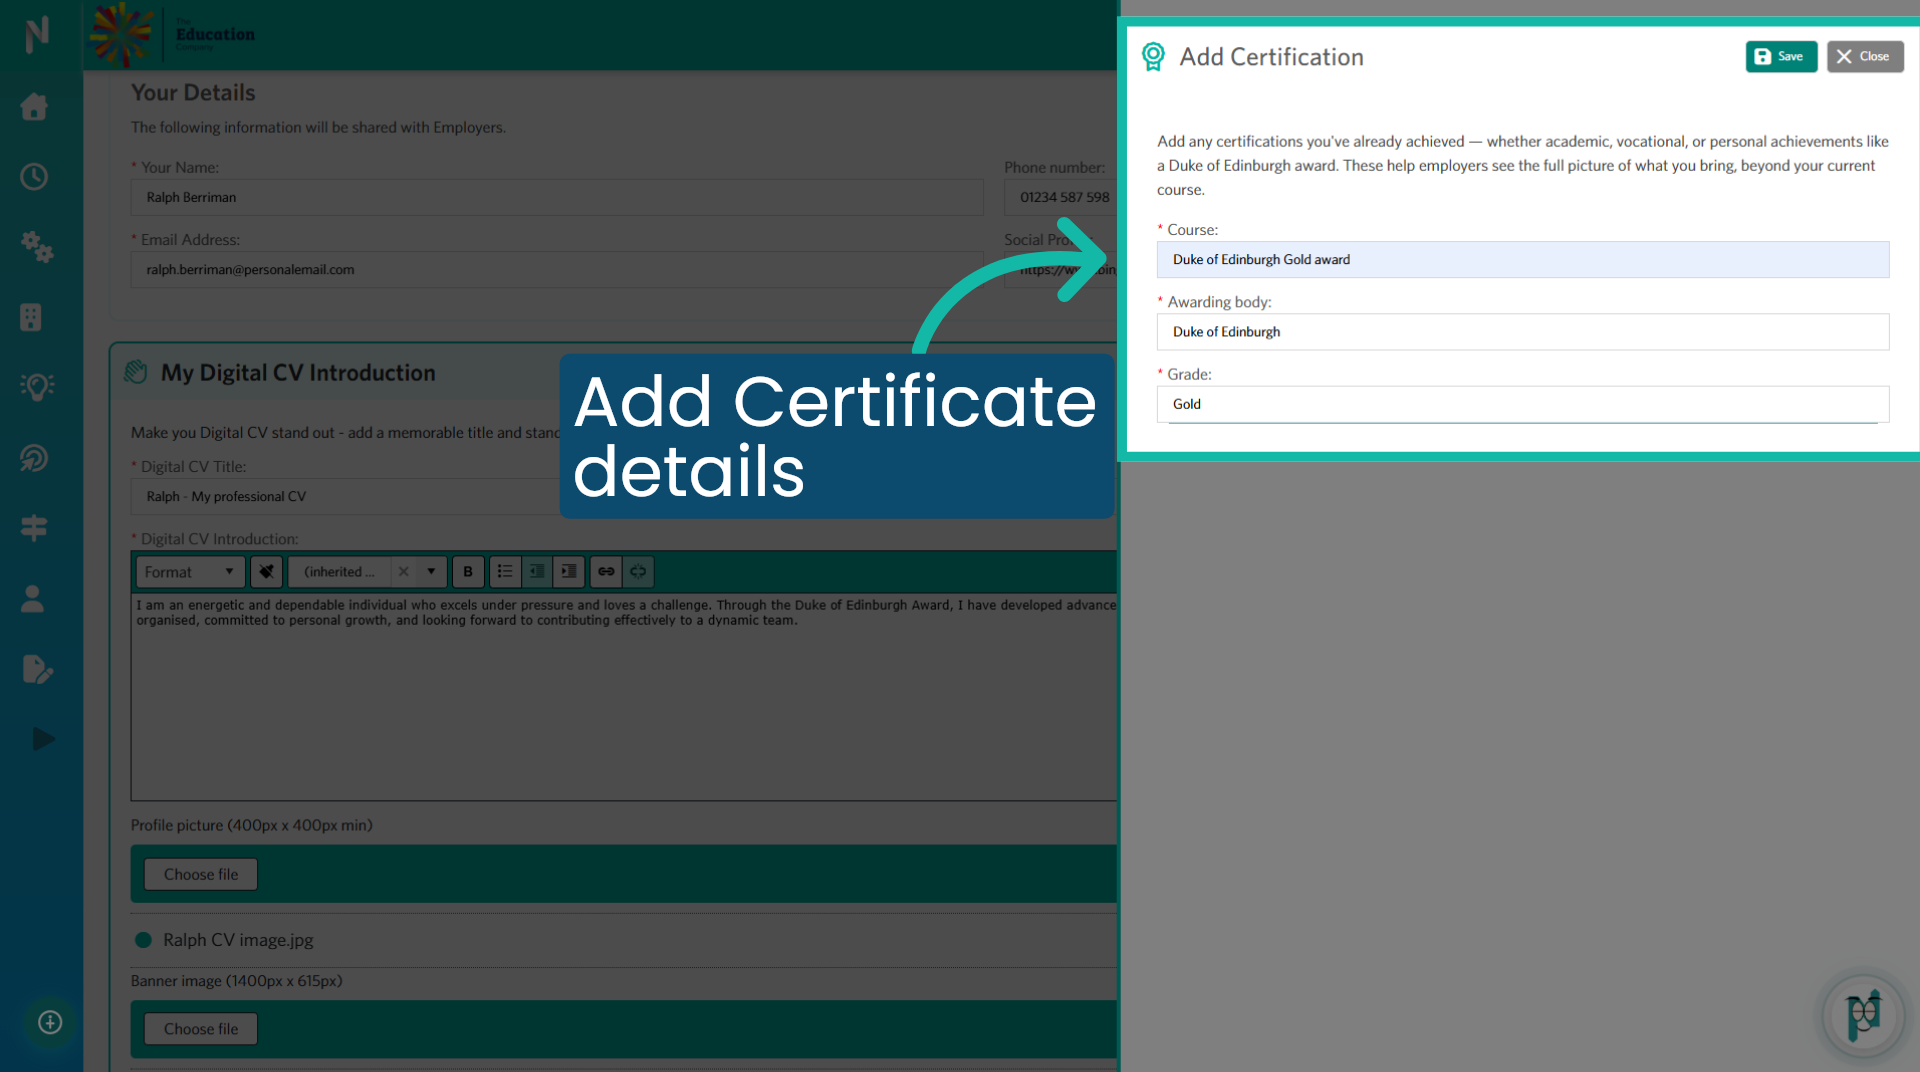
19. Add Certificate details
Start by entering the name of the course you completed to obtain your certificate. Next, include the awarding body, if known, along with the grade you received.
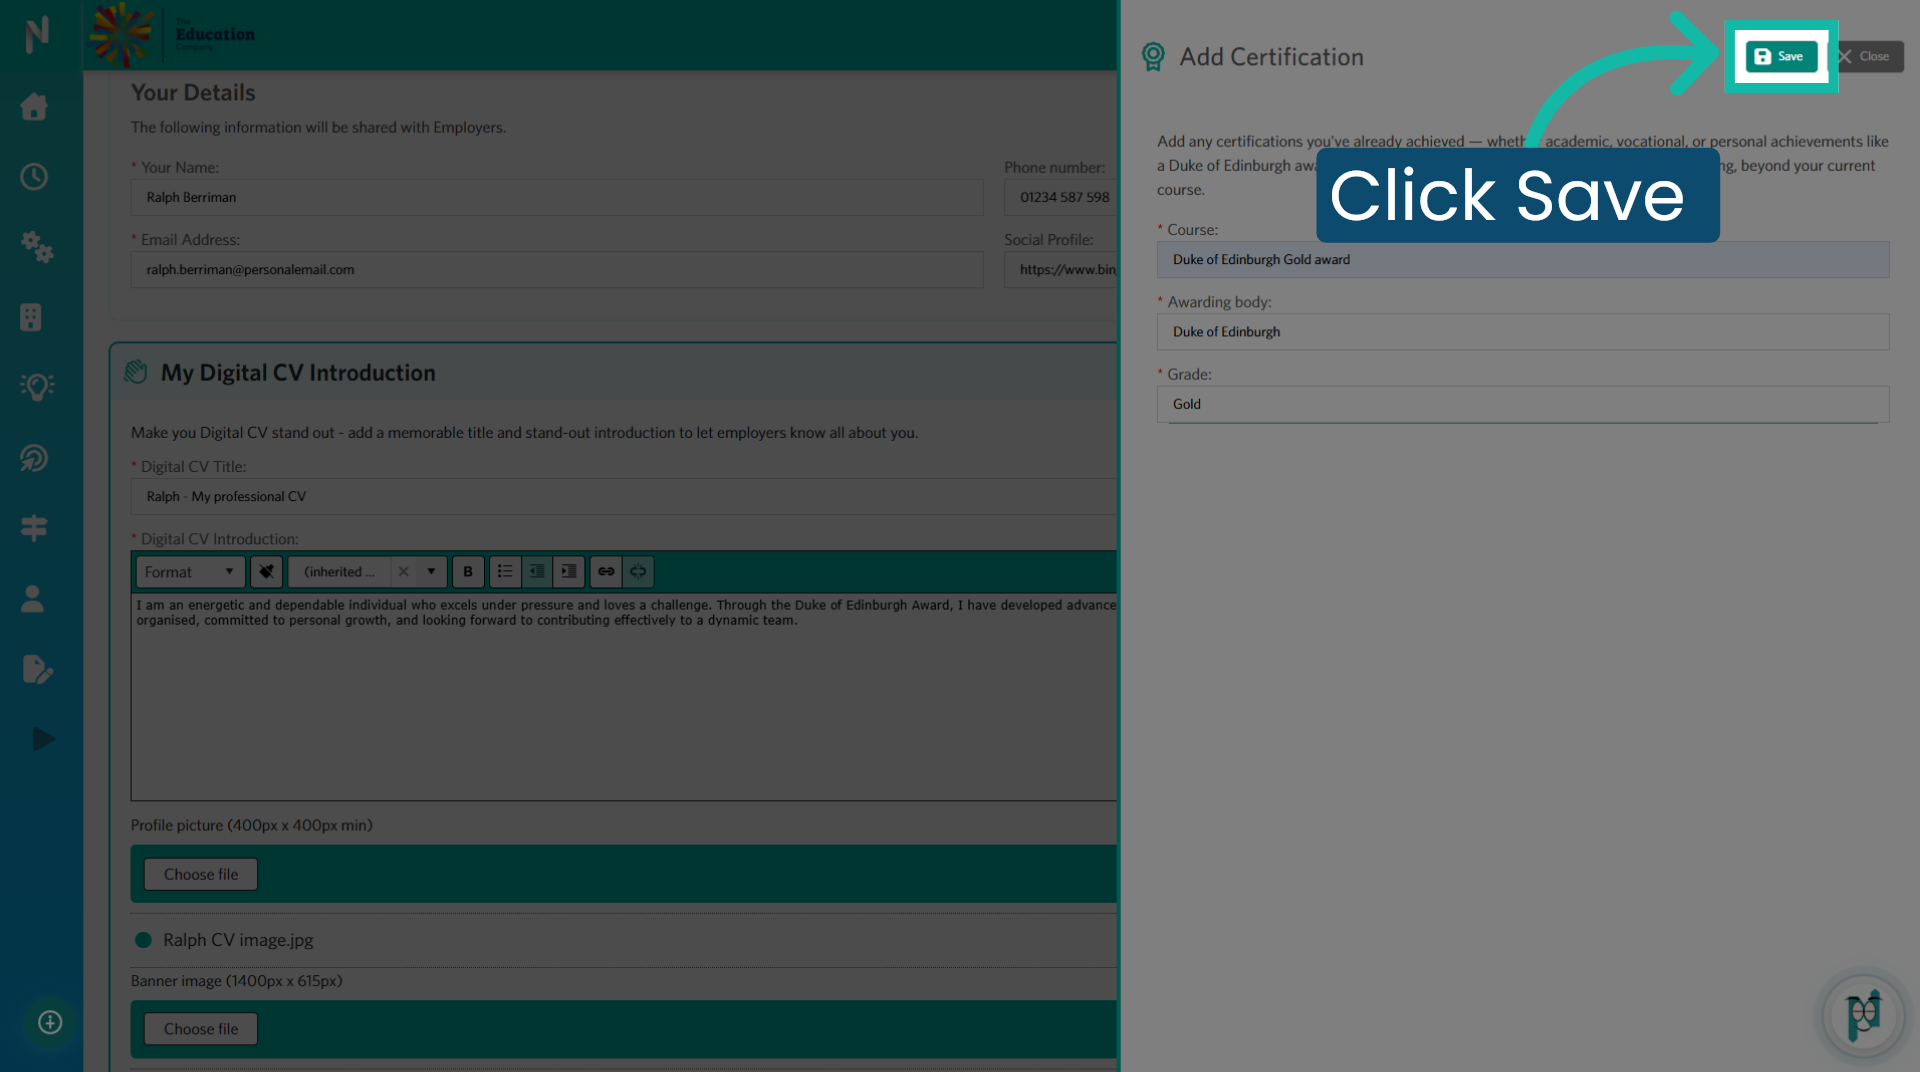
20. Save Certification Details
Click "Save" to store the certification information in your CV.
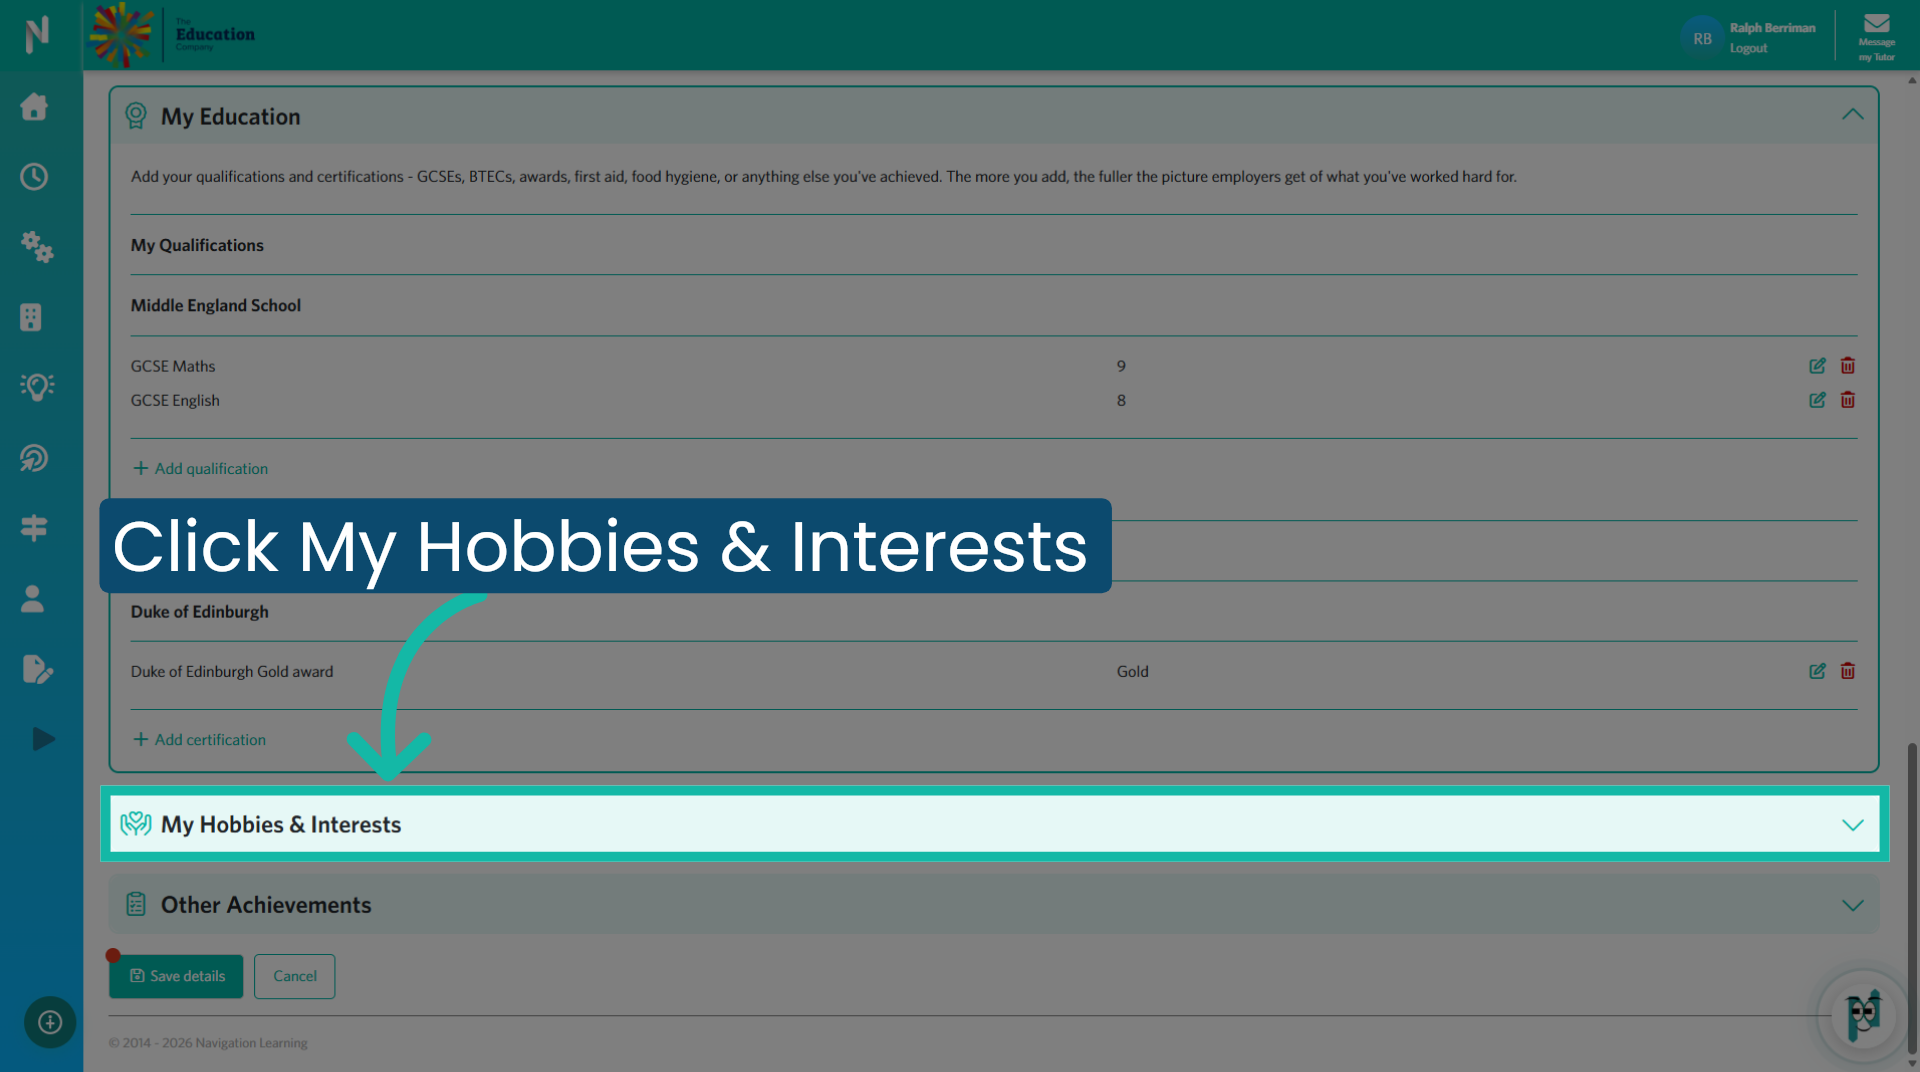
21. Open My Hobbies & Interests
Click "My Hobbies & Interests" to add your personal interests. You can add to these as your interests change and you gain new hobbies.
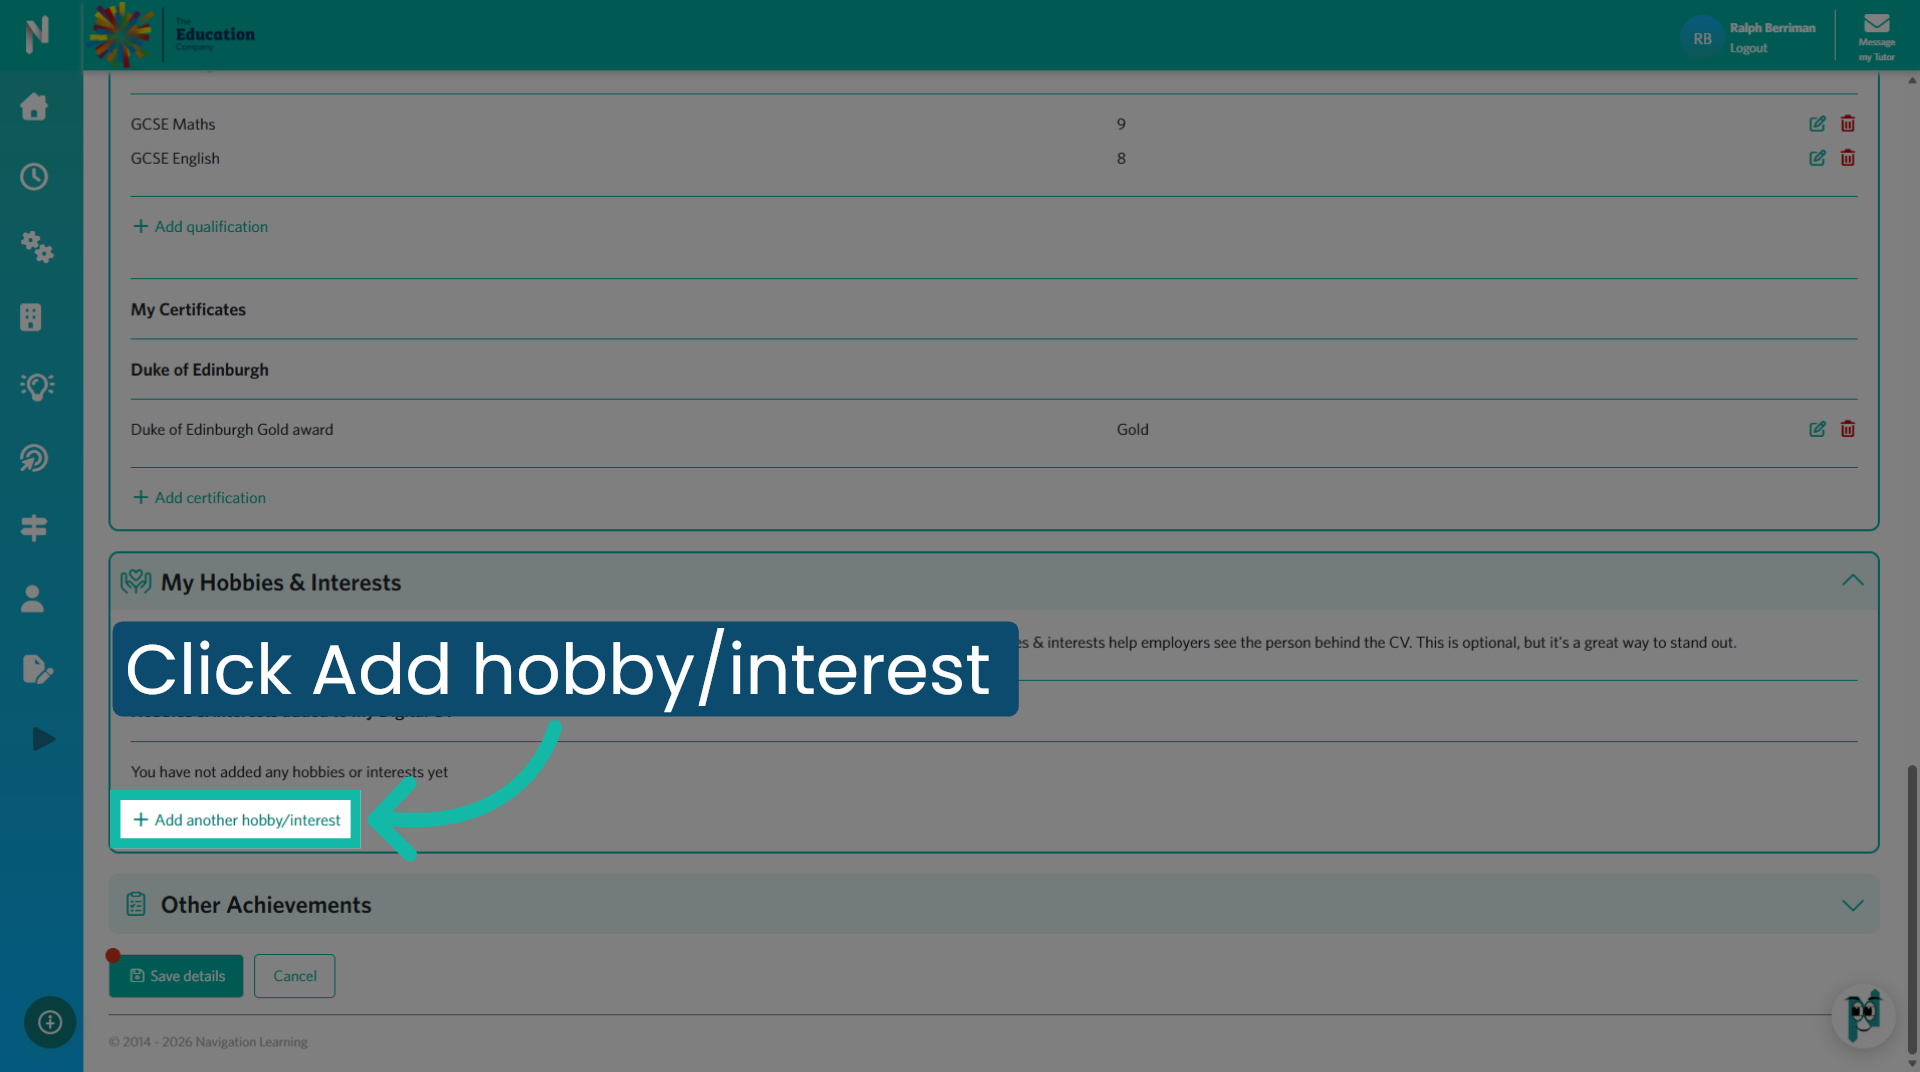
22. Add New Hobby Entry
Click "Add hobby/interest".
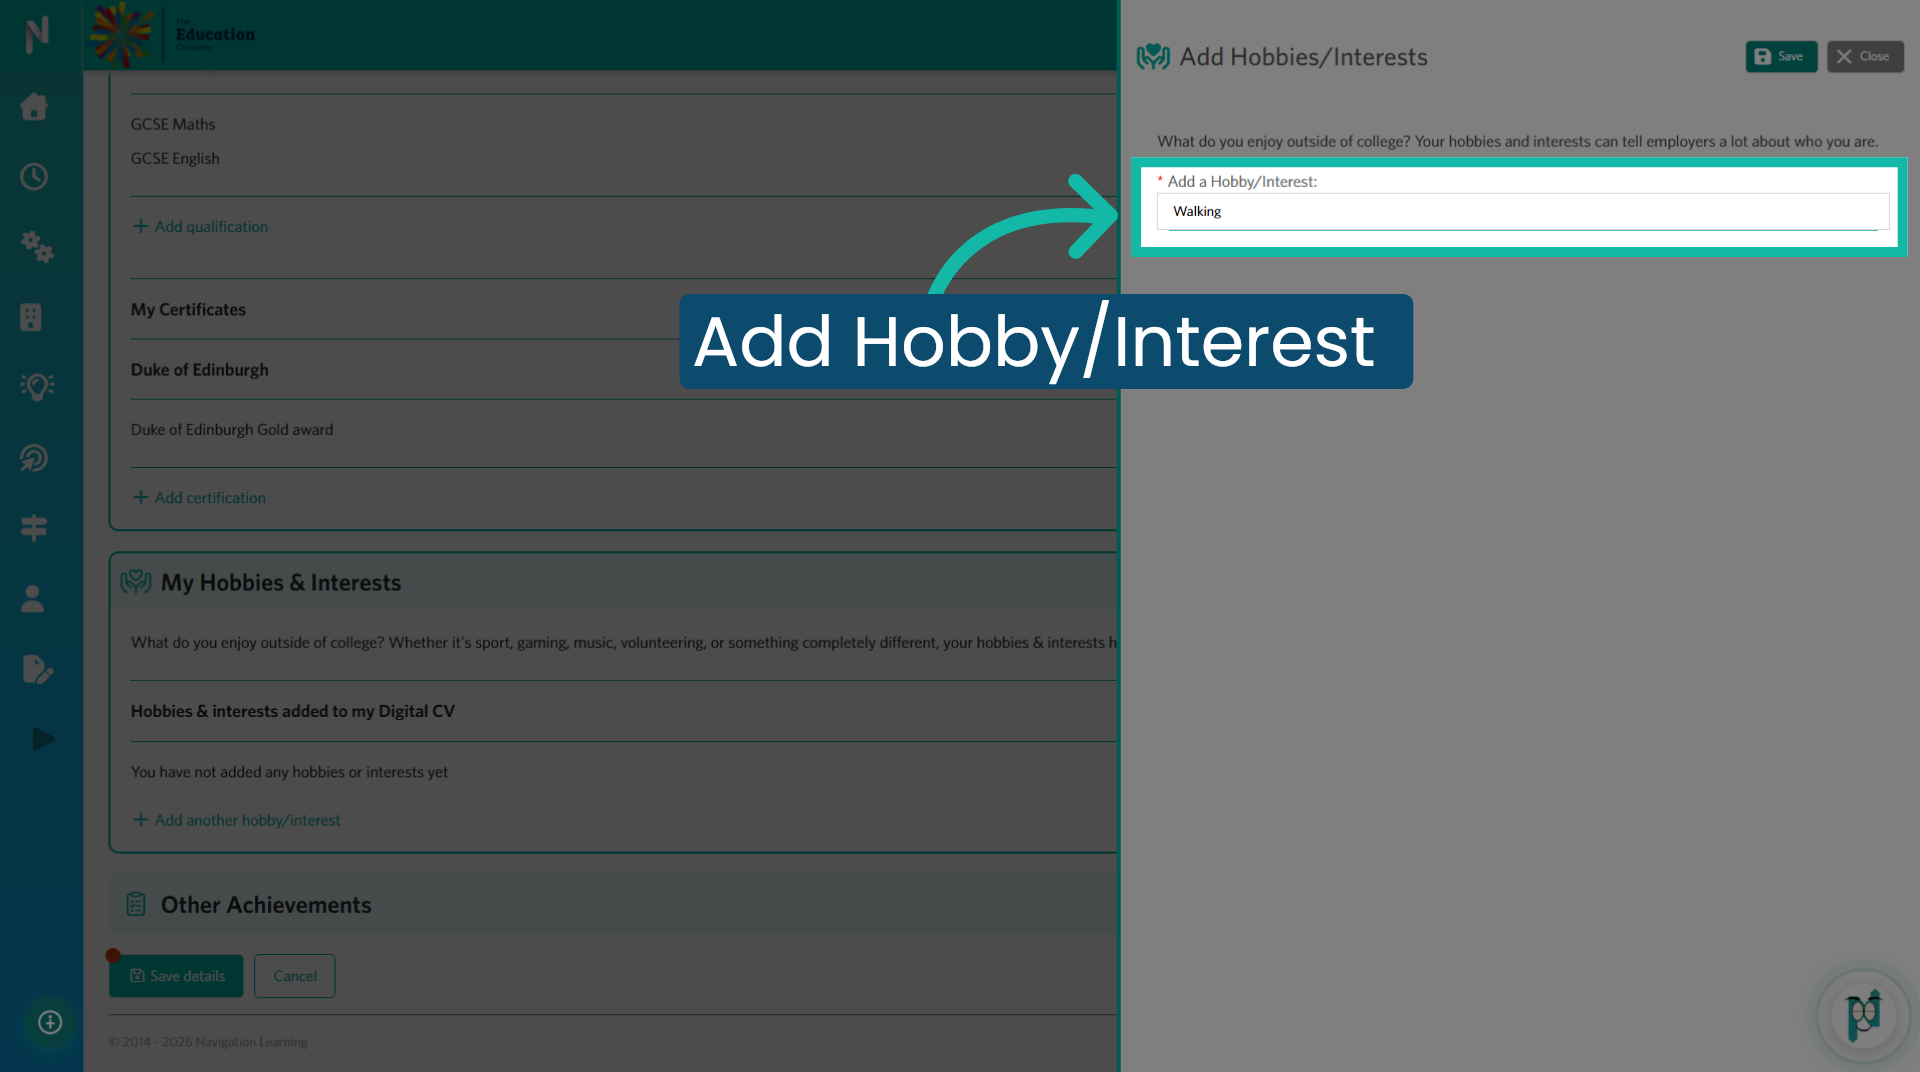
23. Add Hobby/Interest
Add your Hobby or Interest.
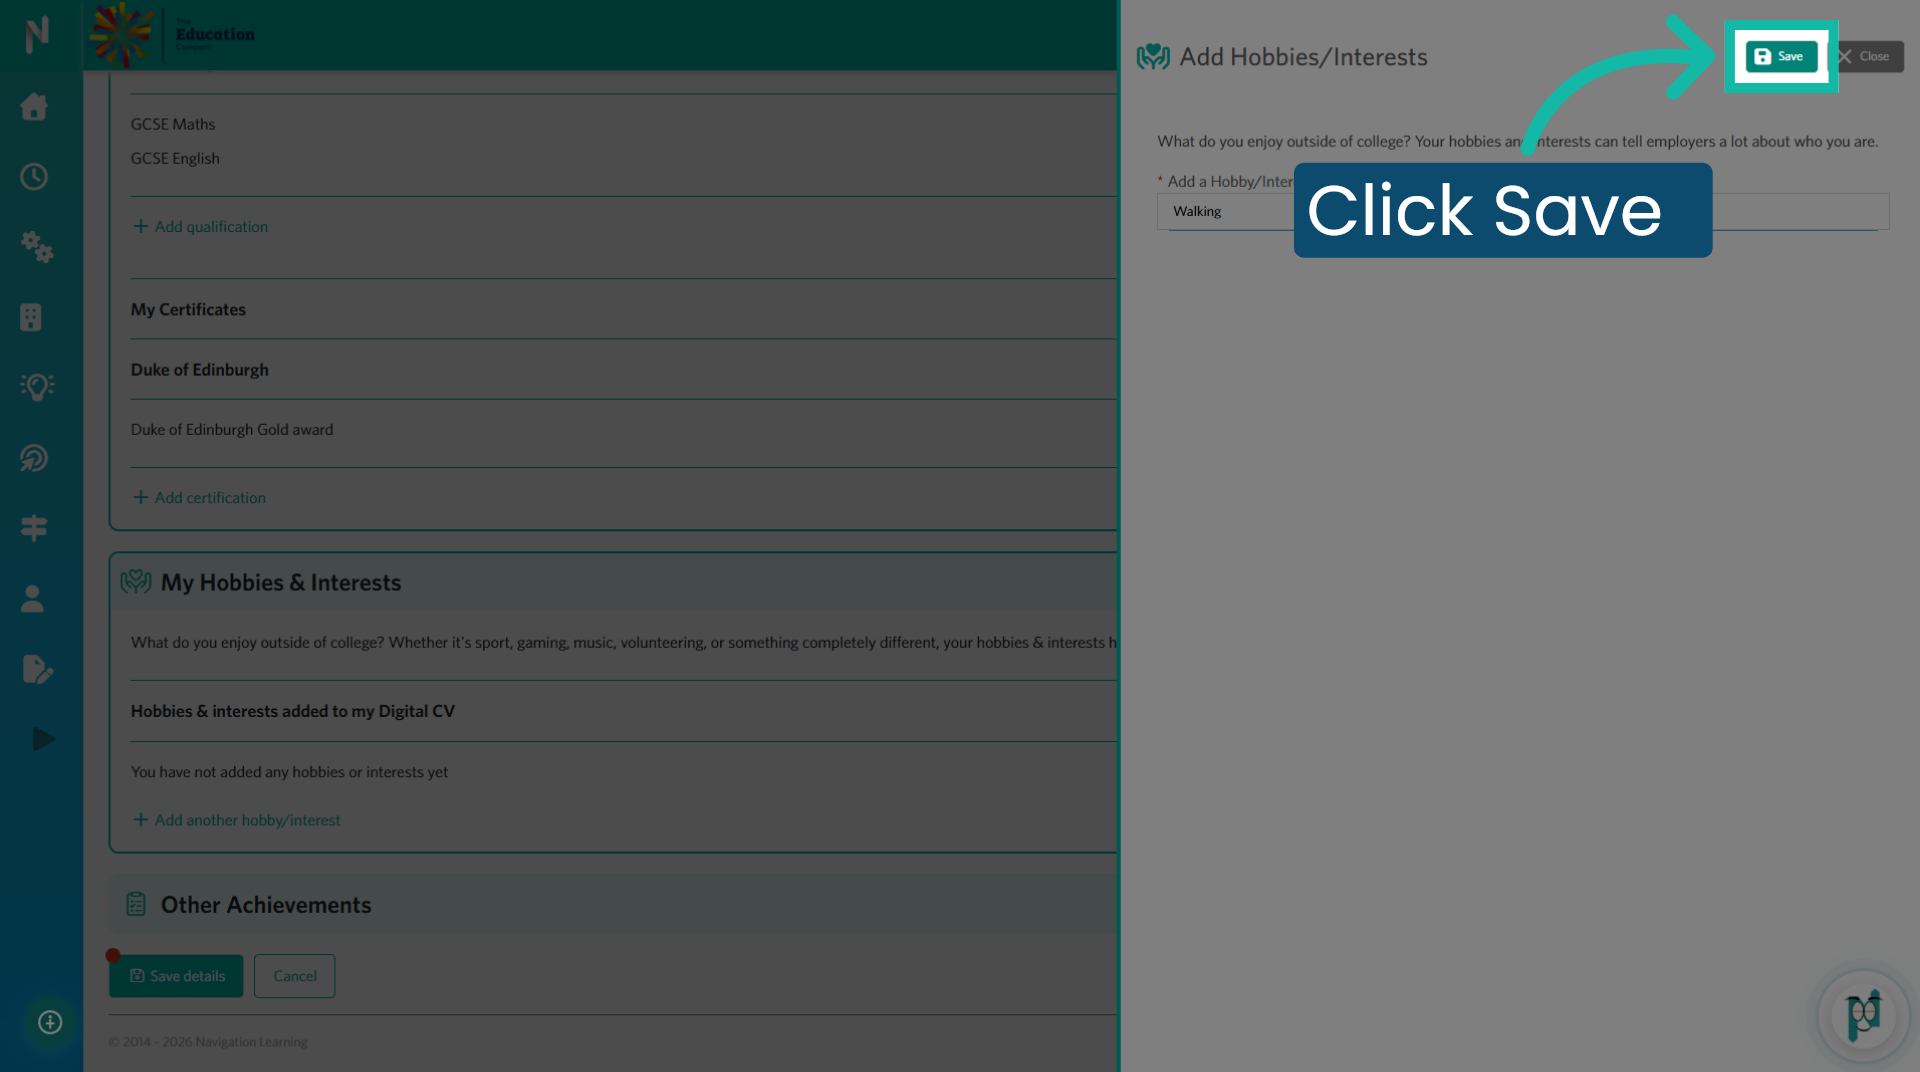
24. Save Entry
Click "Save" to add the hobby/interest to your CV.
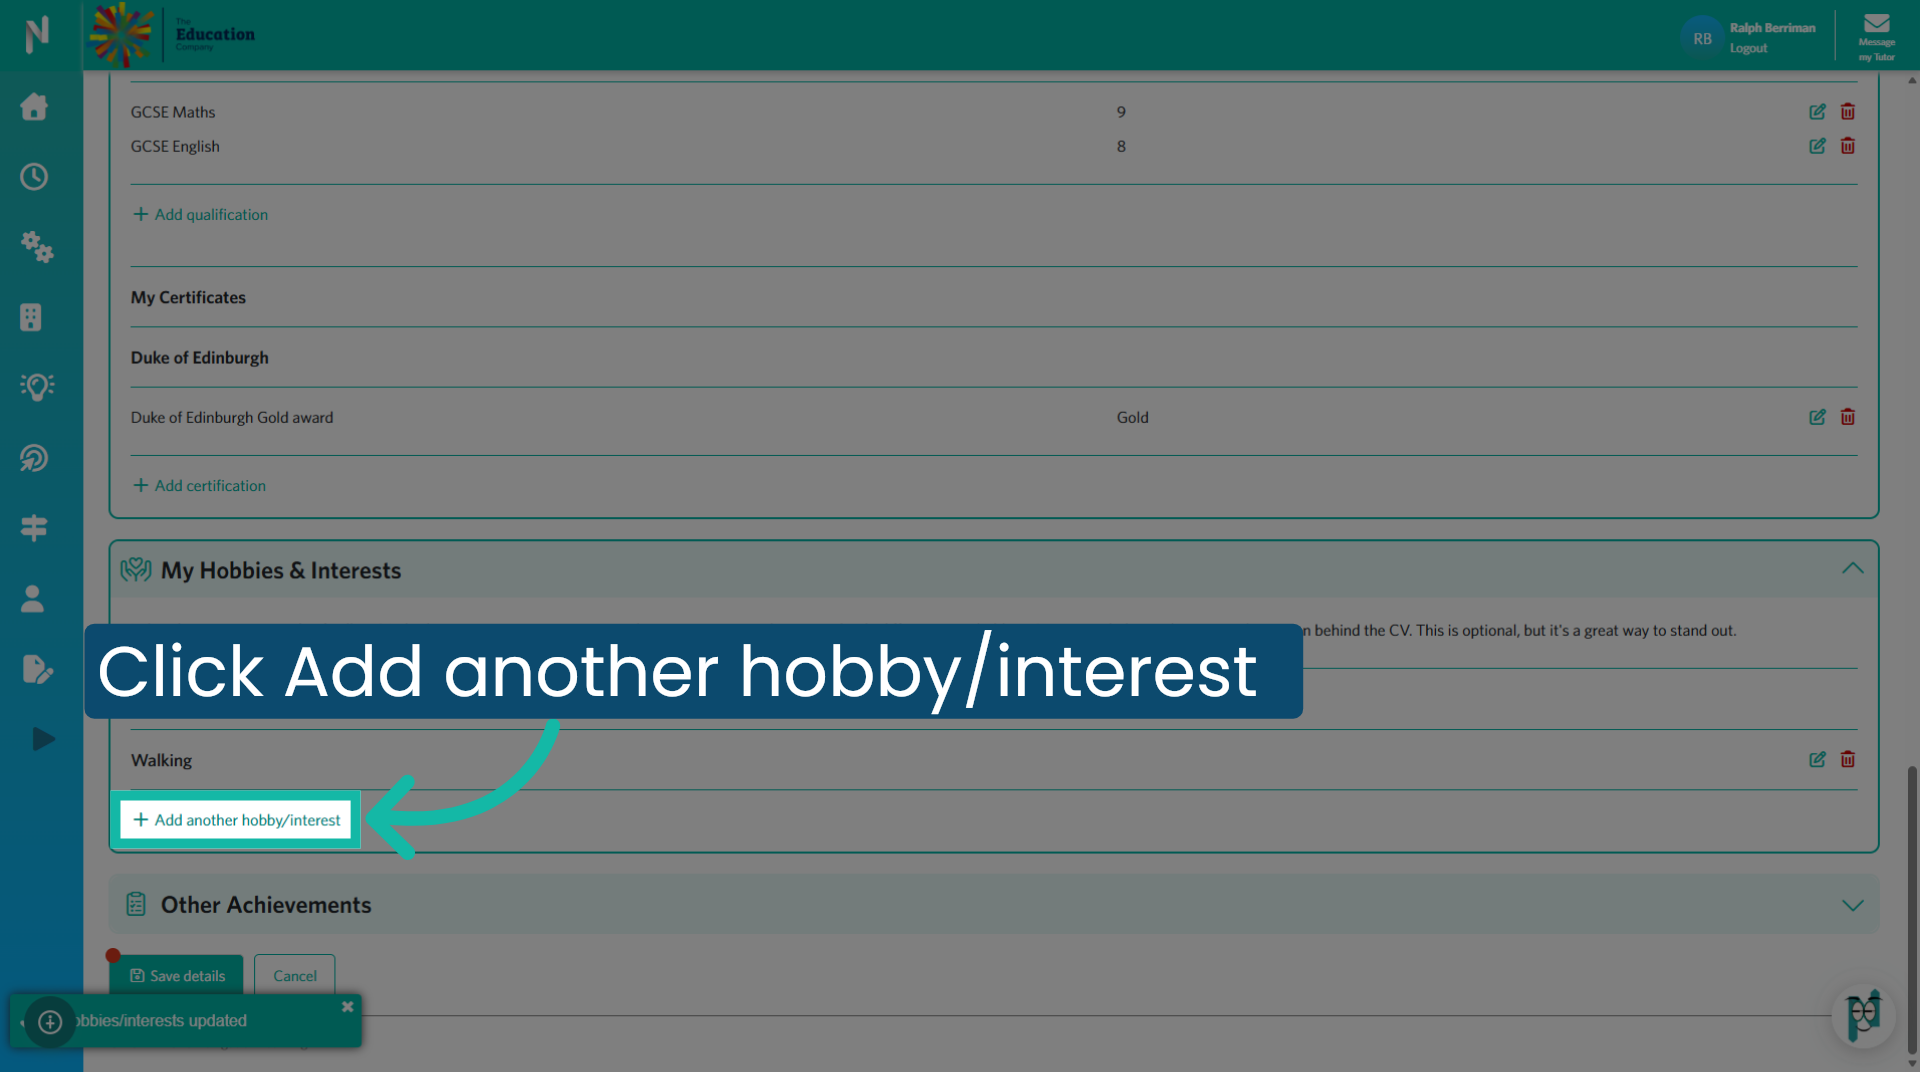
25. Add Another Hobby
Click "Add another hobby/interest" to add more personal interests.
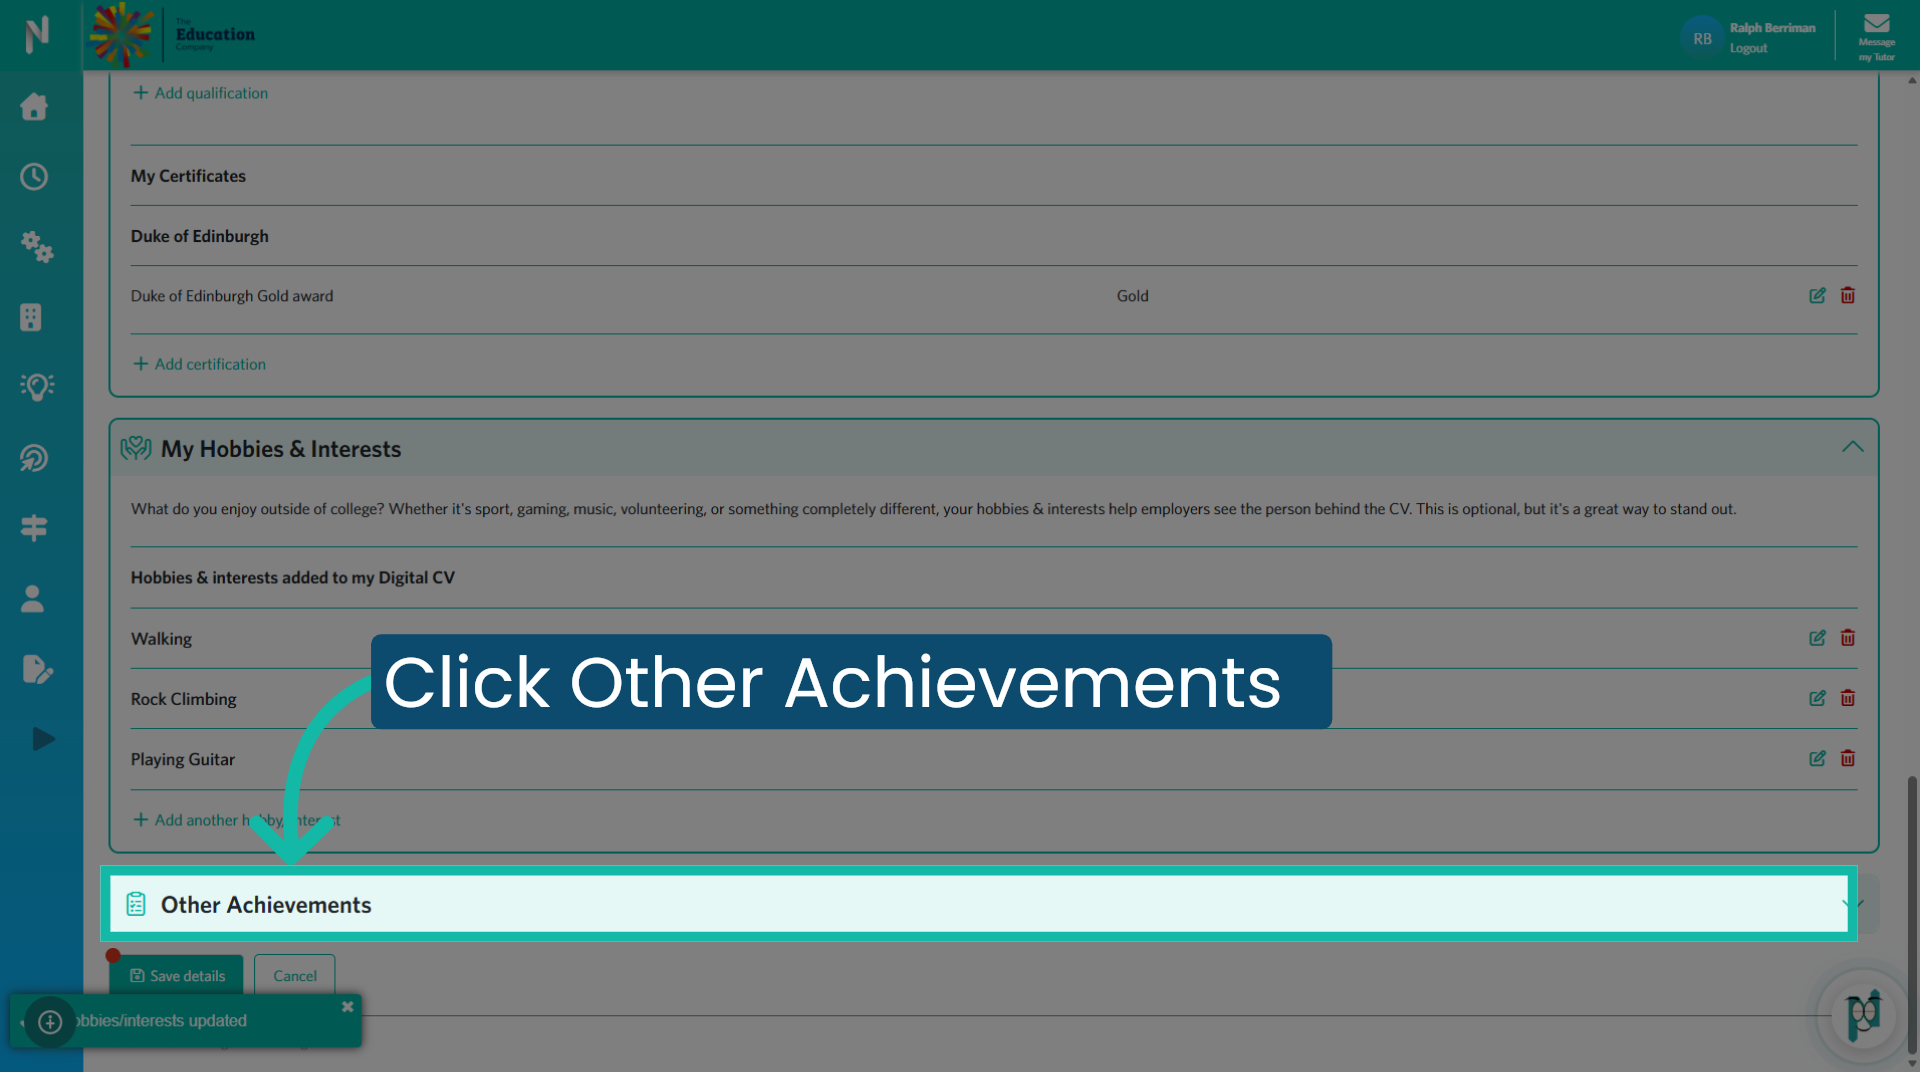
26. Open Other Achievements
Click "Other Achievements" to manage additional accomplishments on your CV.
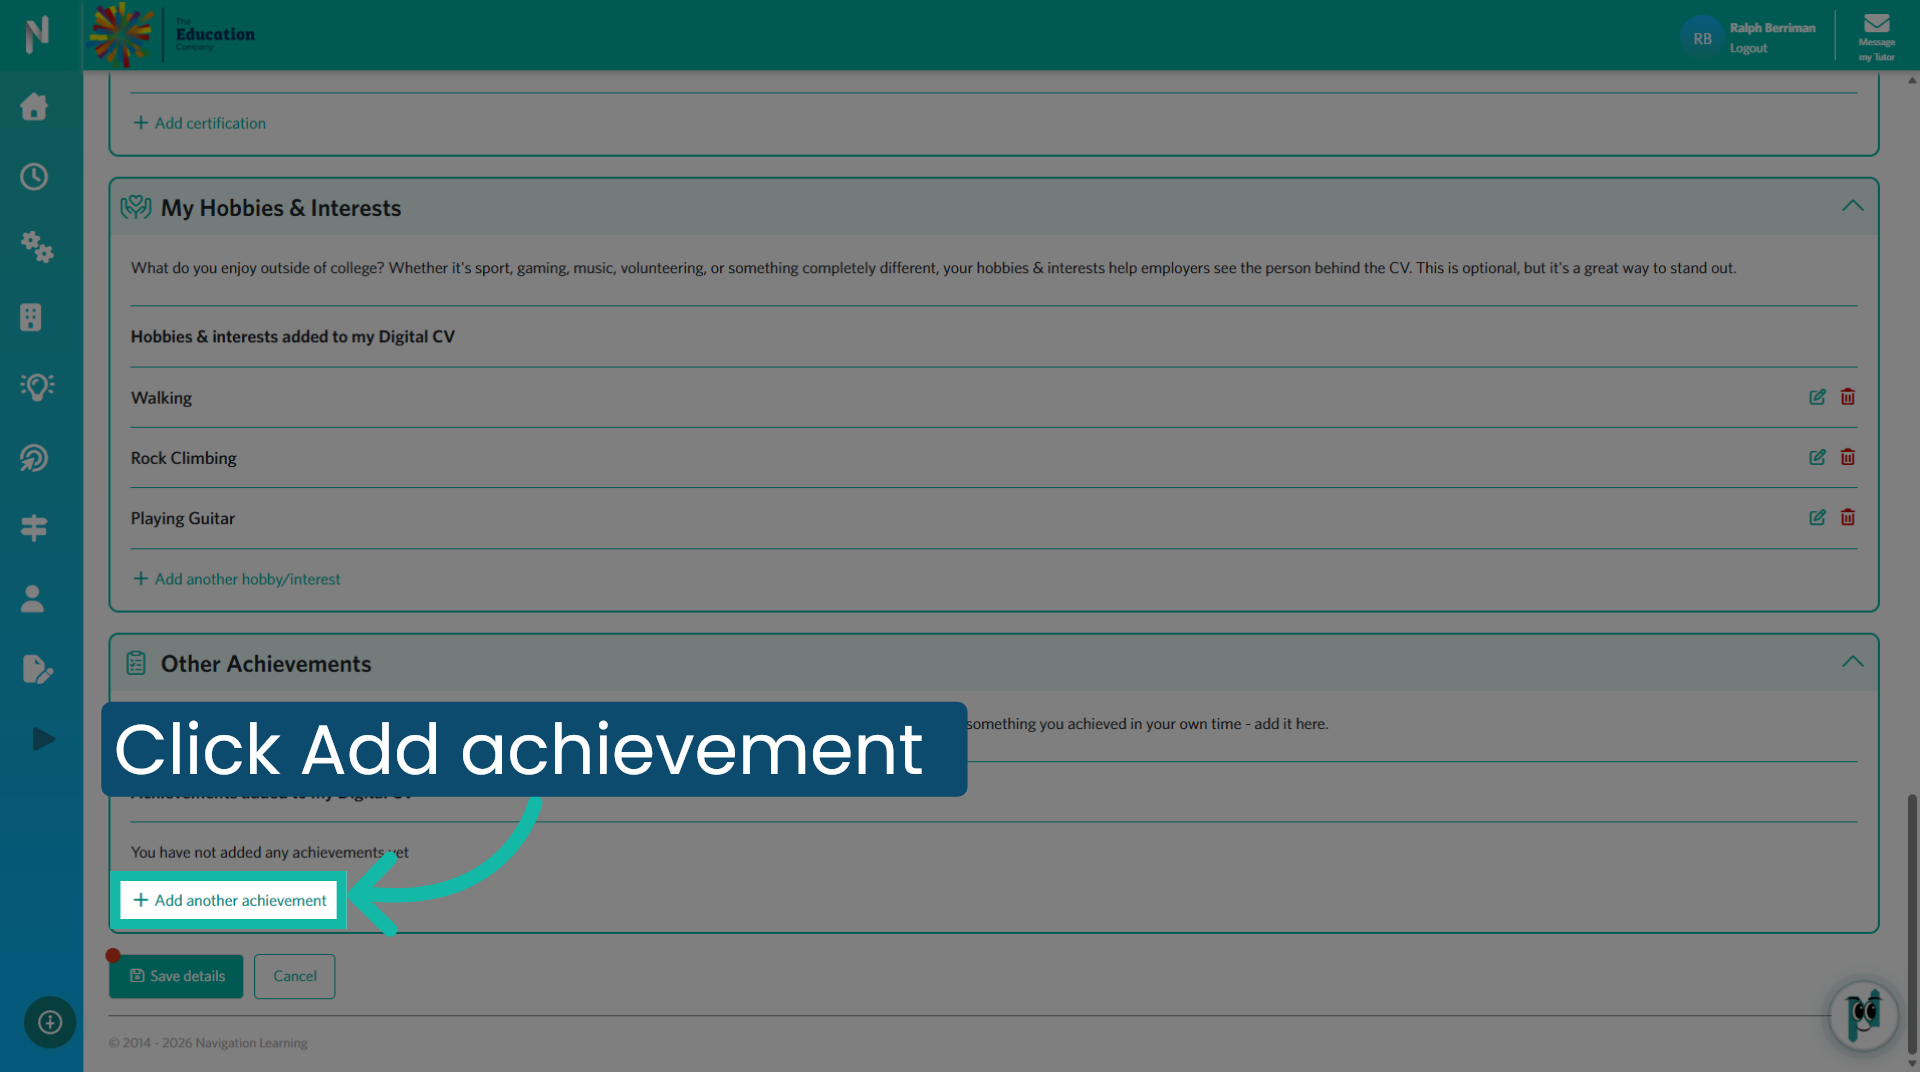
27. Add New Achievement
Click "Add another achievement" to start entering an achievement.
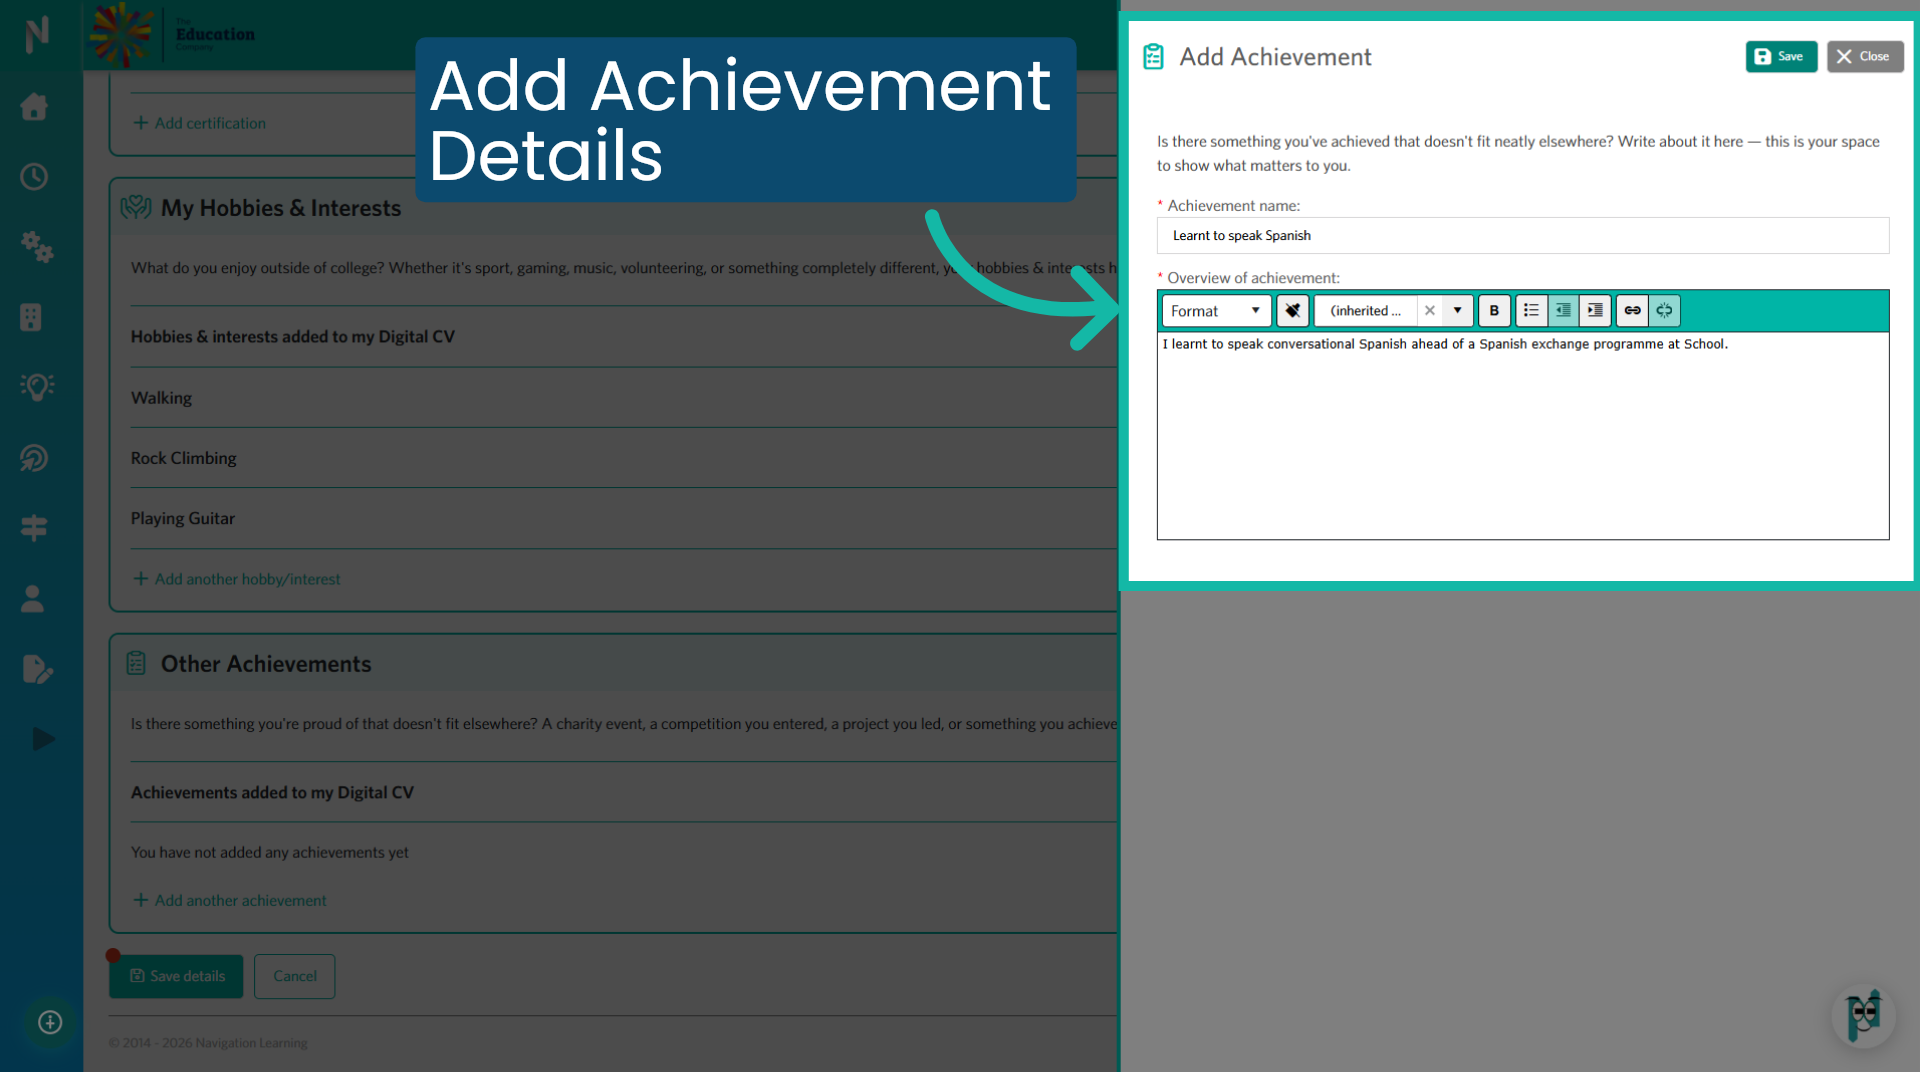
28. Add Achievement Details
Add the name of the achievement along with a brief overview. Don't worry if you don't have a complete list of achievements yet; you can add to this over time.
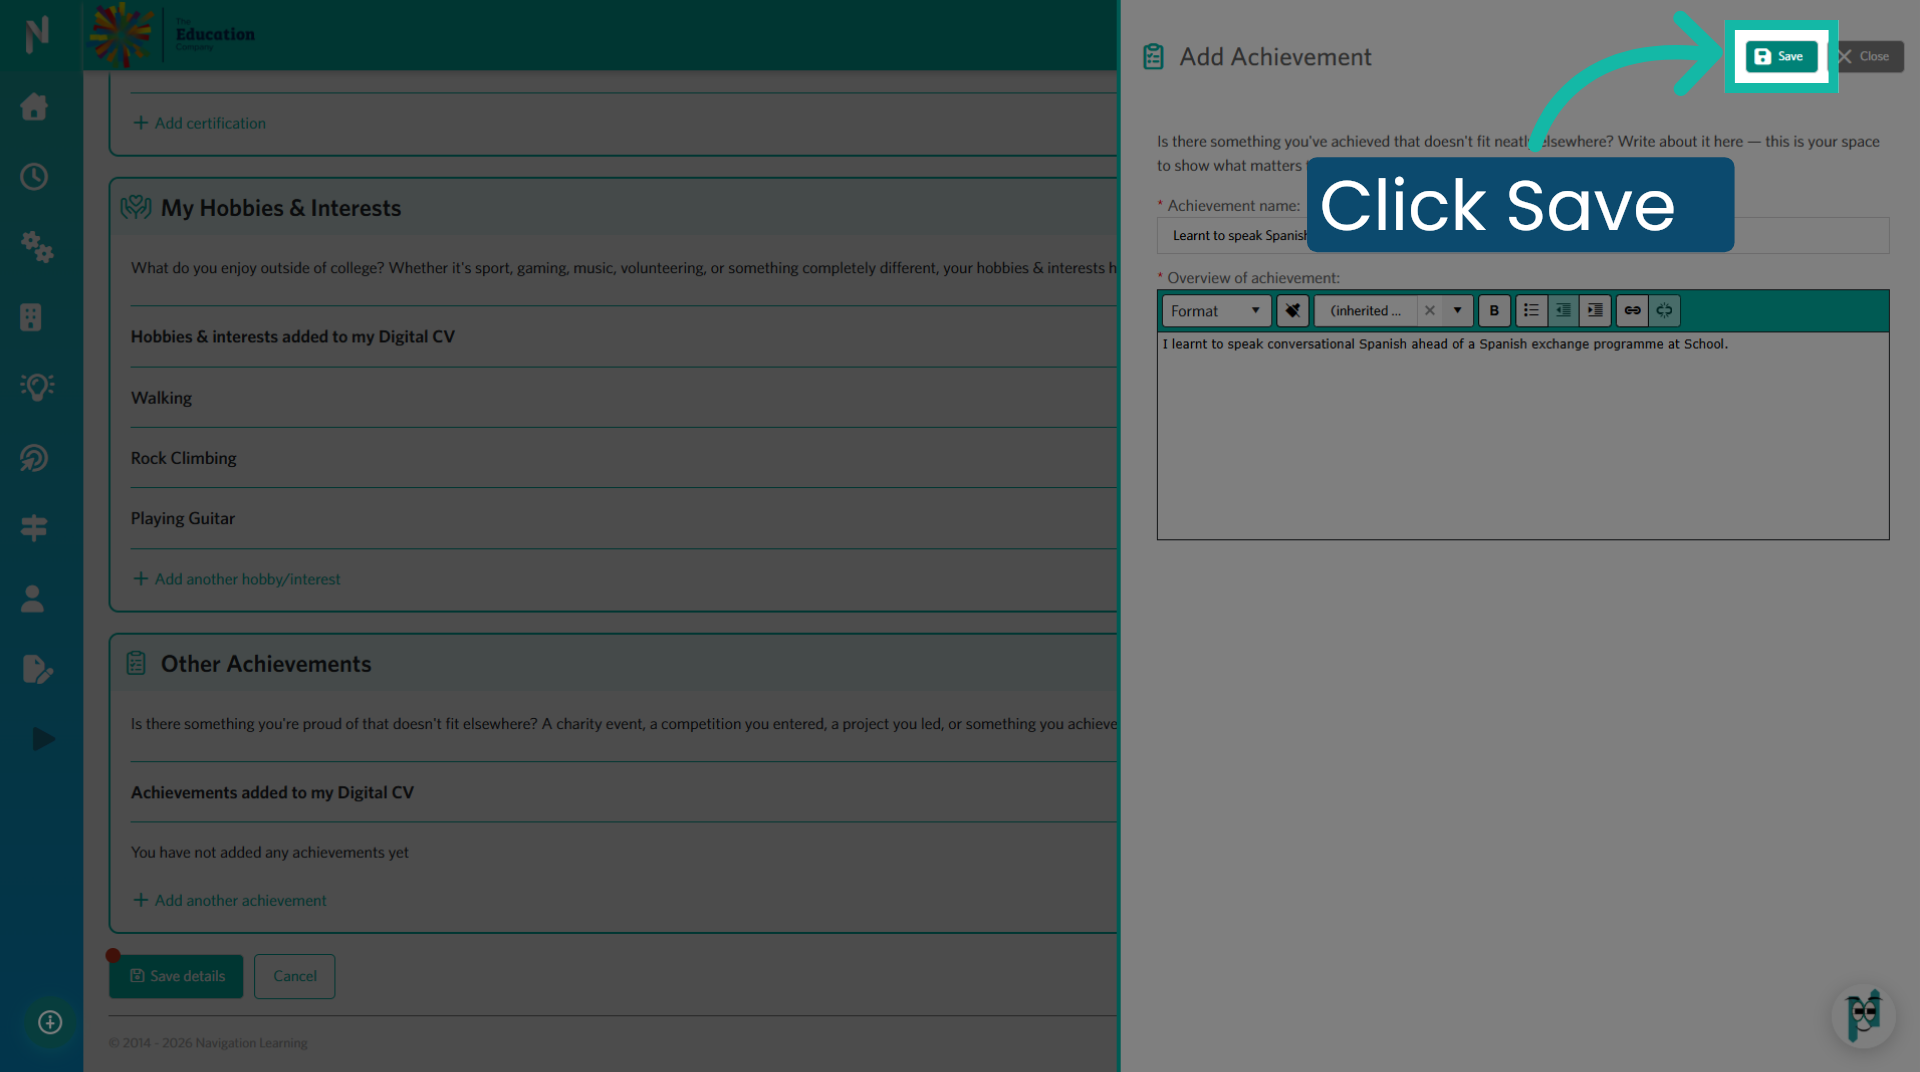
29. Save Achievement
Click "Save" to store the achievement details in your CV.
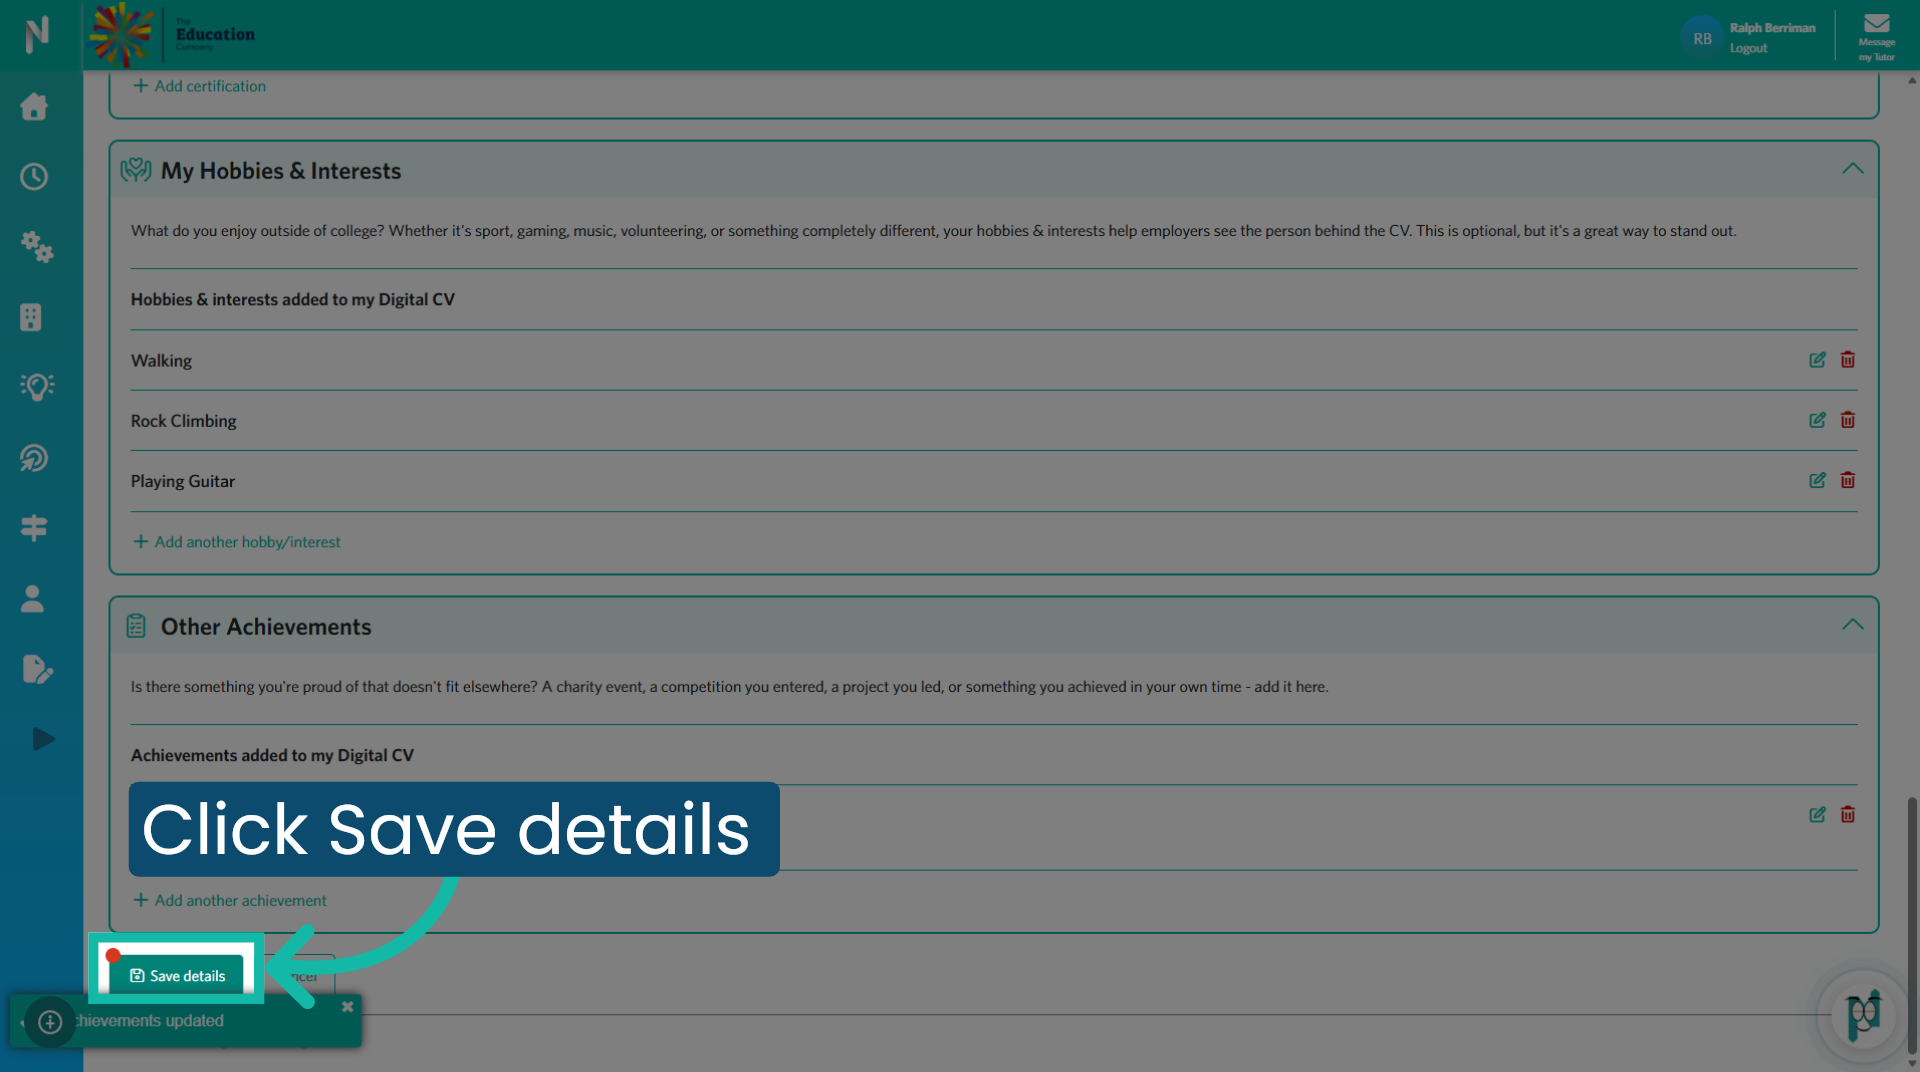
30. Save Details
Click 'Save Details' at the bottom of the page to save your introduction, or save partway through to finish it later. You can update your experiences, skills, and achievements at any time. This is your Digital CV, built to grow with you!
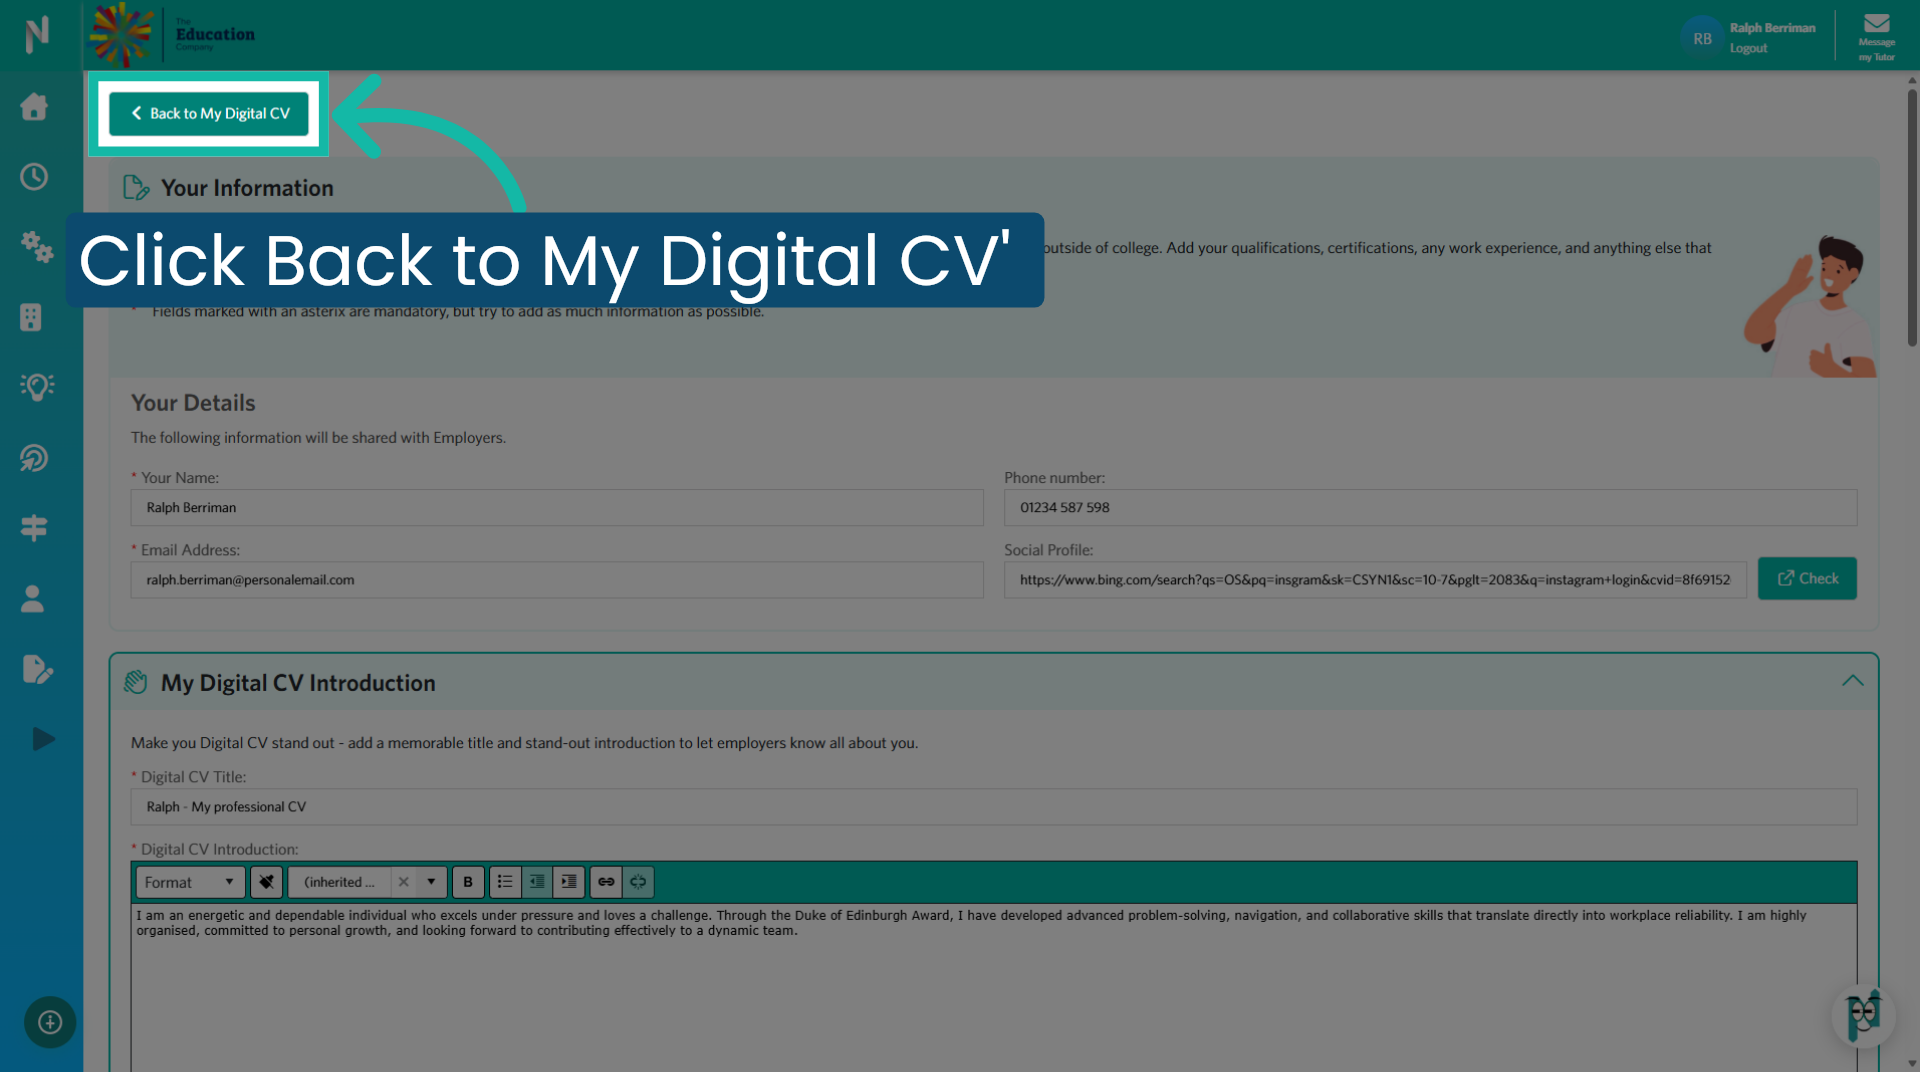
31. Return To Digital CV
Click "Back to My Digital CV" to return to your main CV overview.
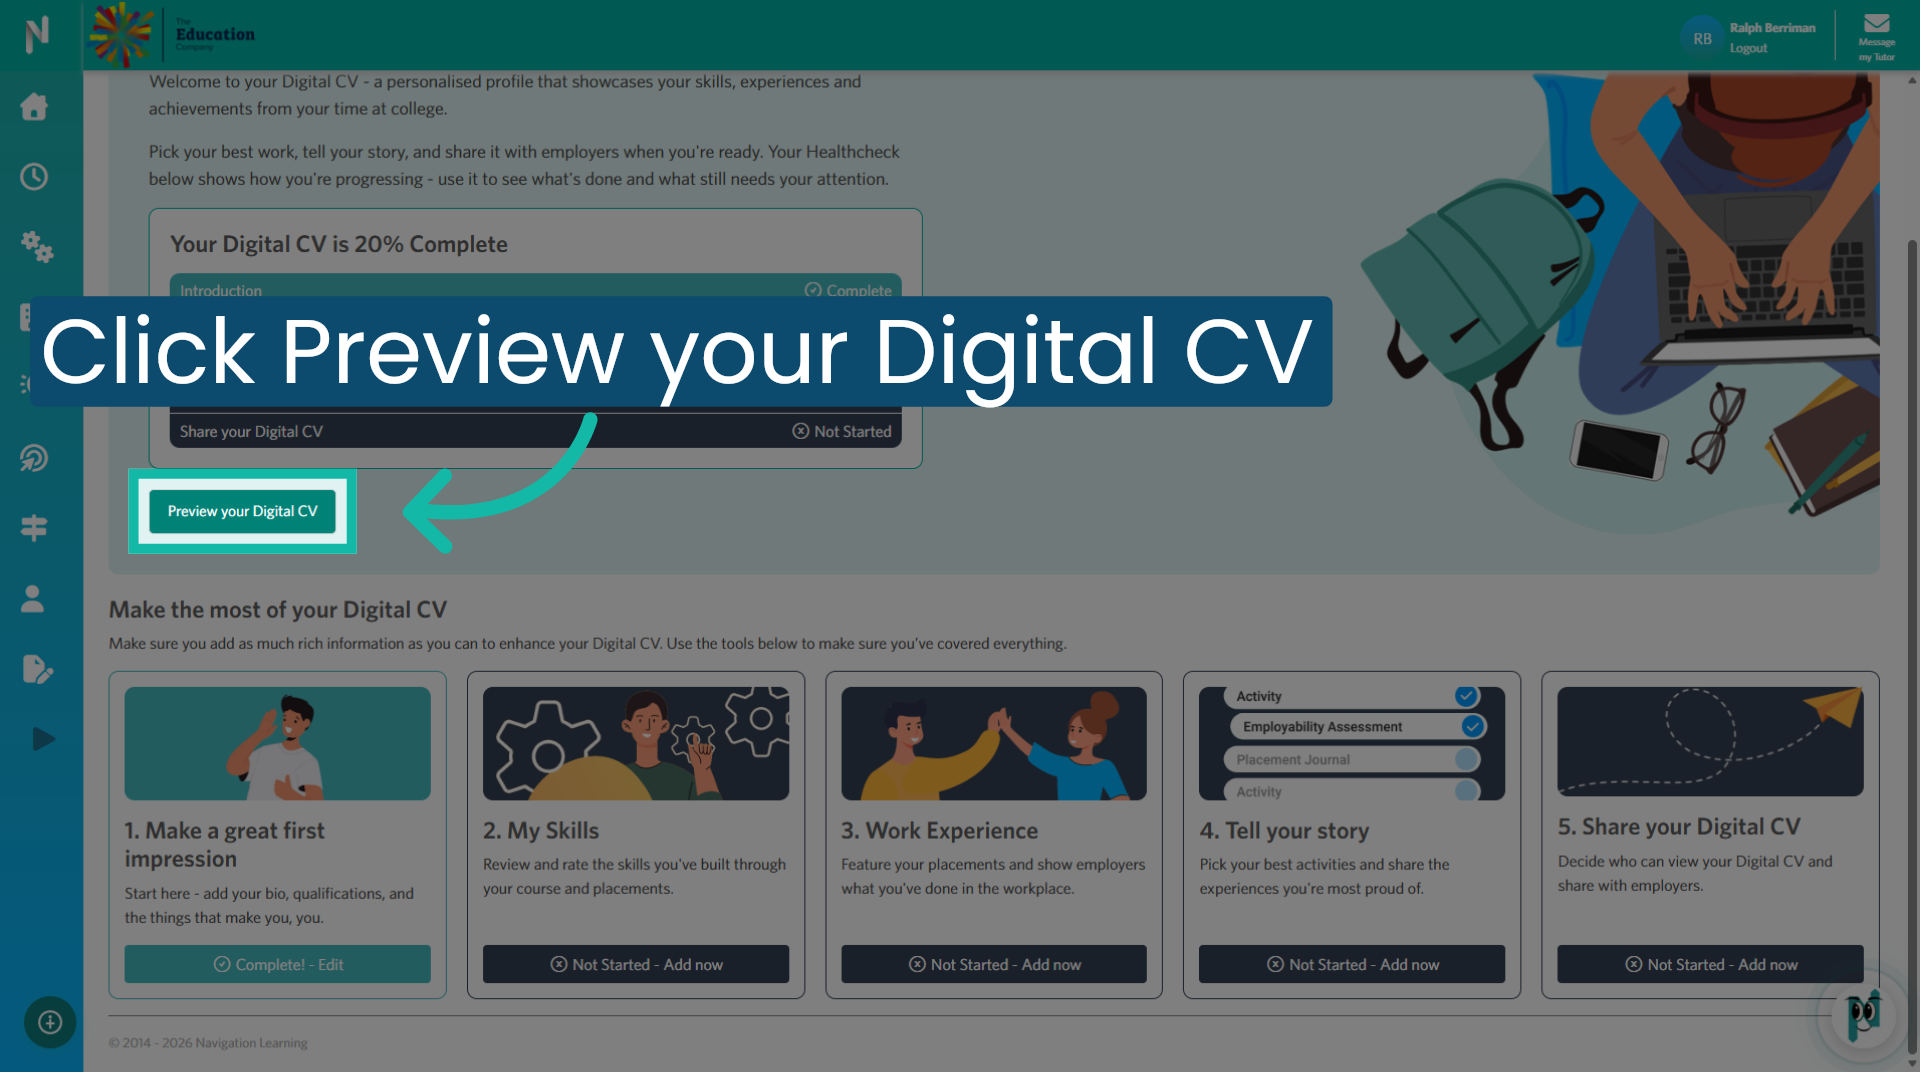
32. Preview Digital CV
Click "Preview your Digital CV" to view how your CV appears to others.
33. Analyse CV Content
Click "Analyse your CV" . This will engage Ai to review and indicate areas of your CV's that could be improved.
34. Navigate Back
Click "Back" to return to the previous screen or menu.
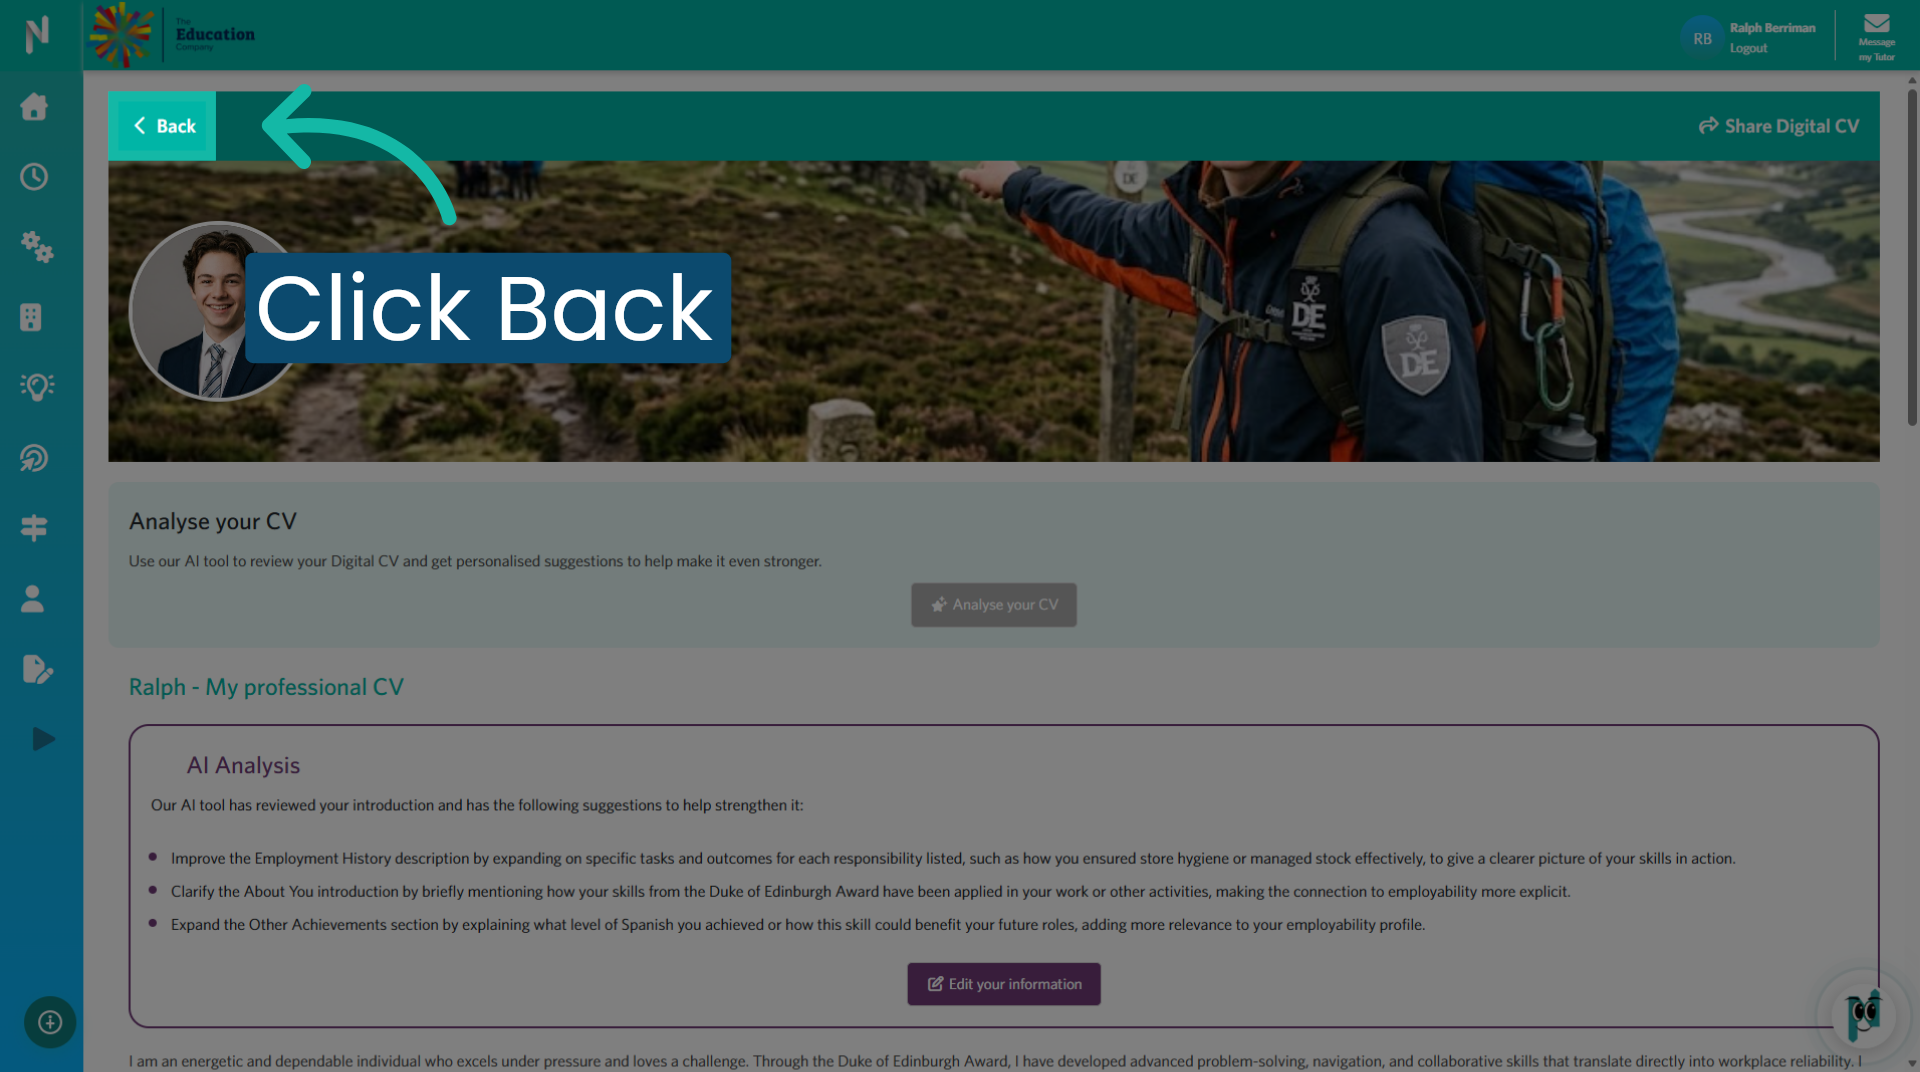
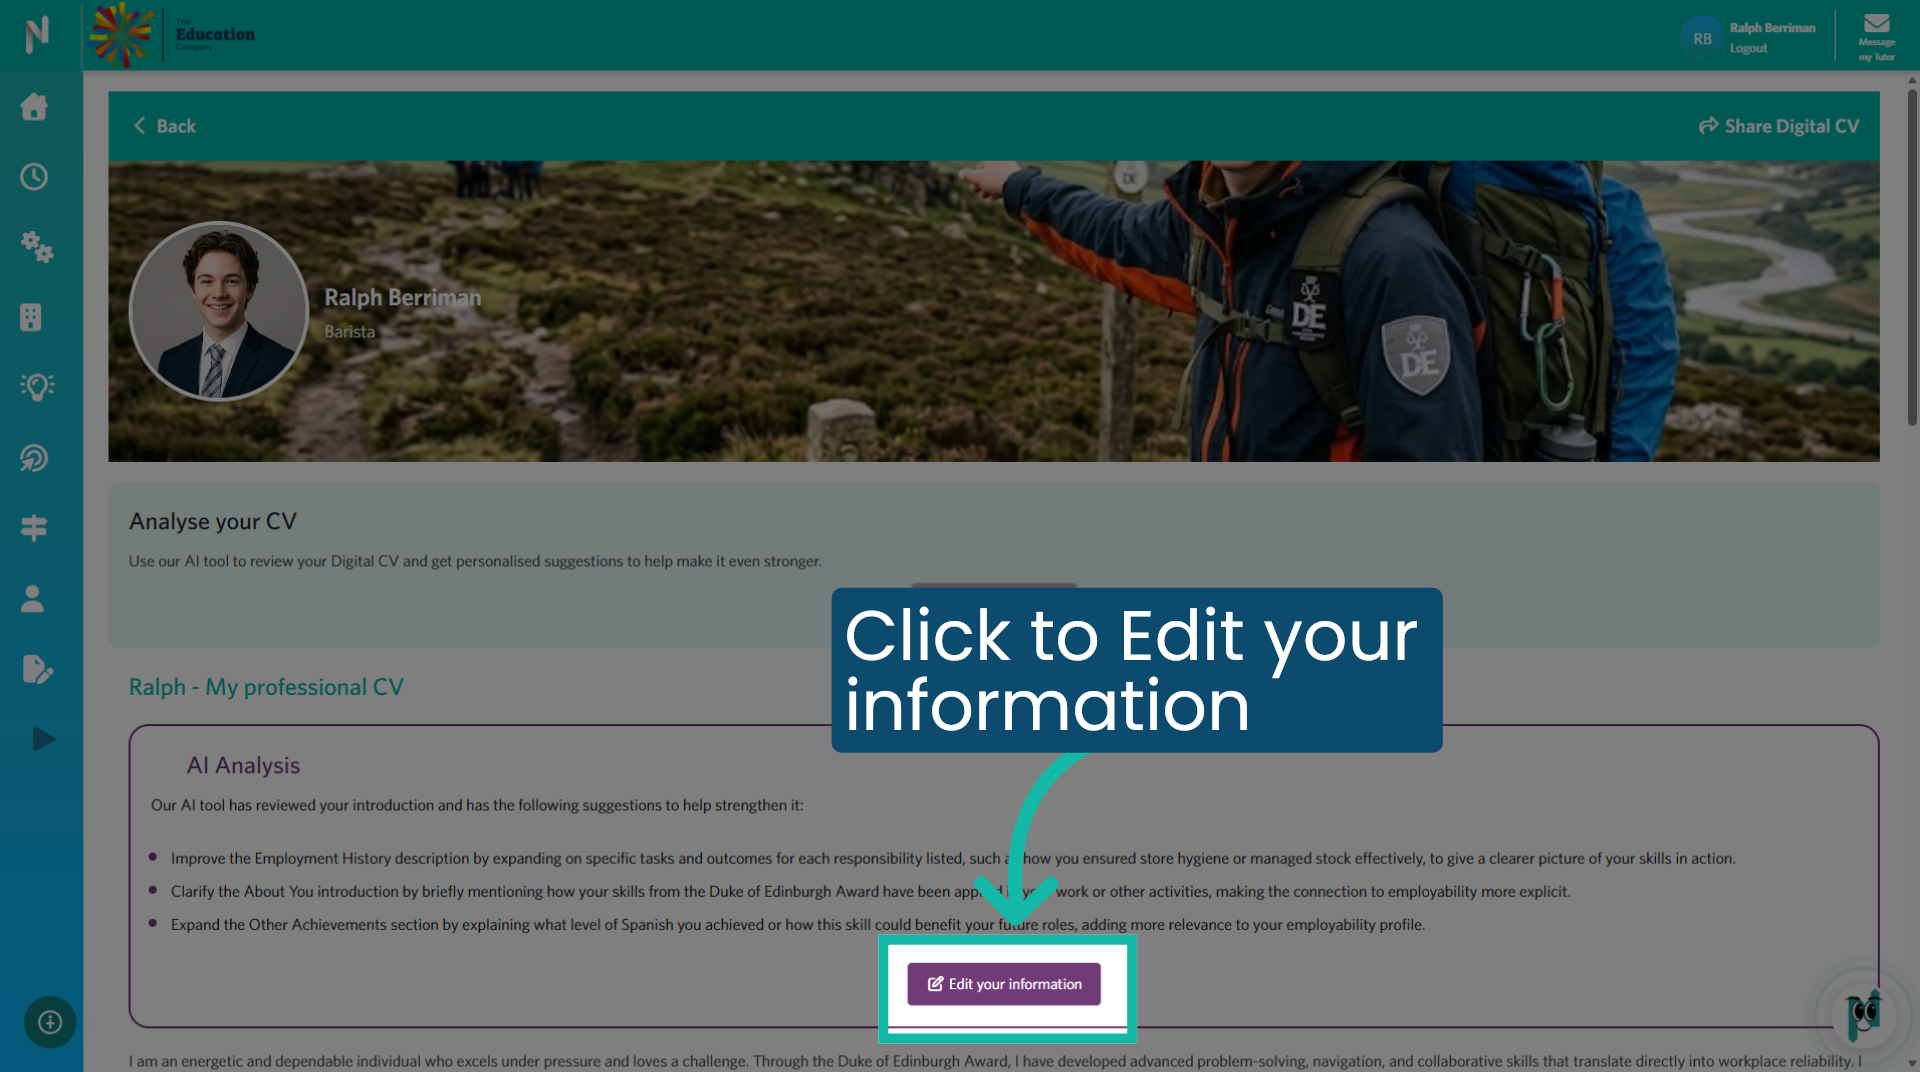
35. Ai suggested improvements
This panel will display any improvements it feels you could make to sections.
36. Click to Edit your information
Click "Edit your information" to make the changes. Remember to click "Save Details" at he bottom after you have made your changes.
37. Thank you
You have successfully added certifications, hobbies, and achievements to your digital CV using the Navigate application. Review your CV preview and use the analysis tool to ensure your profile is complete and well-presented.
You have successfully created and completed your digital CV by entering personal details, employment history, education, and certifications using the Navigate platform. Review your CV to ensure all information is accurate and up to date before sharing or submitting it.
Was this article helpful?
That’s Great!
Thank you for your feedback
Sorry! We couldn't be helpful
Thank you for your feedback
Feedback sent
We appreciate your effort and will try to fix the article