
Go to login.navigate.uk.com
1. Scroll down to "My Placements" Panel.
Once logged in scroll down to the my placements panel.

2. Click "See all."
Click see all.

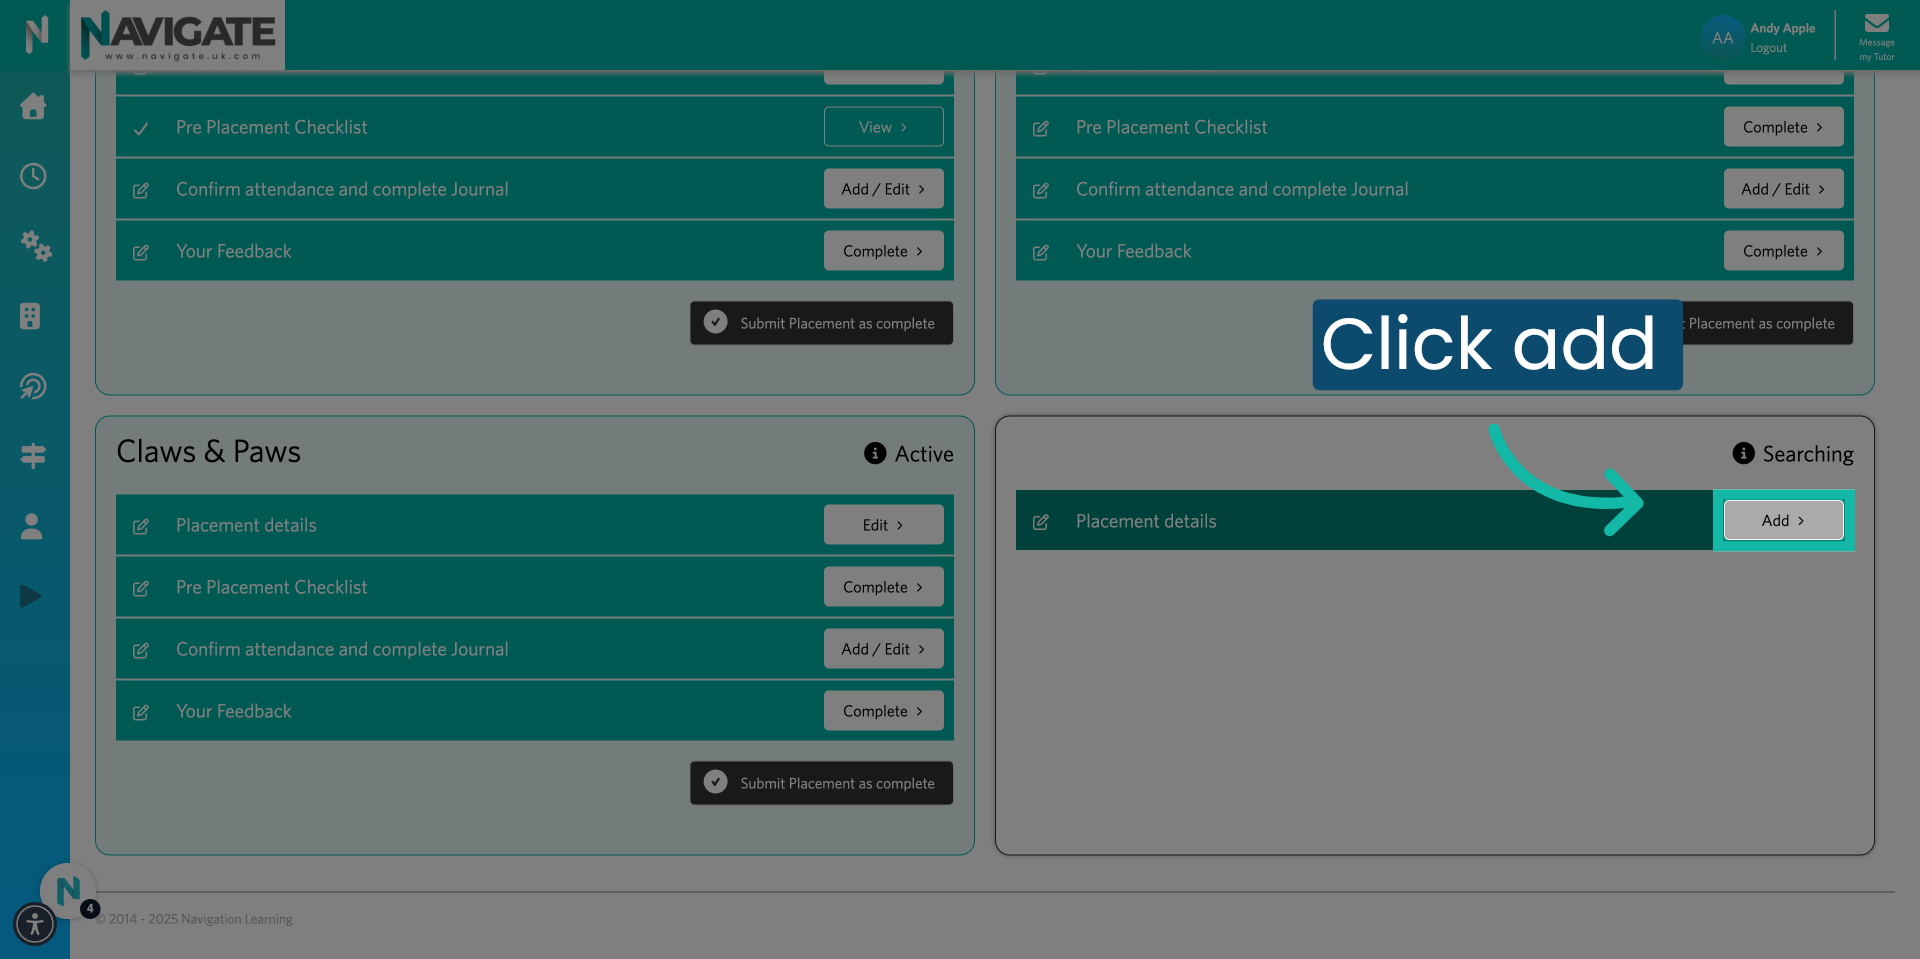
3. Add placement details.
You will see a blank panel that shows placement details. This means you have been requested to find and add details of your placement.

4. Click "Add."
Click on add.
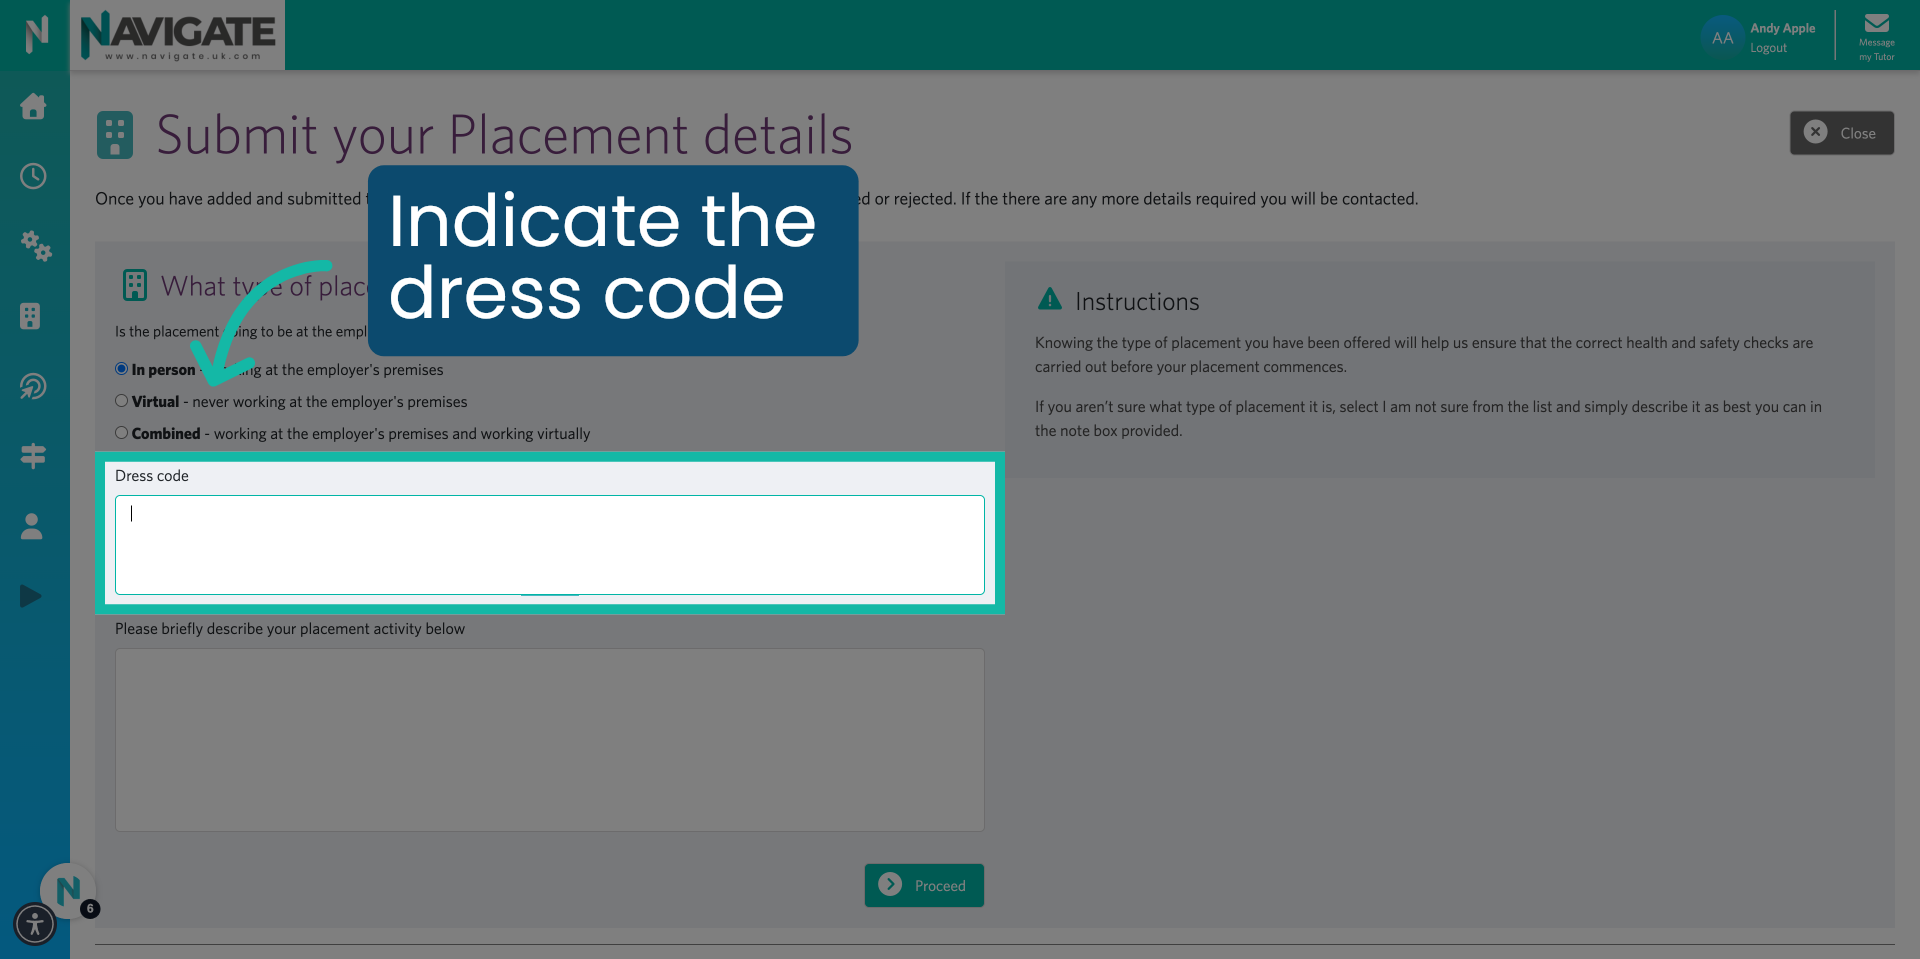
5. Select type of placement.
Select where your placement is taking place. On the employer's premises virtually. Or a combination of virtual and the employer's premises.

6. Indicate the dress code.
If applicable, fill out the placement dress code.
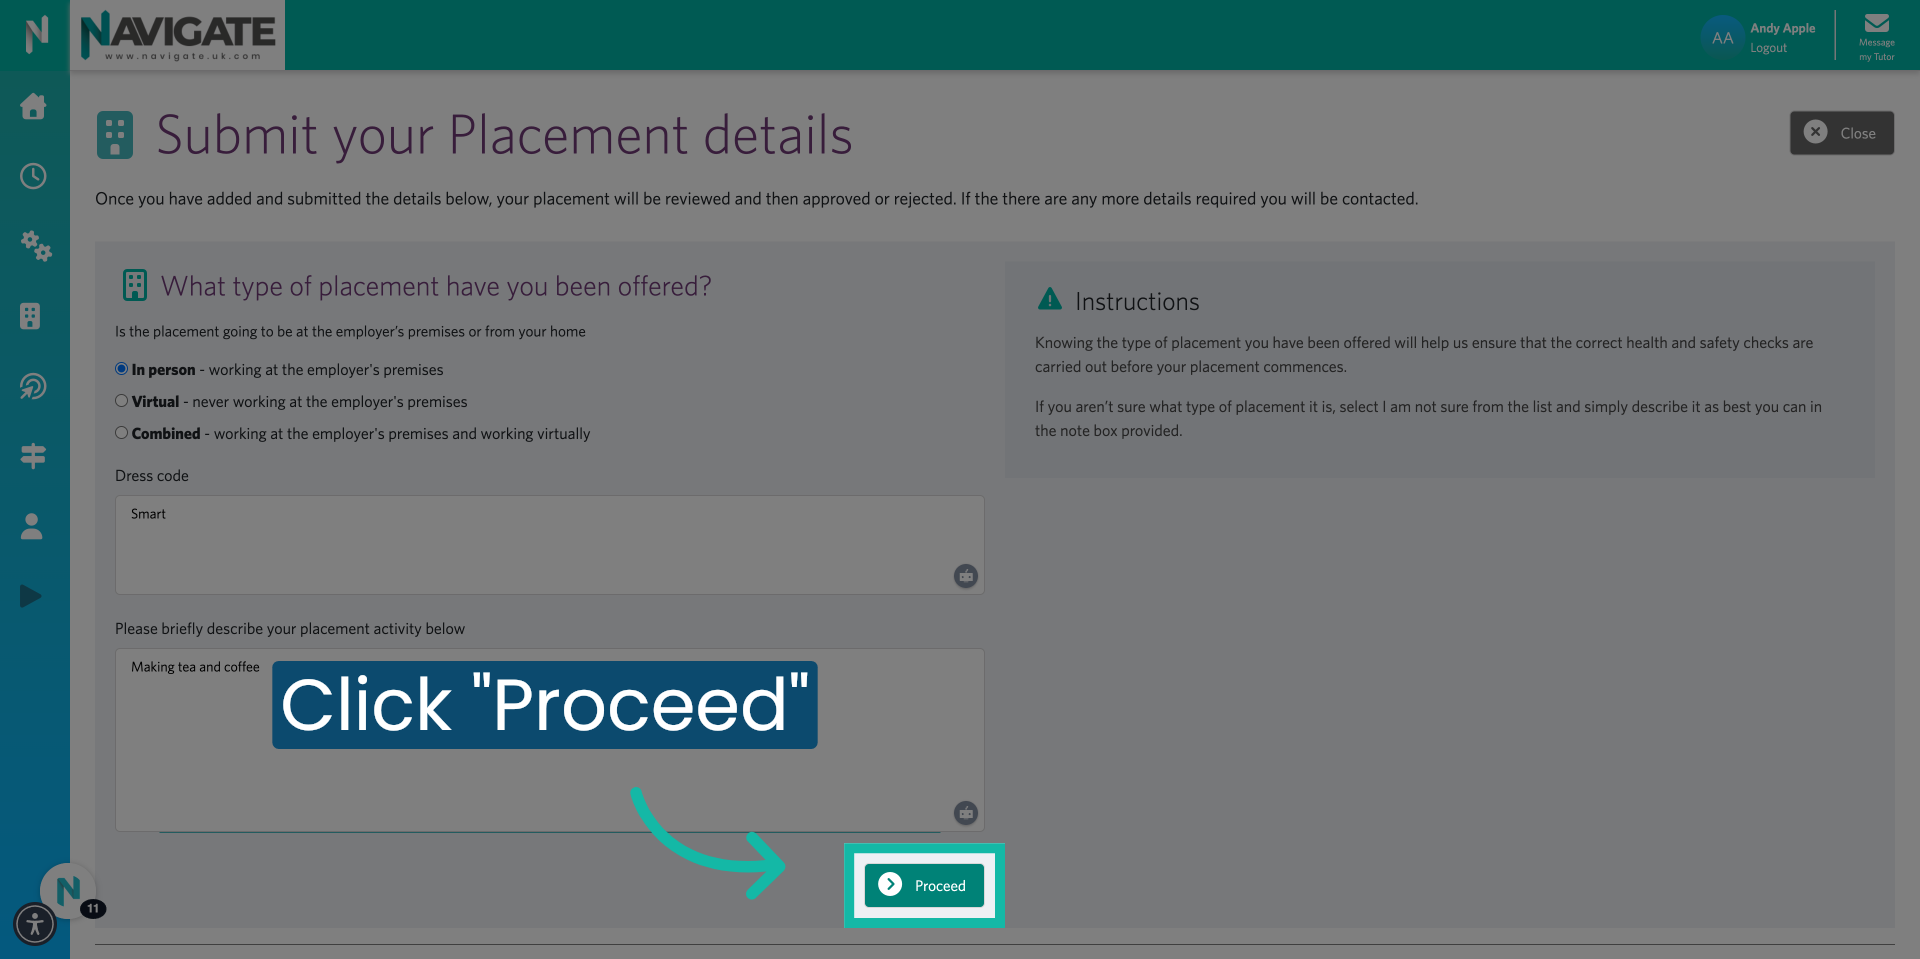
7. Describe your placement activity.
Describe what you will be doing during the placement. You can also use this box to let your work placement coordinator know any additional information that you think will be useful to them.

8. Click "Proceed."
Once completed, click proceed.
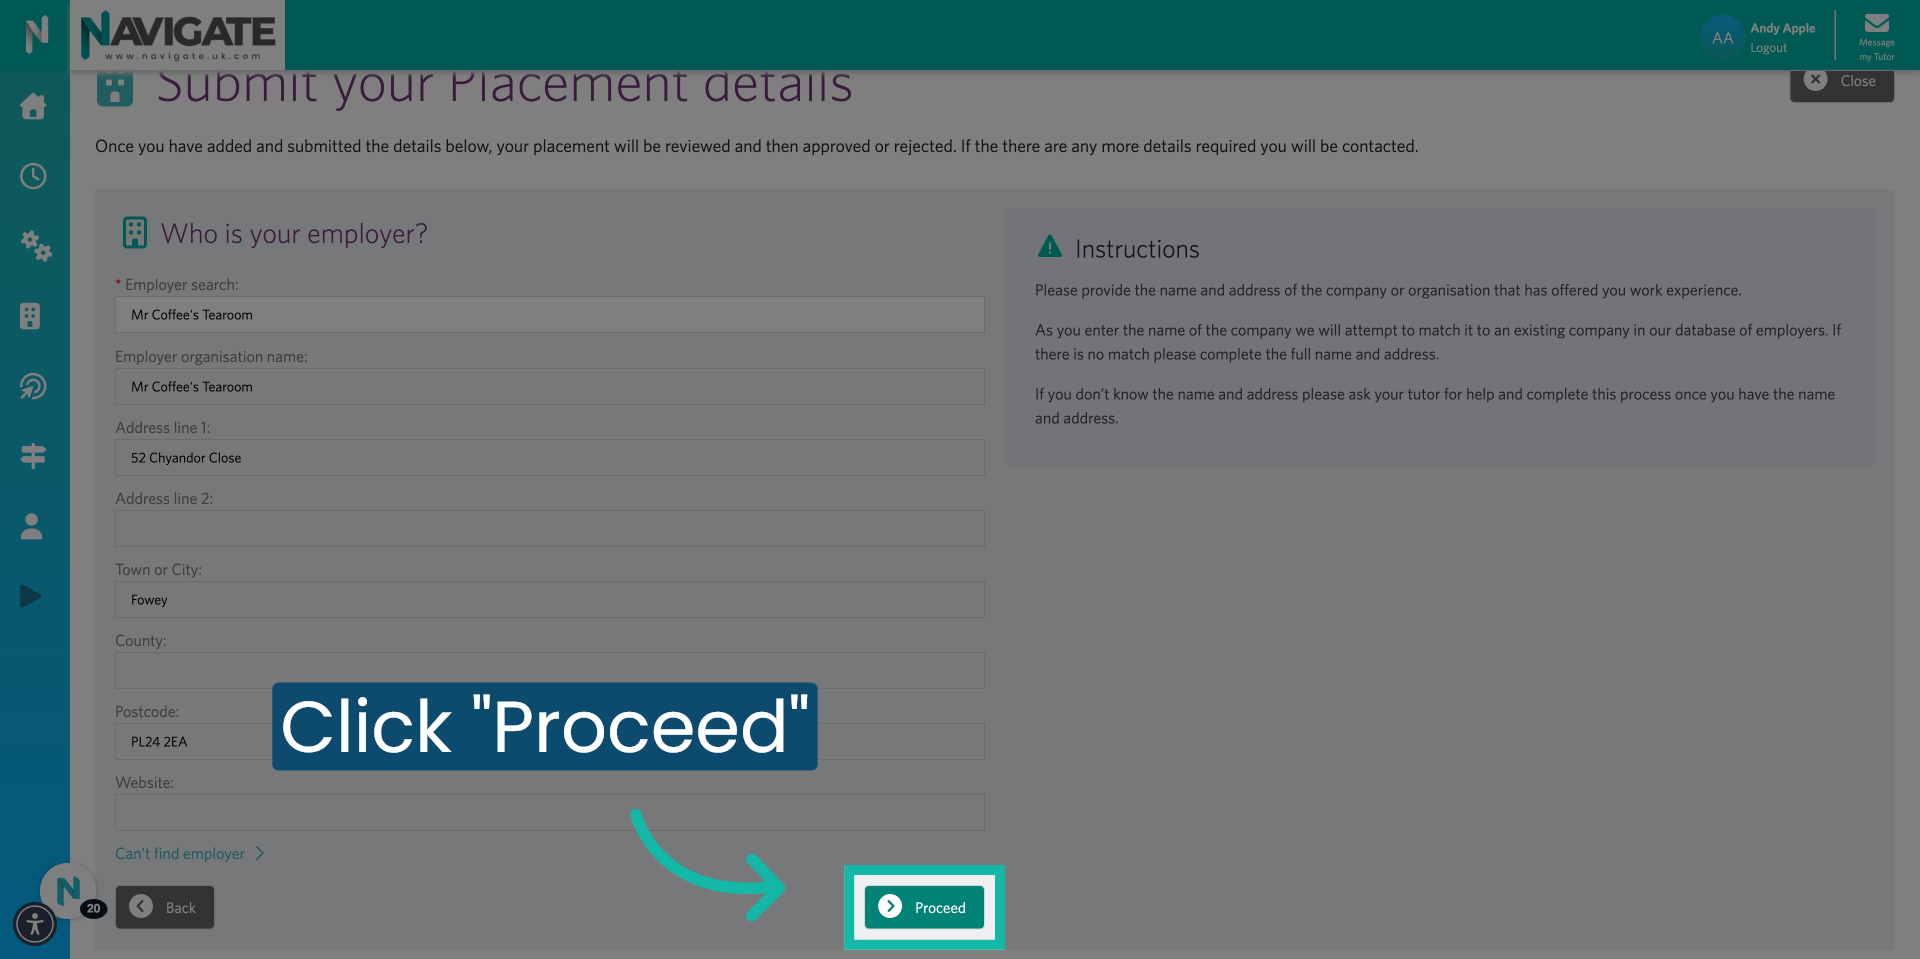
9. Fill out the employer details.
Fill out the employer details.

10. Search for the employer.
Type in the first few letters of the employer organisation in the search box.

11. Select from the dropdown.
Select the employer from the dropdown.

12. Click "Can't find employer"
If the employer does not appear as an option for you to select. Click on can't find employer.

13. Fill in employer details.
This will open a new page where you can fill out the employer details yourself.

14. Click "Proceed."
Once completed, click proceed.
15. Add employer contact
Begin typing the name of the employer contact.

16. Select Employer Contact from the drop-down.
Select your employer placement manager from the drop-down list.

17. Click "My contact is not listed."
If the employer contact does not appear as an option for you to select. Click on my contact is not listed.

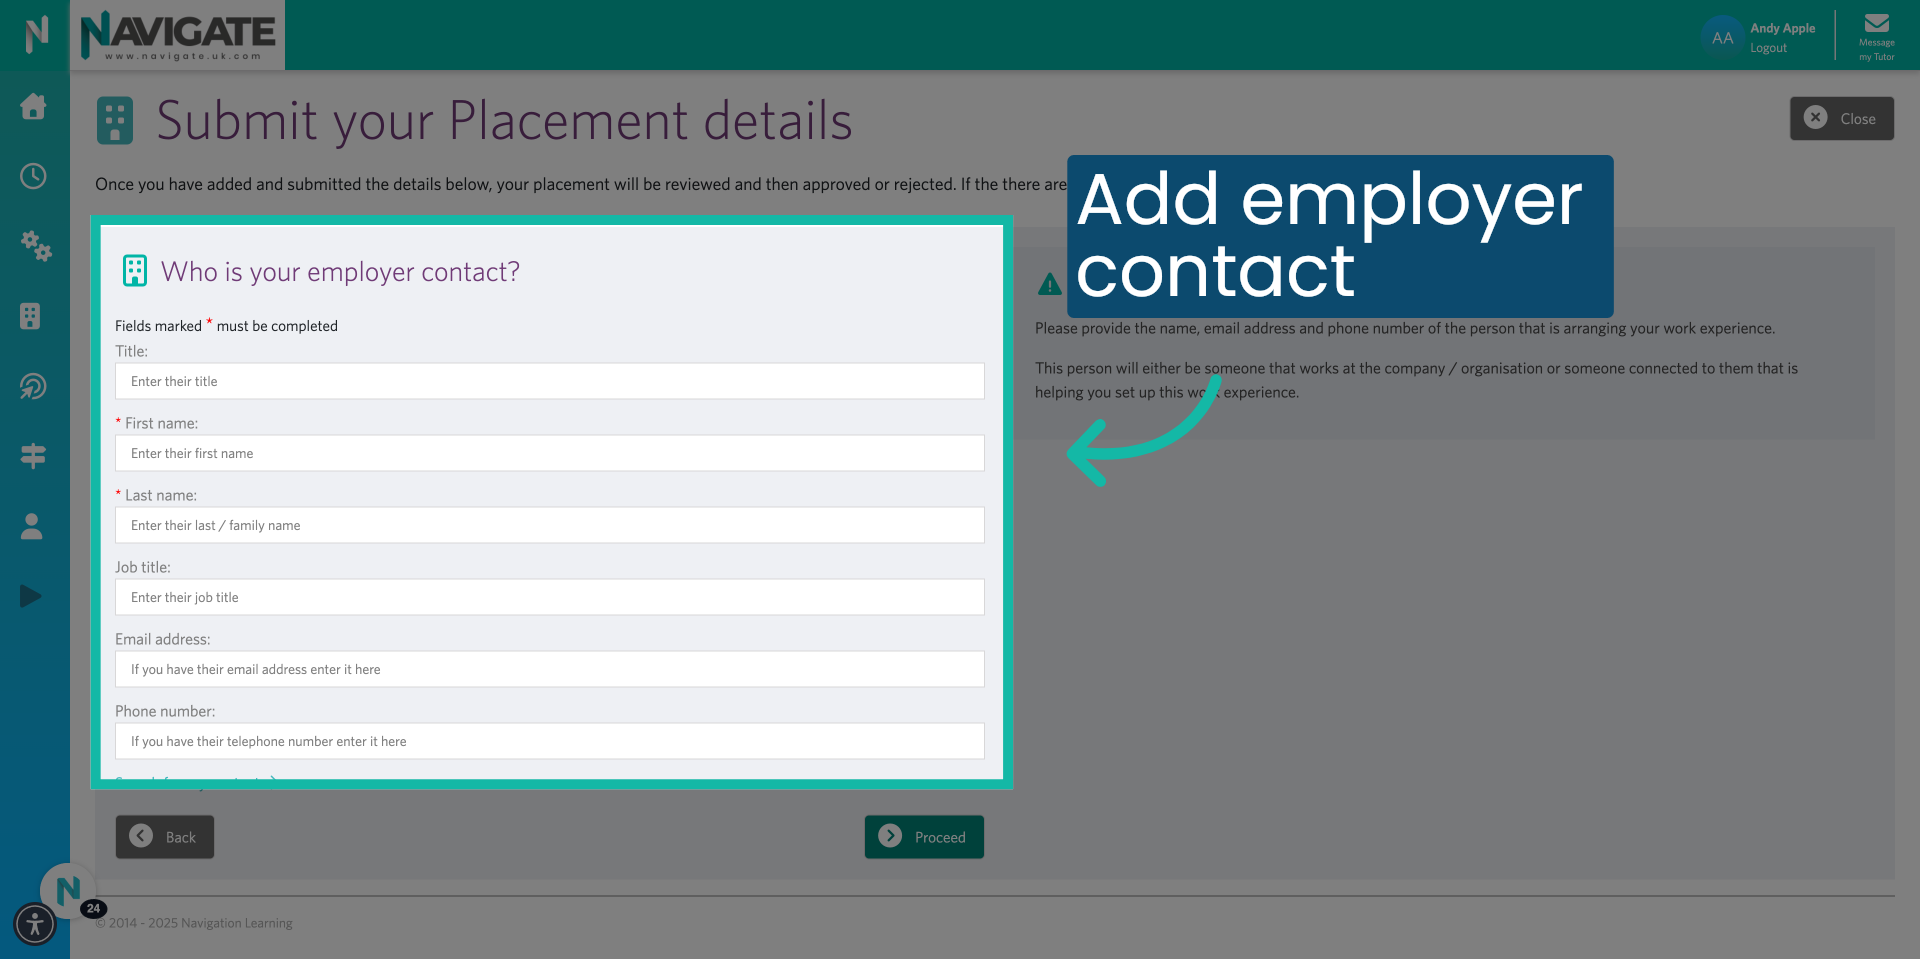
18. Add employer contact.
This will open a new page where you can add the employer details yourself.
19. Click "Proceed."
Once completed, click proceed.

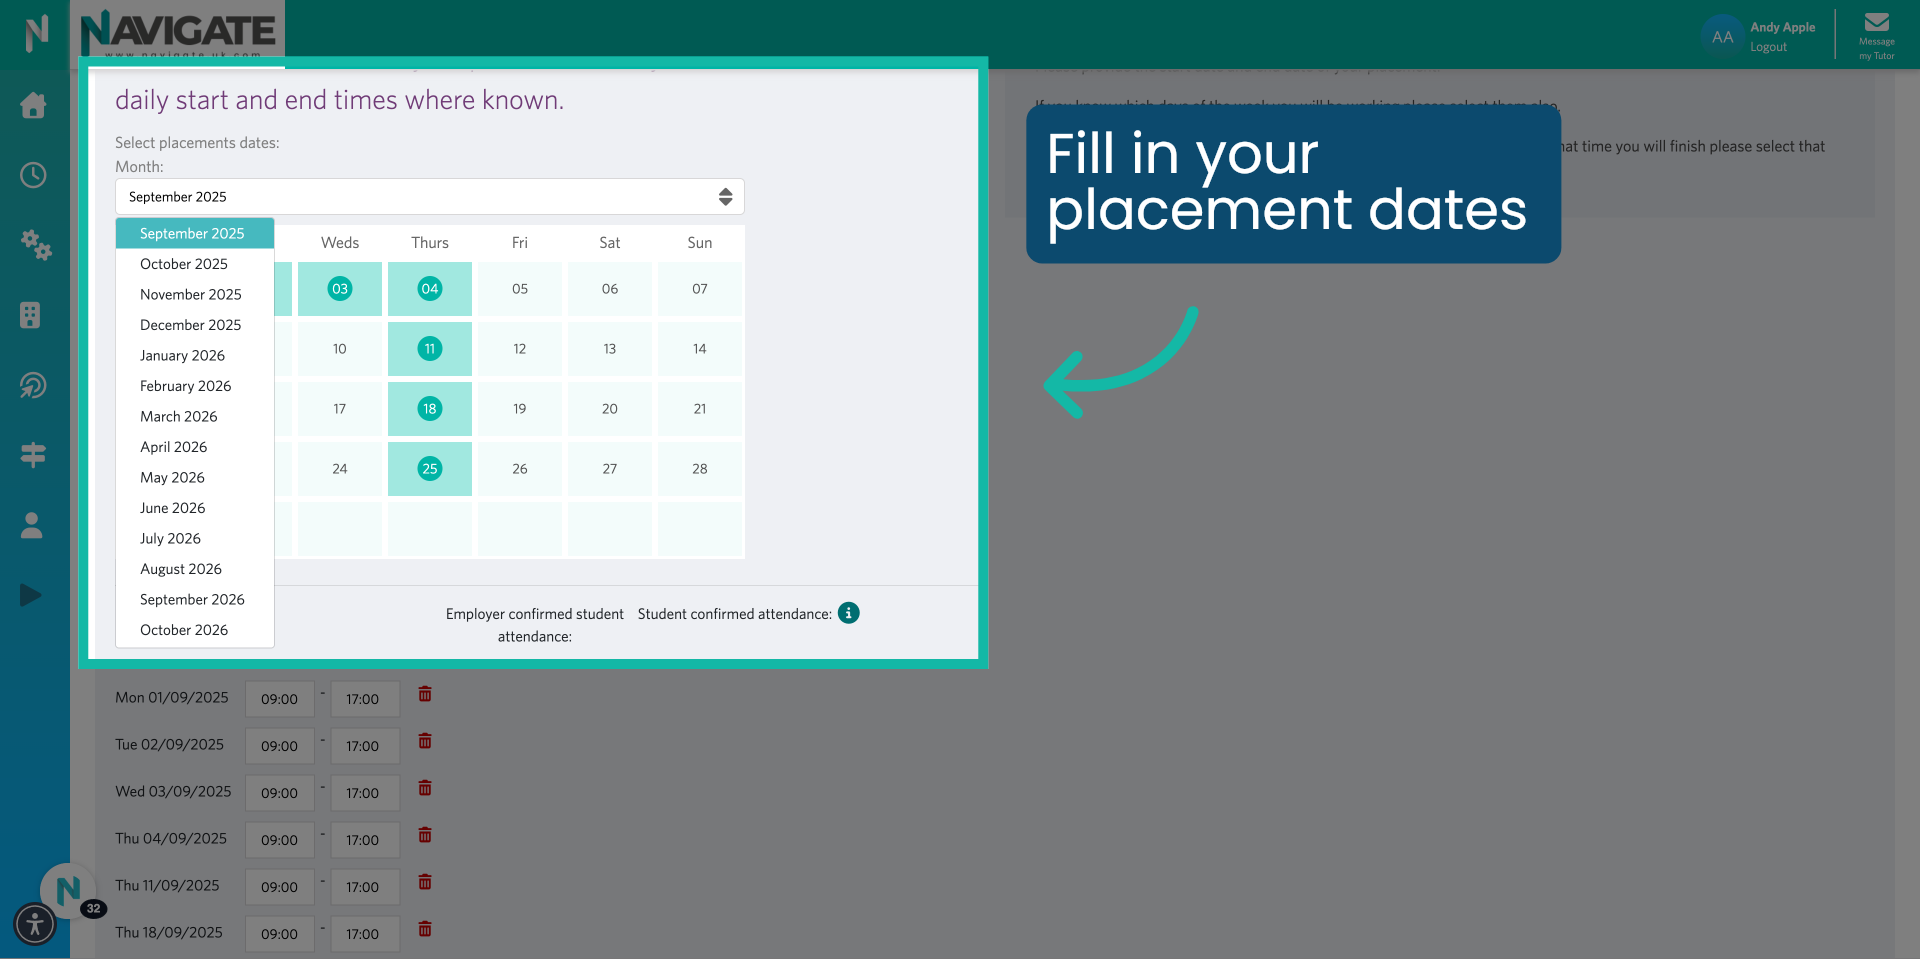
20. Fill in your placement date and times.
Fill in your placement dates by selecting the month. And clicking on the days, you will be attending.
21. Edit Placement Times.
Edit the Times if necessary.

22. Click "Proceed"
Click proceed when done.

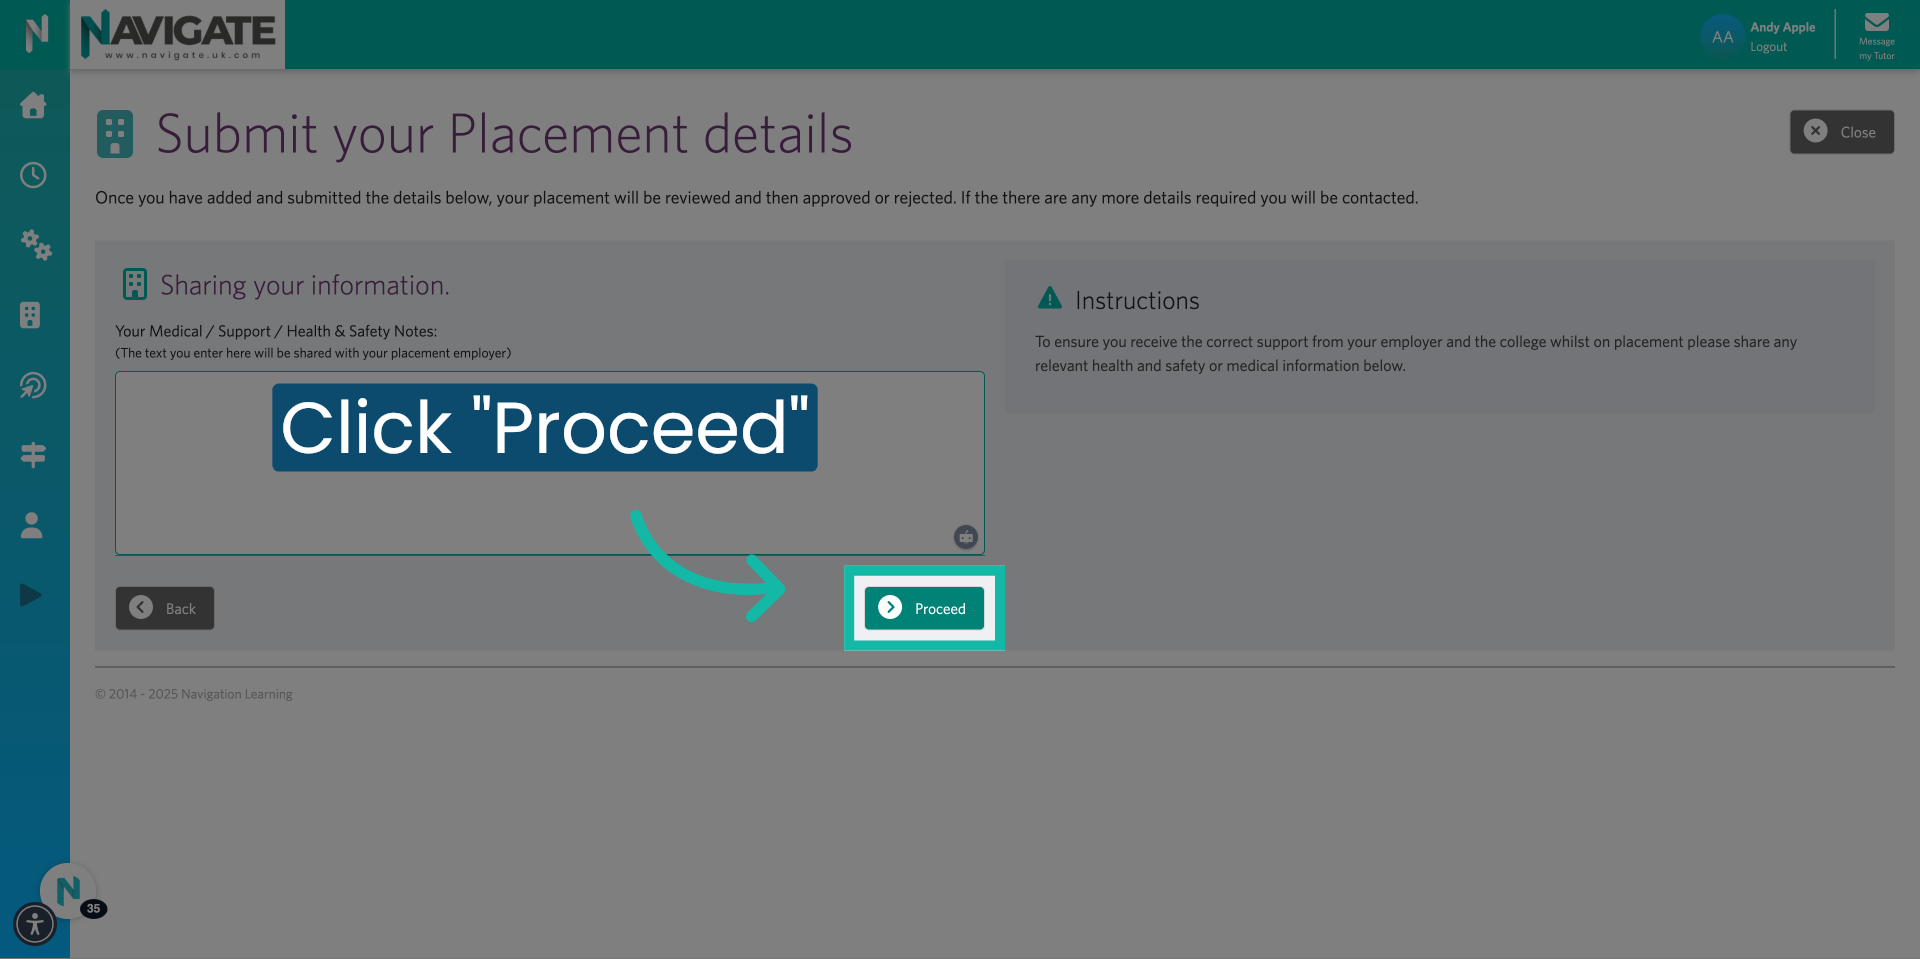
23. Add any medical/support/health & safety notes.
You can add any medical. Support Or health and safety notes Please note. Any information added here will be viewable by the employer.

24. Click "Back" to make any changes.
Click back to return to the previous page if you need to make changes.

25. Send Placement Details.
If you are happy to submit this placement click proceed.
26. Placement submitted for review.
Your placement coordinator will be notified. That you have submitted a placement. And will be in touch with you once it has been reviewed.

Was this article helpful?
That’s Great!
Thank you for your feedback
Sorry! We couldn't be helpful
Thank you for your feedback
Feedback sent
We appreciate your effort and will try to fix the article