This tutorial explains how to add an activity to your timeline.
Go to login.navigate.uk.com
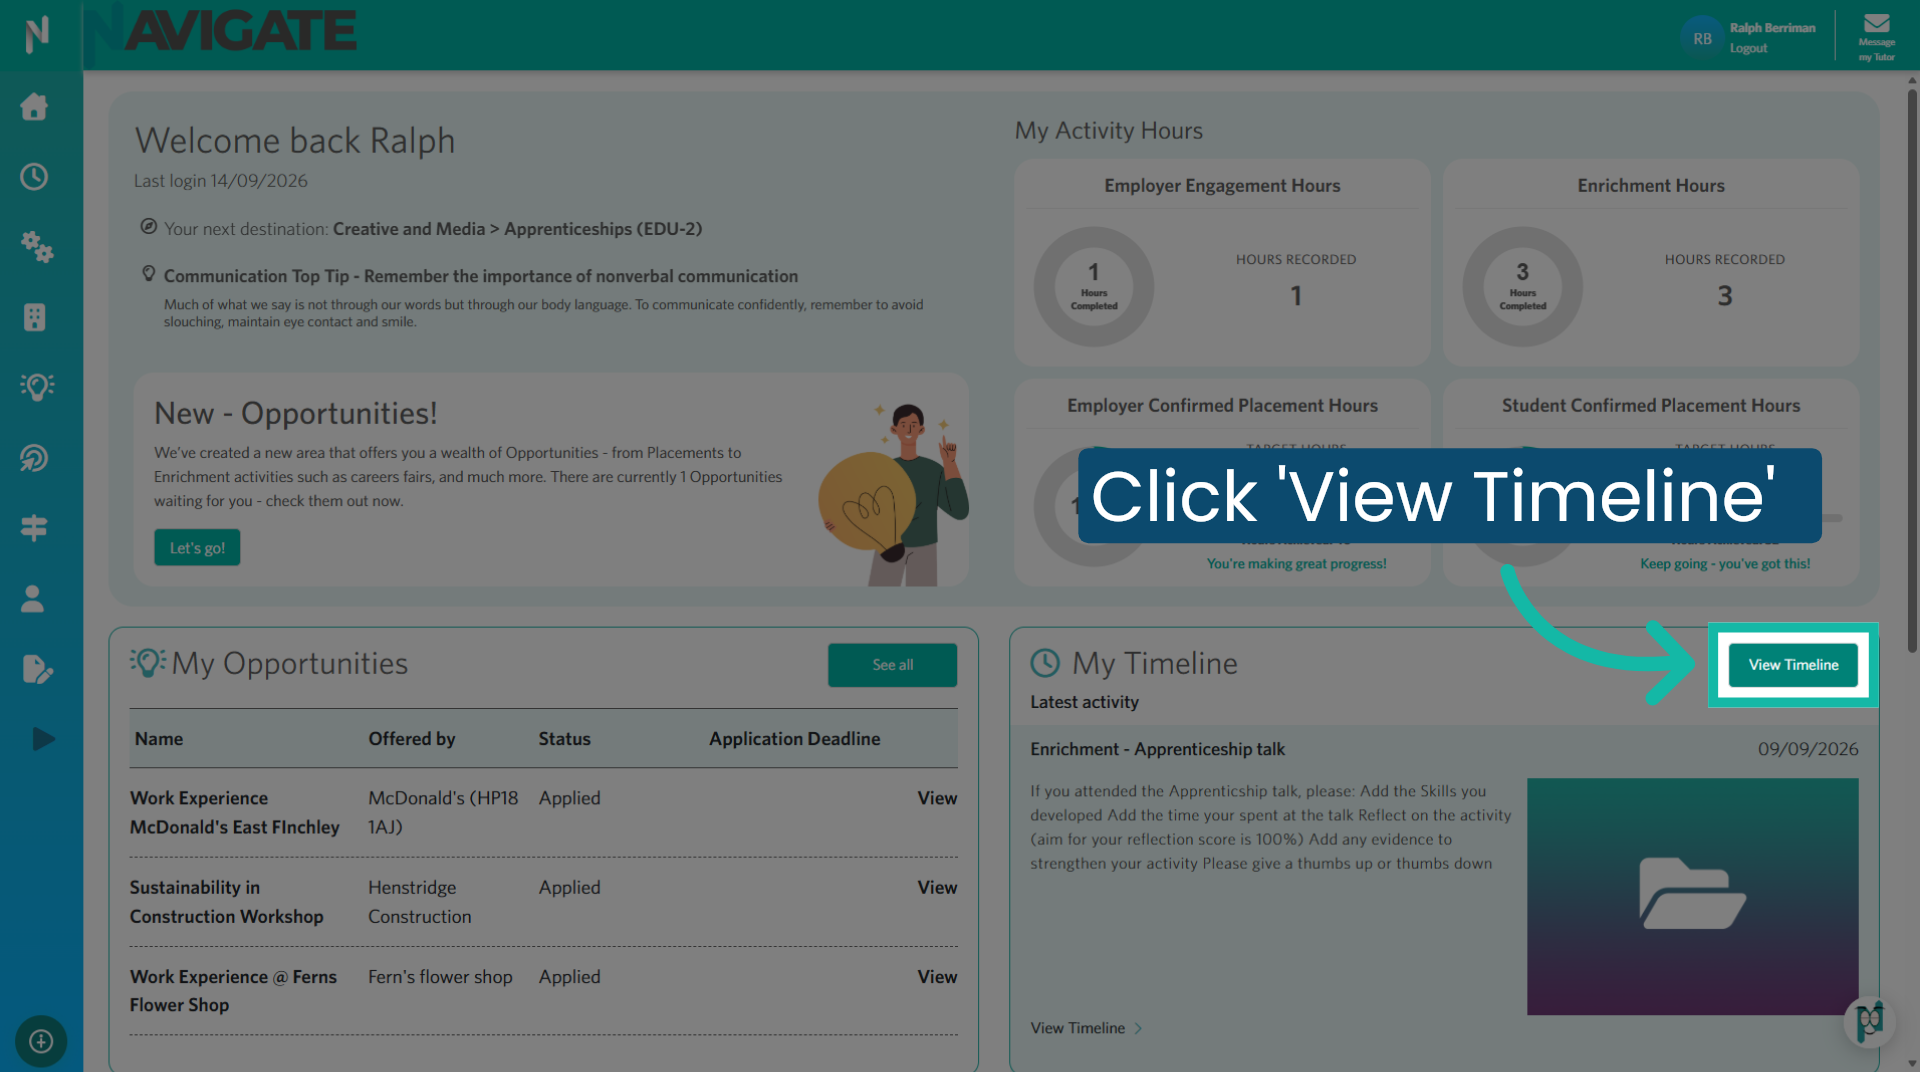
1. Click "View Timeline"
Once you've logged in, scroll down to the My Timeline panel and click 'View Timeline'.
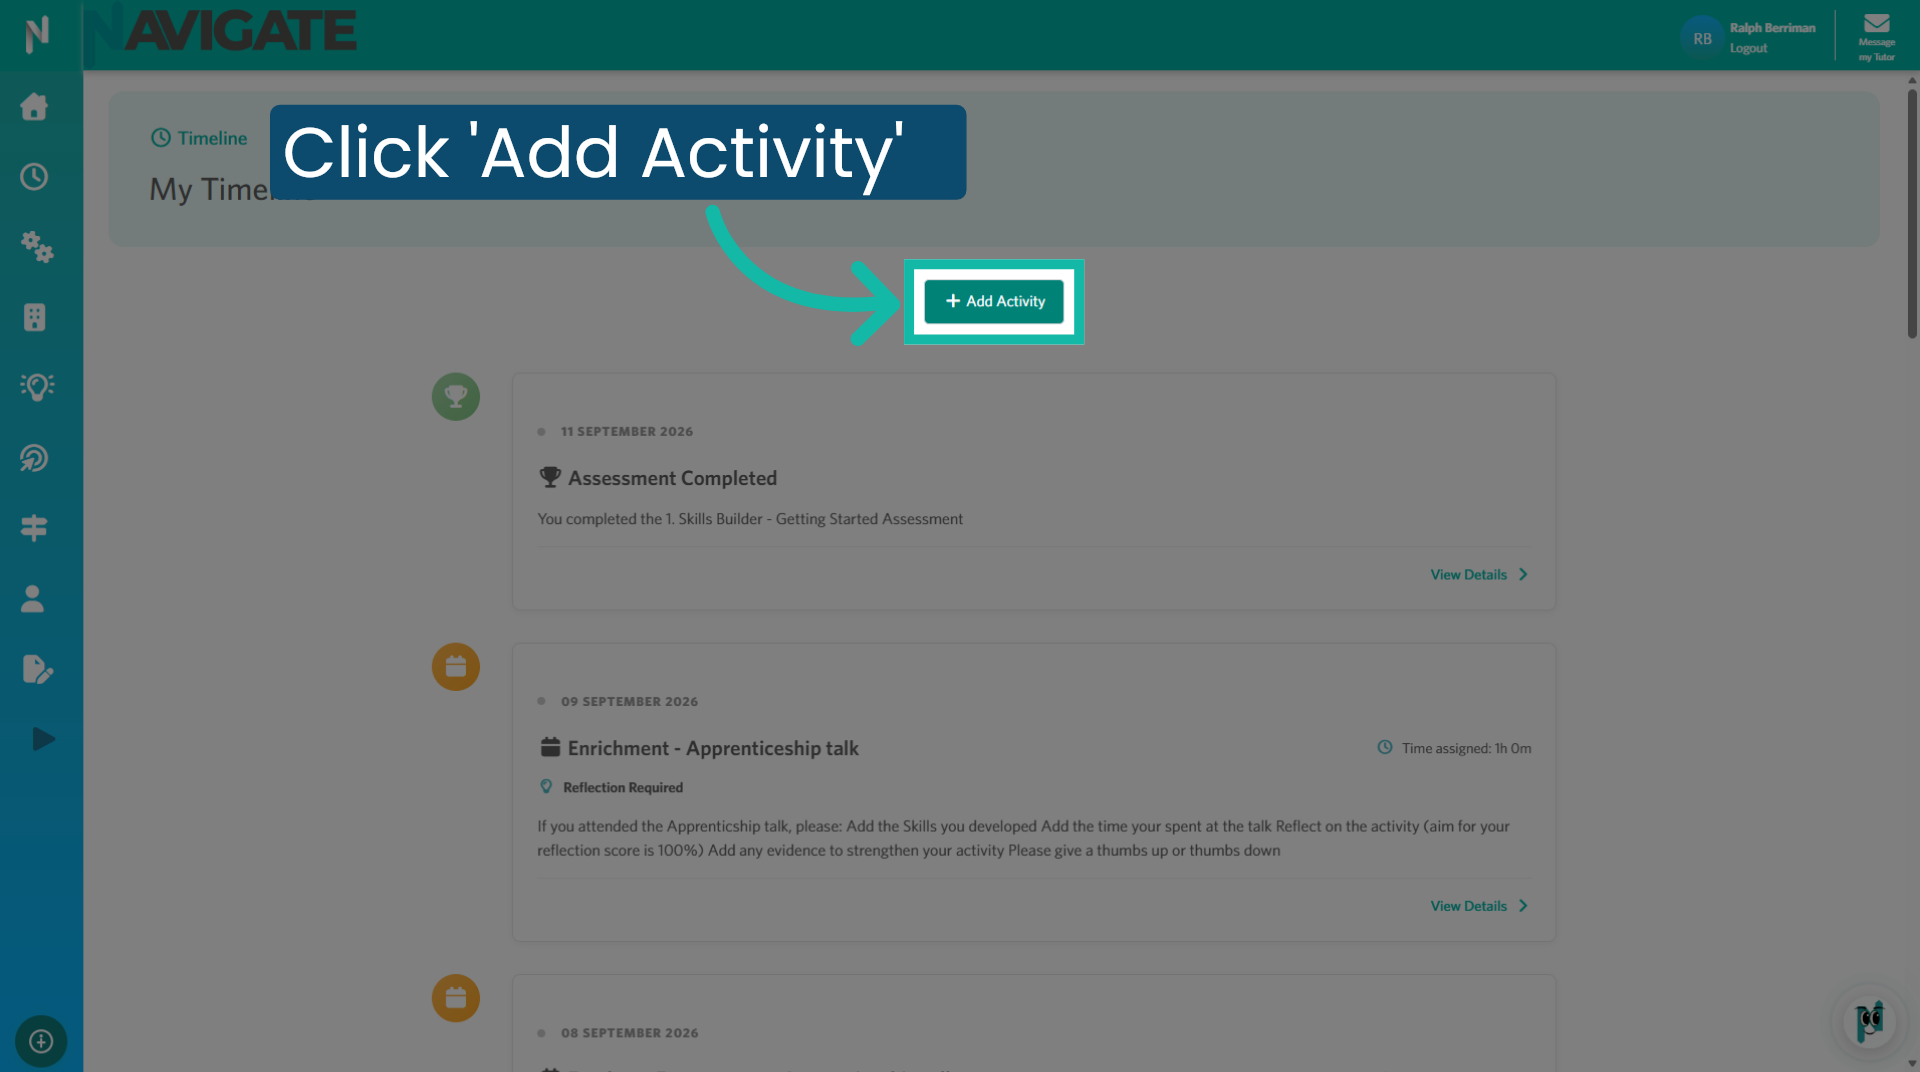
2. Click "Add Activity"
Click on 'Add Activity'. This is located at the top of your timeline.
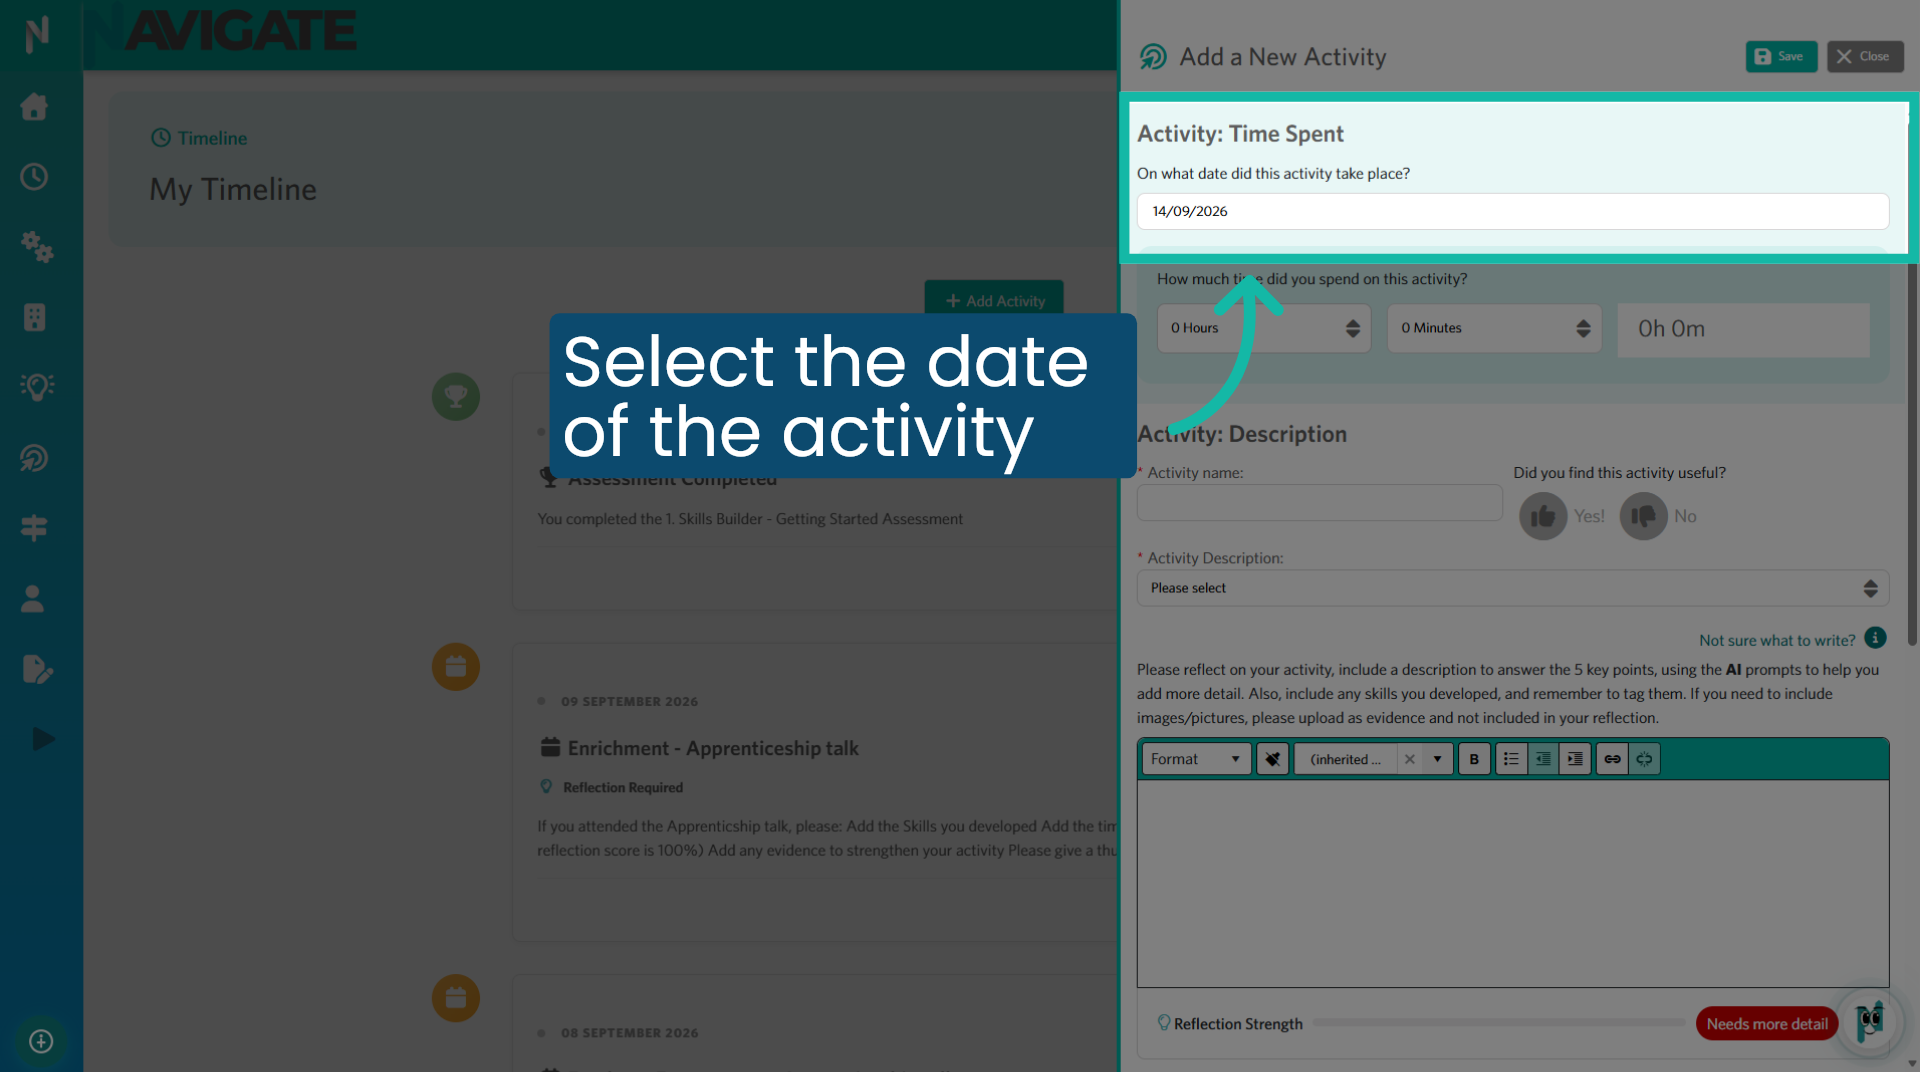
3. Select the date the activity took place
Select the day the activity took place.
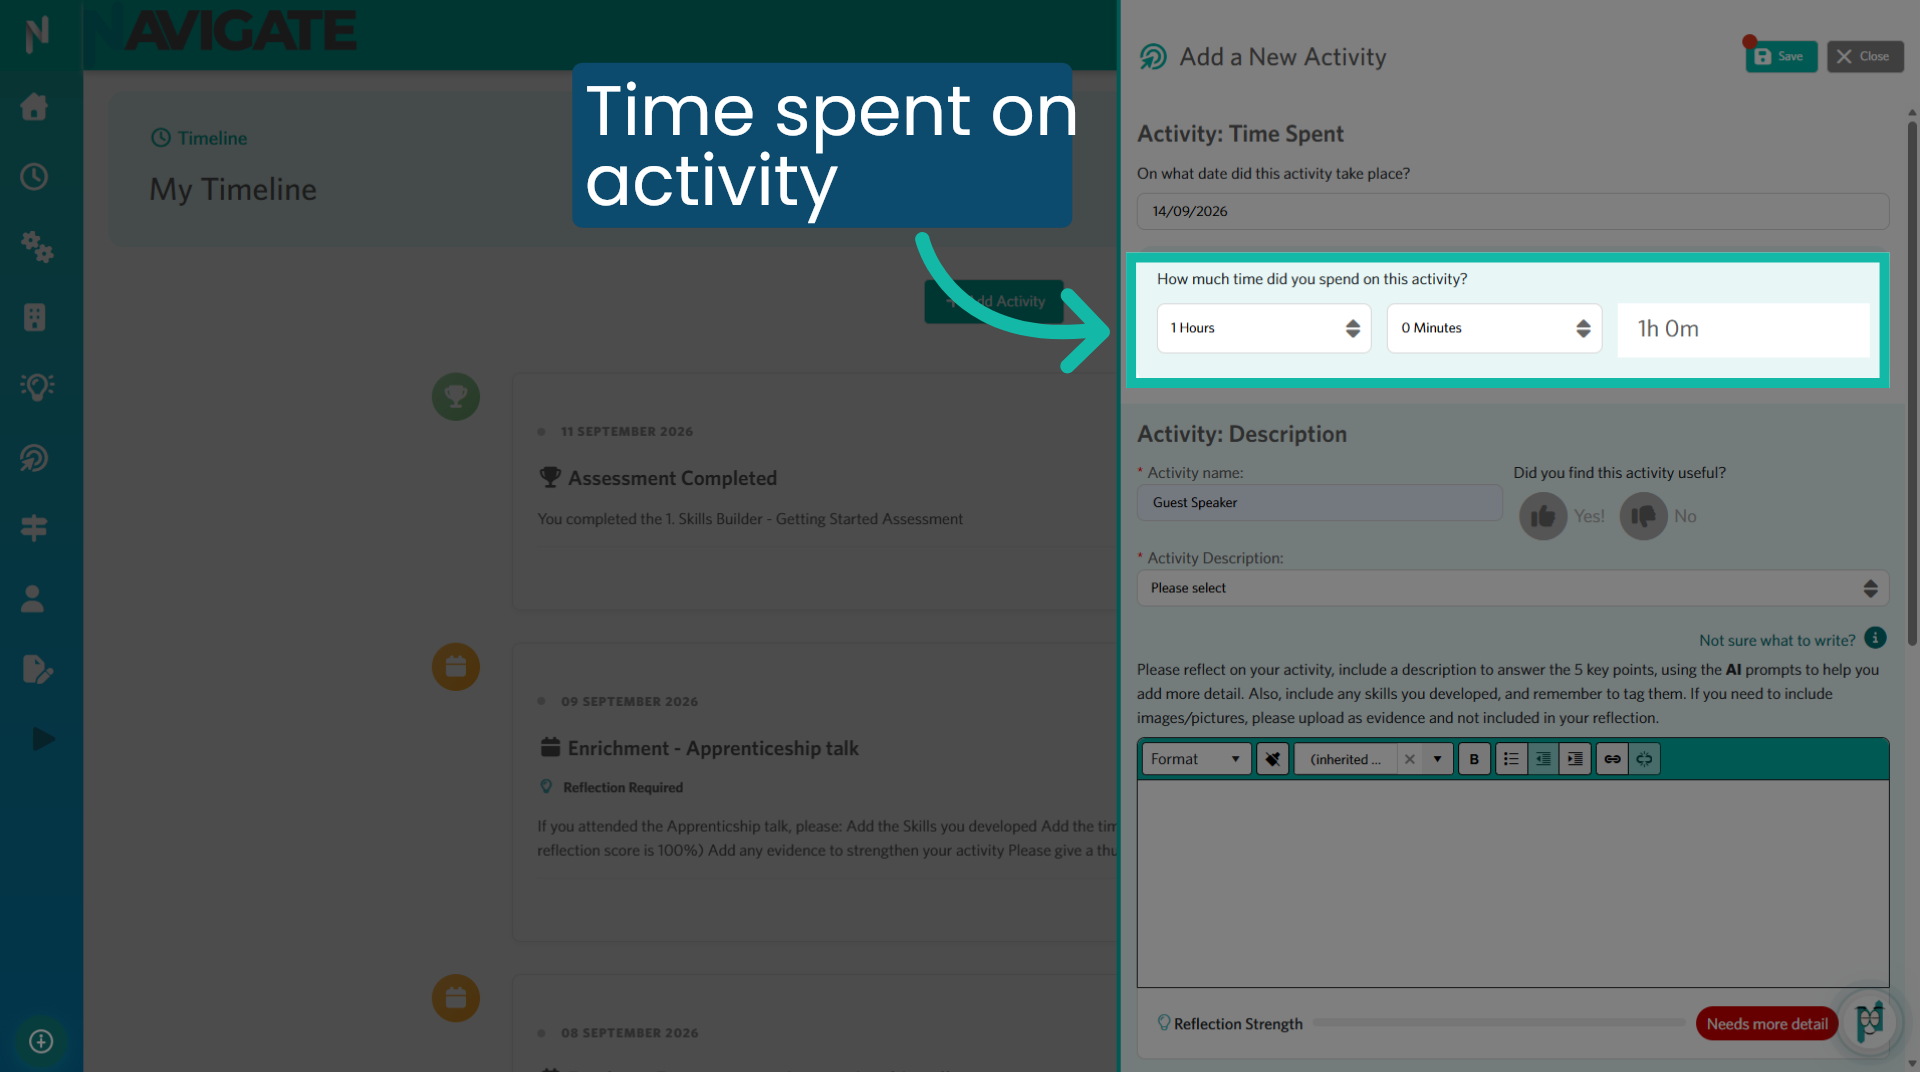
4. Select the amount of time spent on the activity
Add how much time you spent taking part in the activity.
5. Give the activity a name
Fill in the activity name.

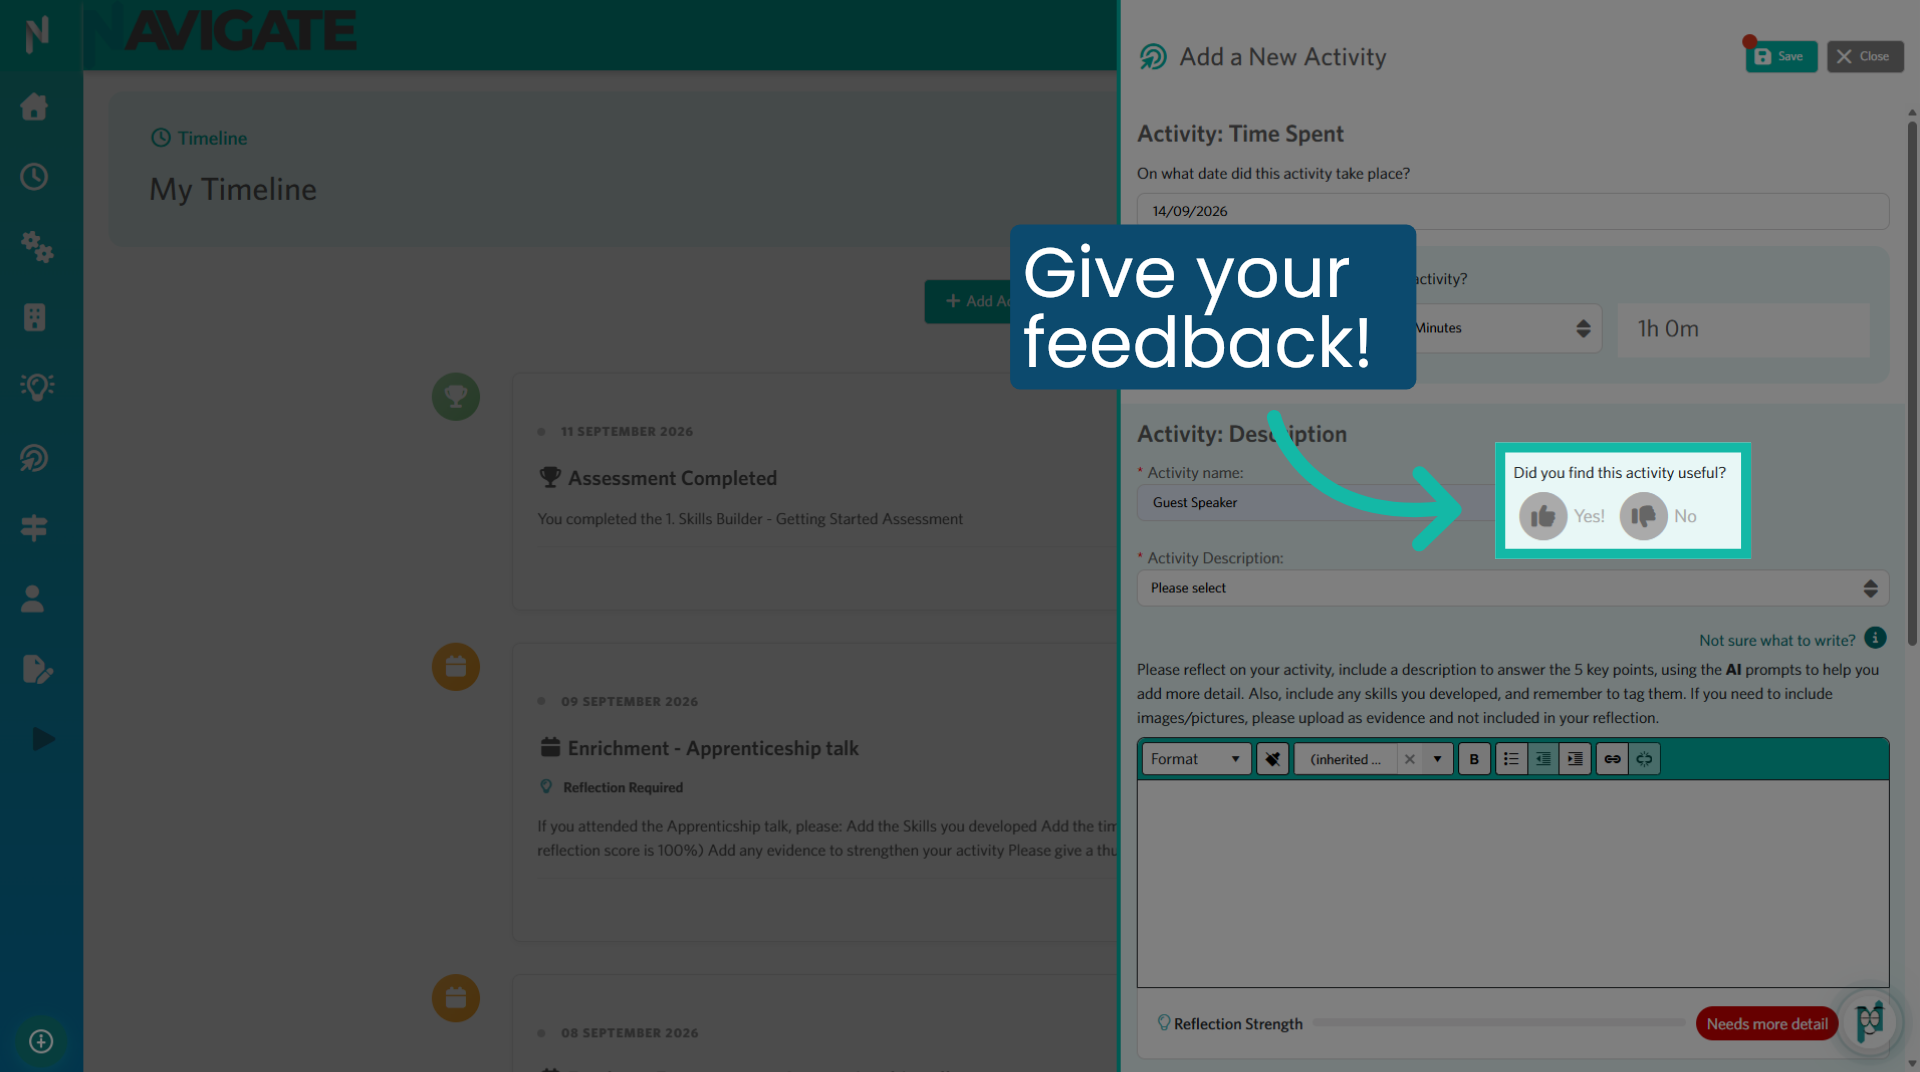
6. Give your feedback
You can use the thumbs up or thumbs down to provide feedback about whether you found the activity useful.
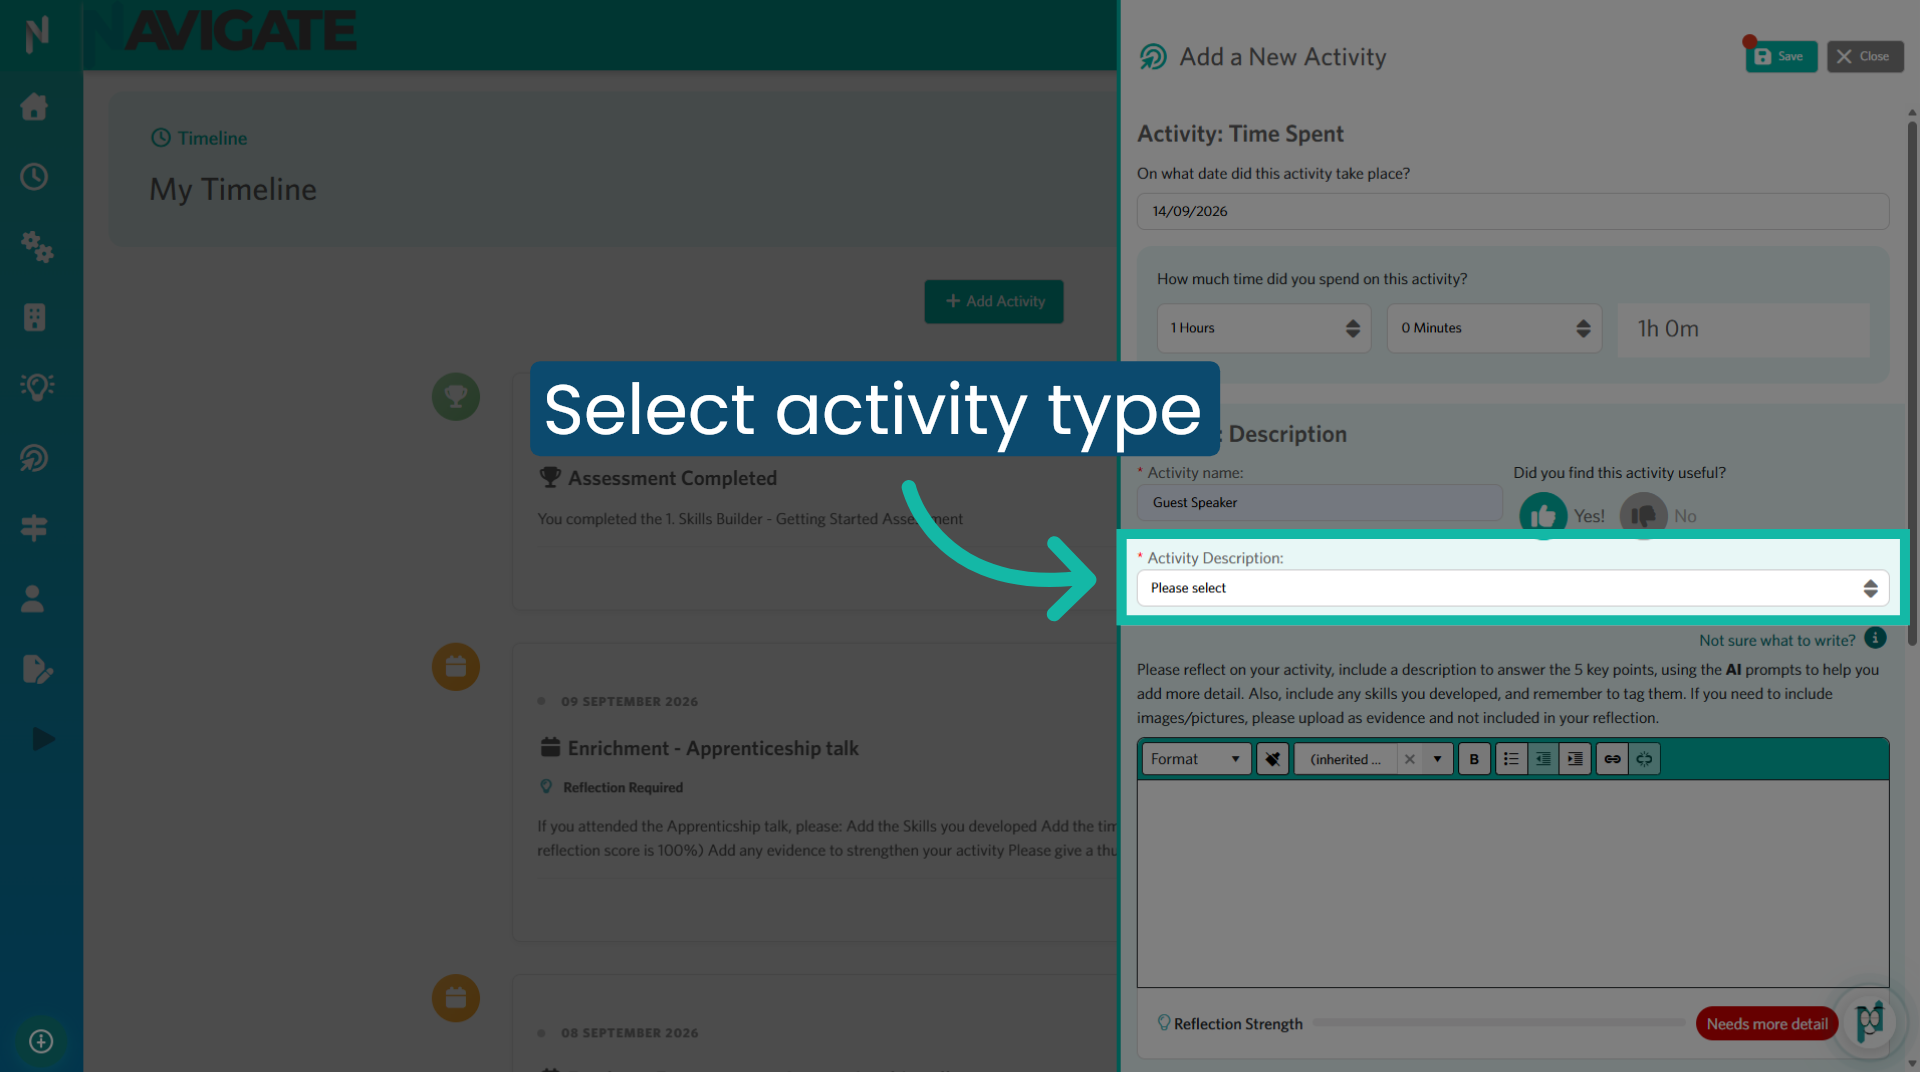
7. Select the activity type
Select the activity type and description.
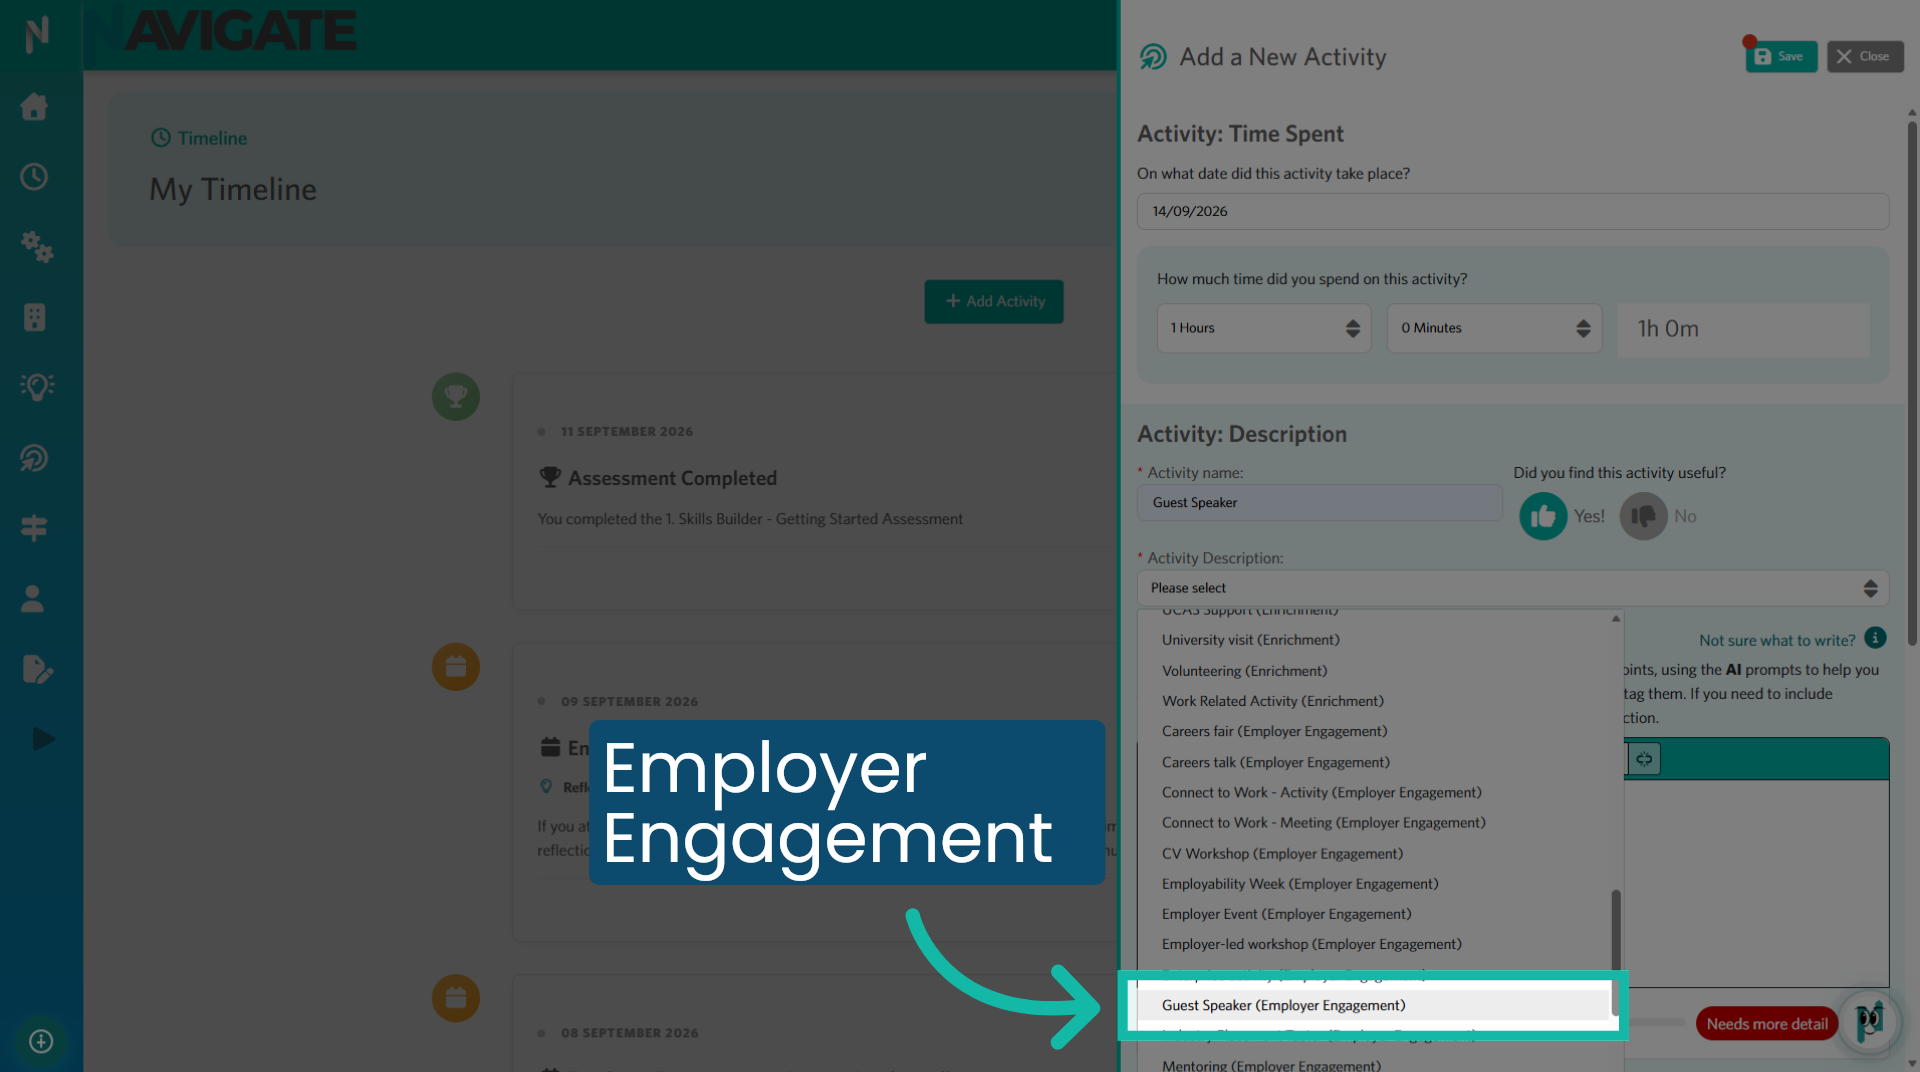
8. Employer Engagement
Choose from a variety of Enrichment or Employer Engagement activities. If you select an 'Employer Engagement' activity, you can then choose the associated employer.
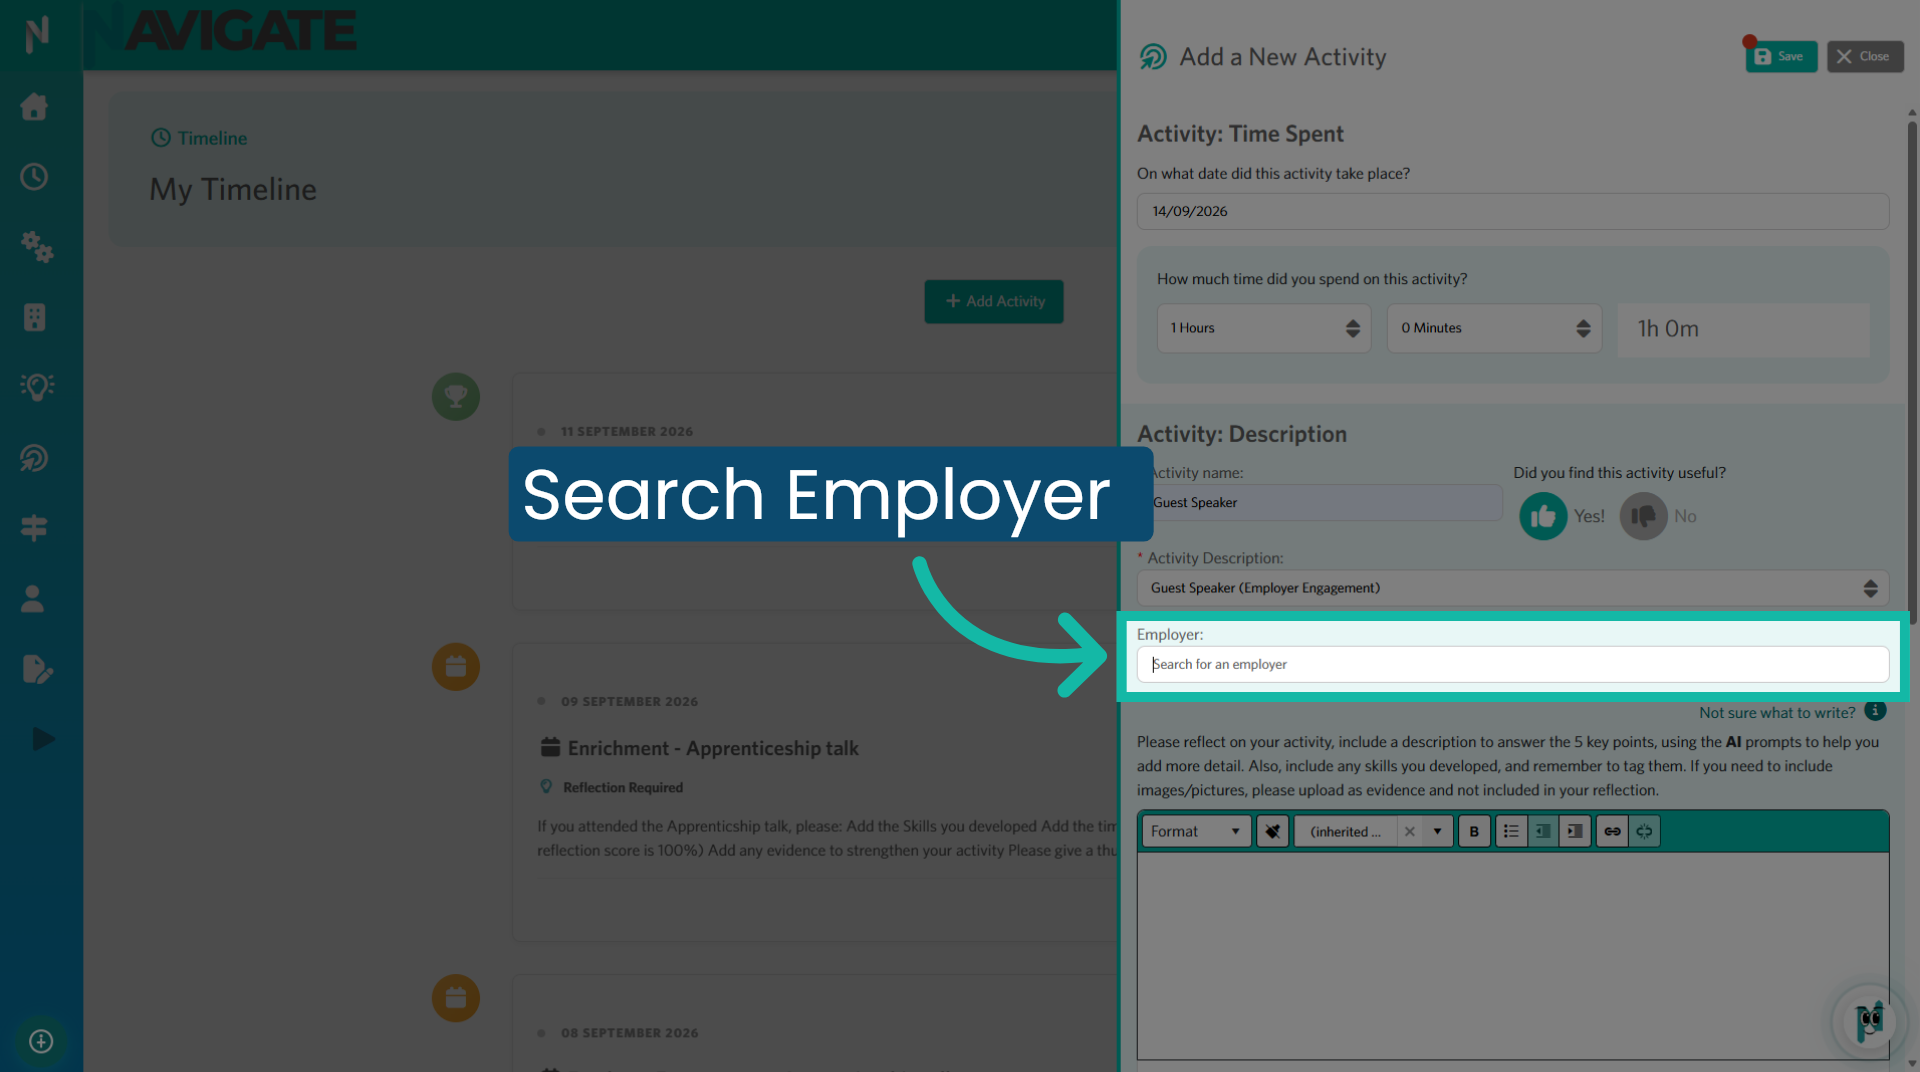
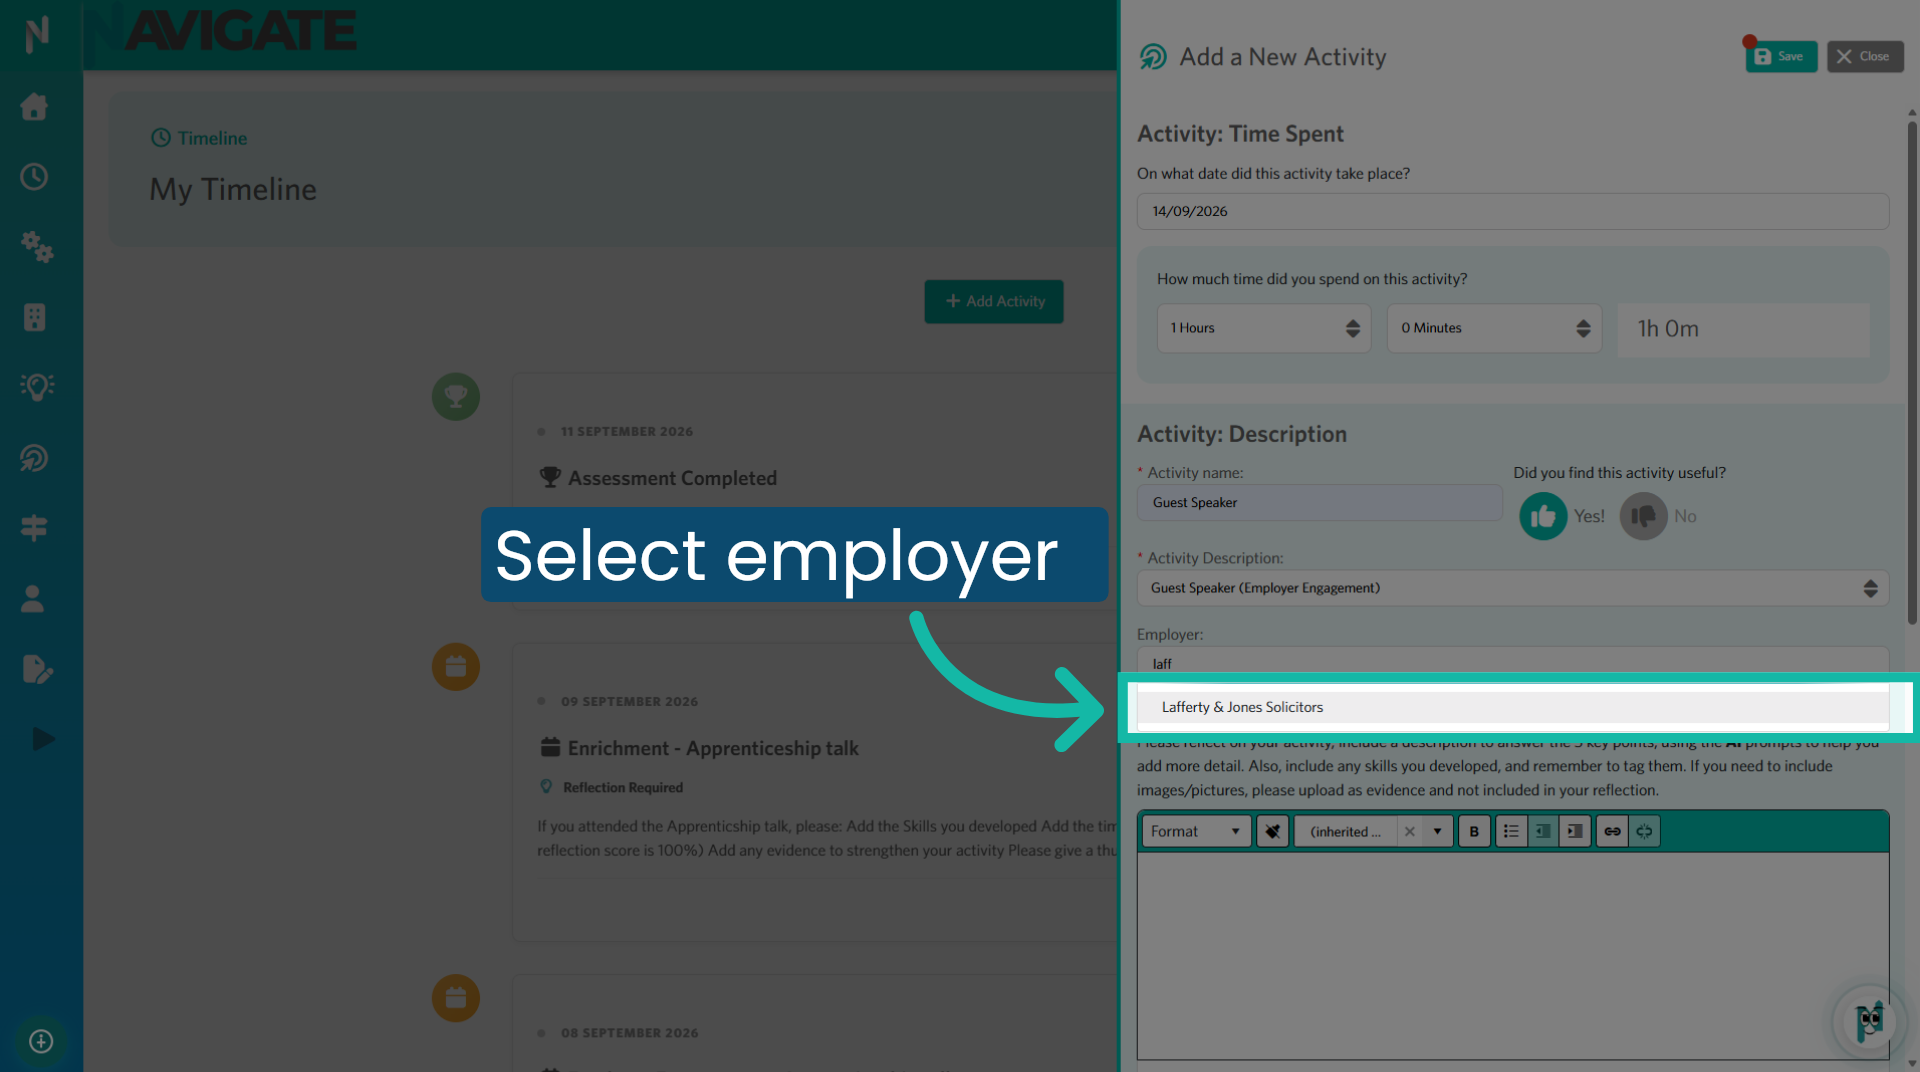
9. Search Employer
Check if your college has worked with this employer before; they might be in the Navigate database. Just start typing their name to search and link them to your activity.
10. Choose Employer From List
Select the right employer from the search results to link with the activity. If you don’t see them, just skip this part.
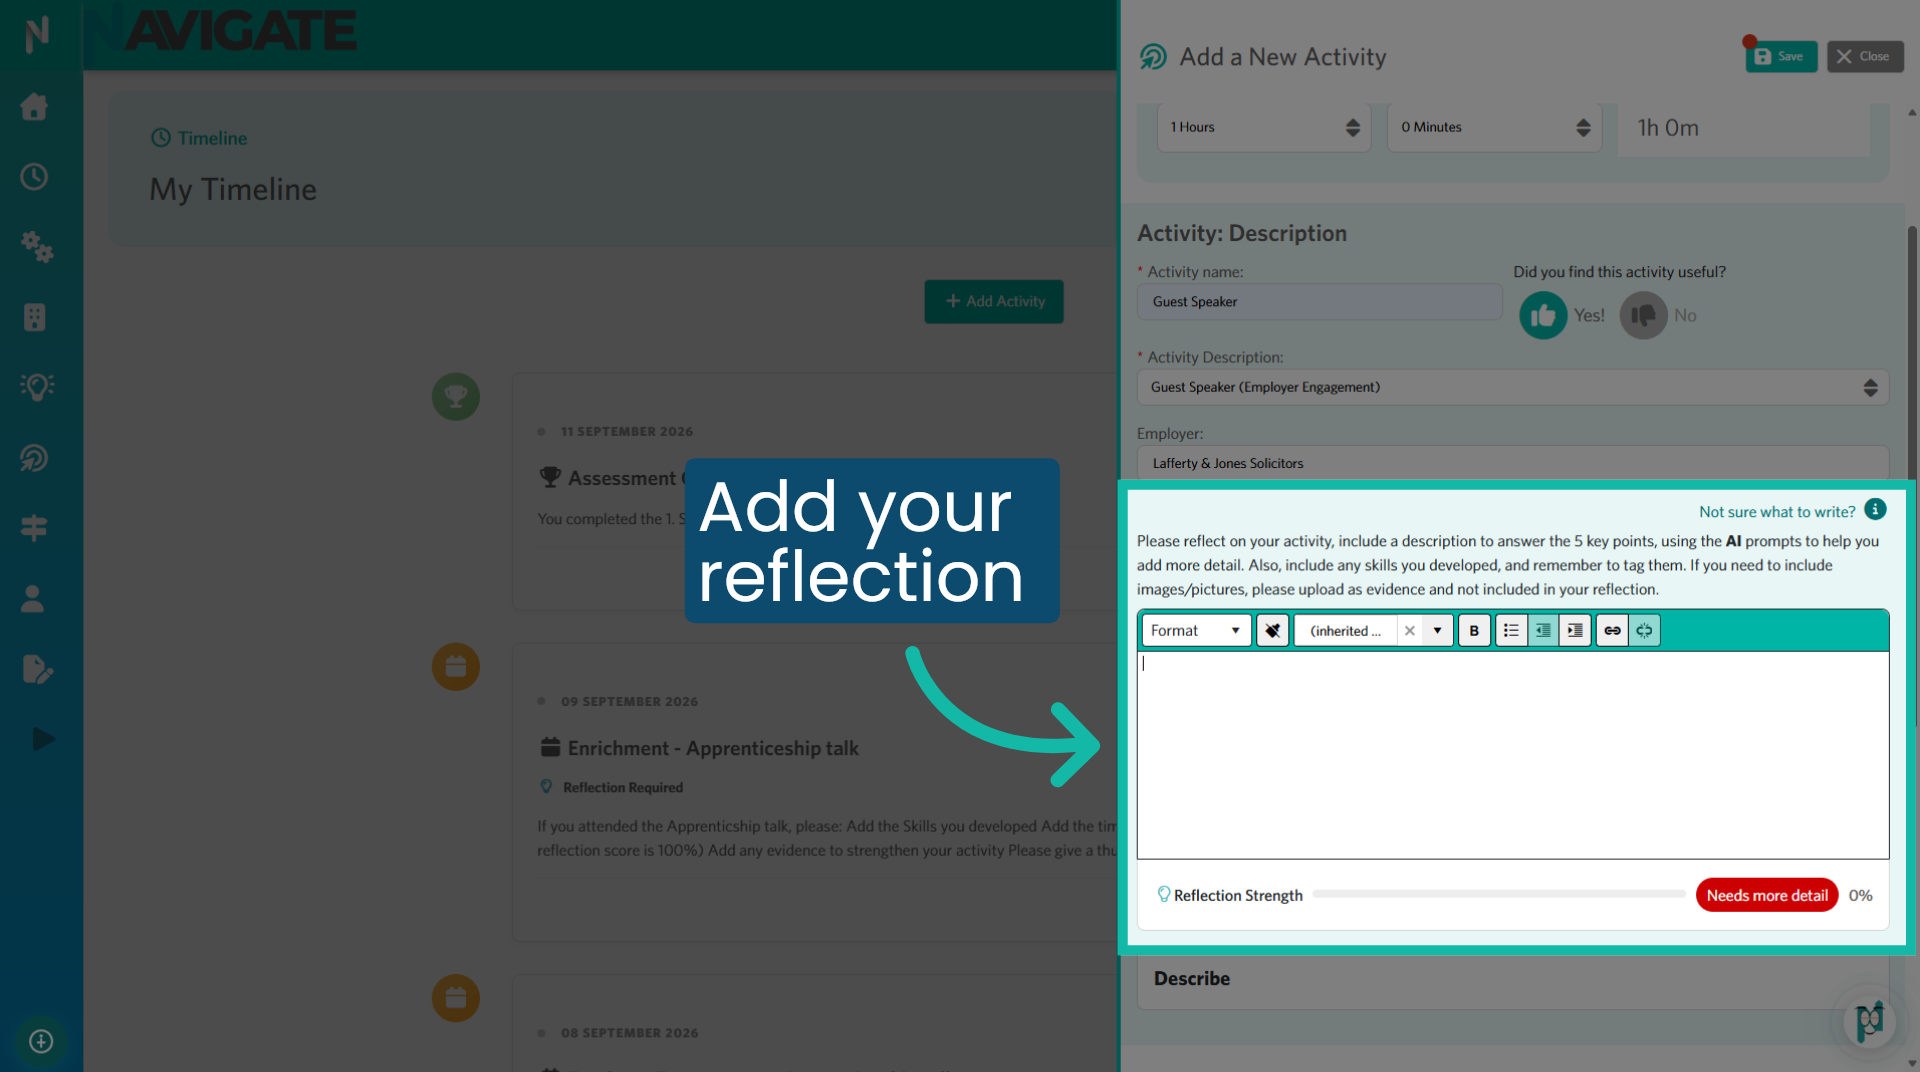
11. Add your reflection
Now add your reflections for this activity.
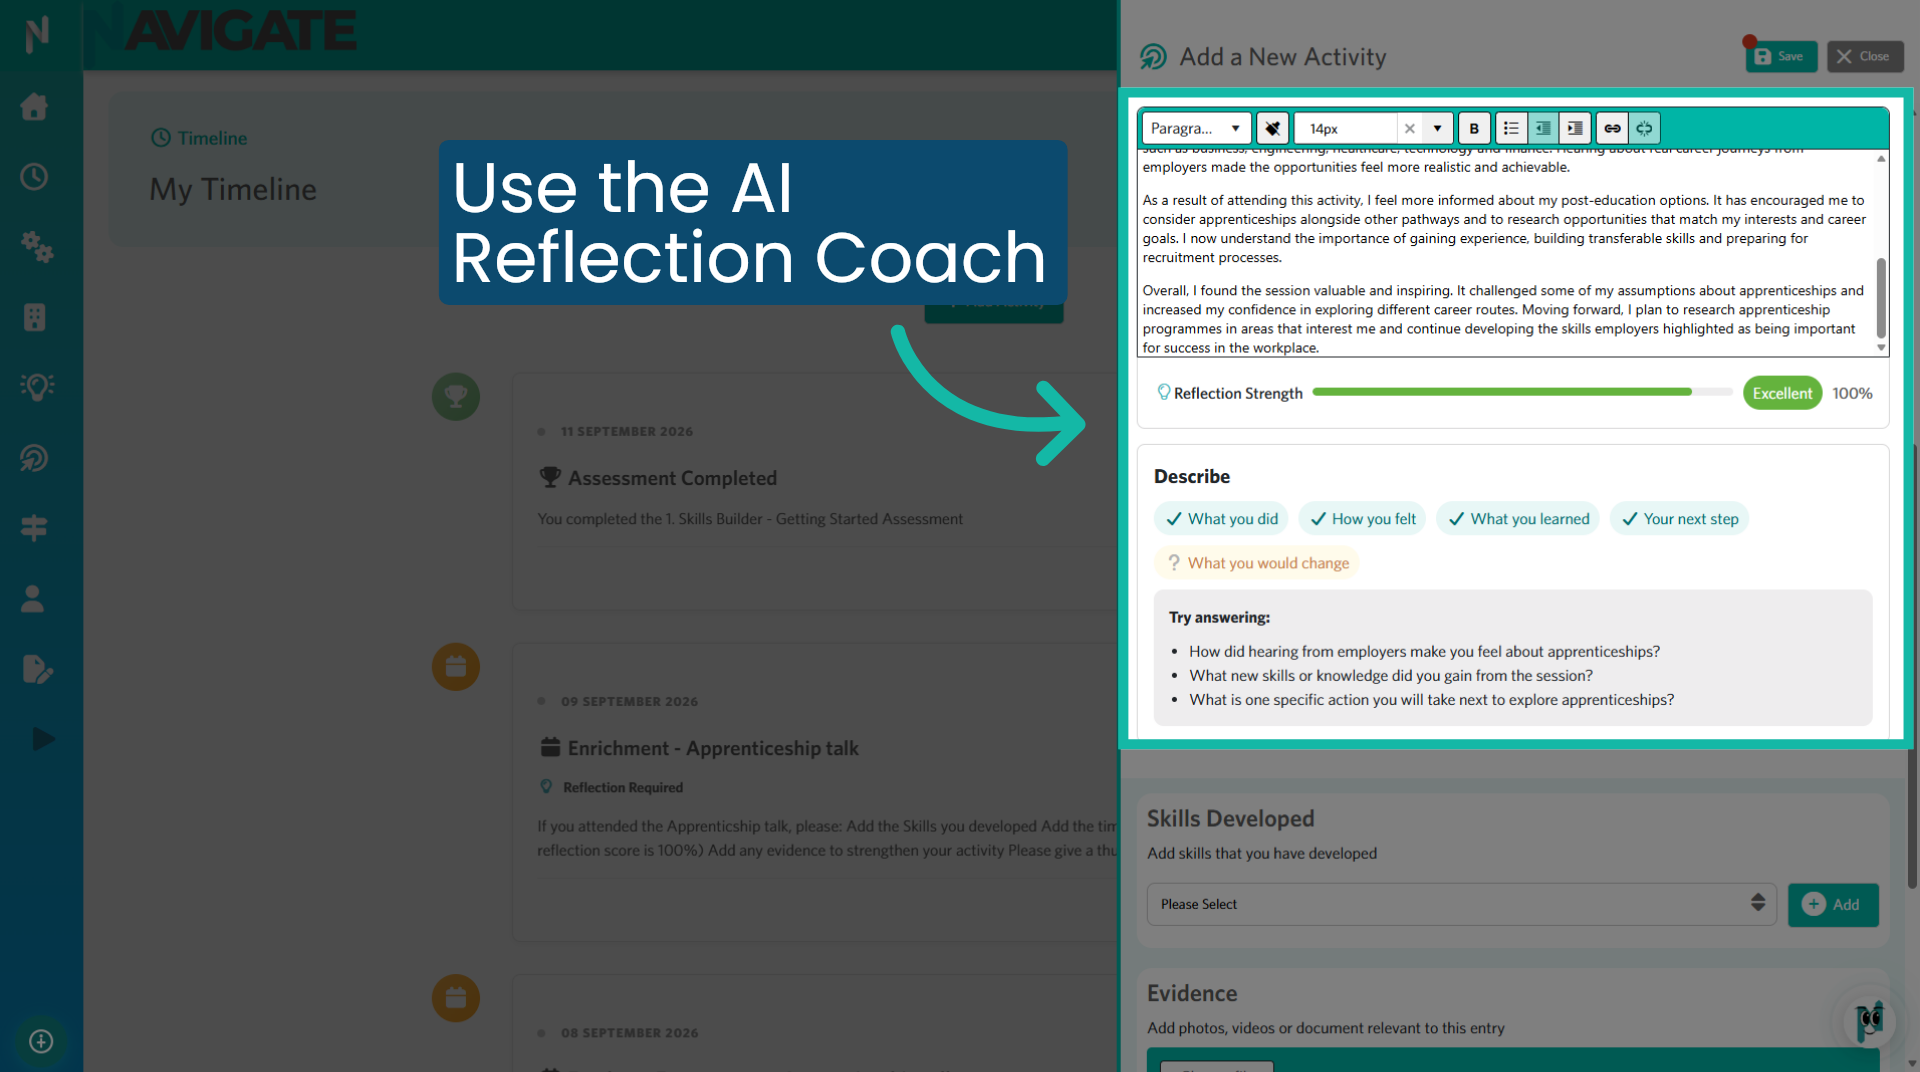
12. Use the AI Reflection Coach
Your reflections transform an activity into a valuable learning experience. Use the Reflection Coach prompts to guide you in asking the right questions and strive for 100%!
13. Select Skills developed
Please select the skills you believe you developed by participating in the activity. You may choose multiple options.
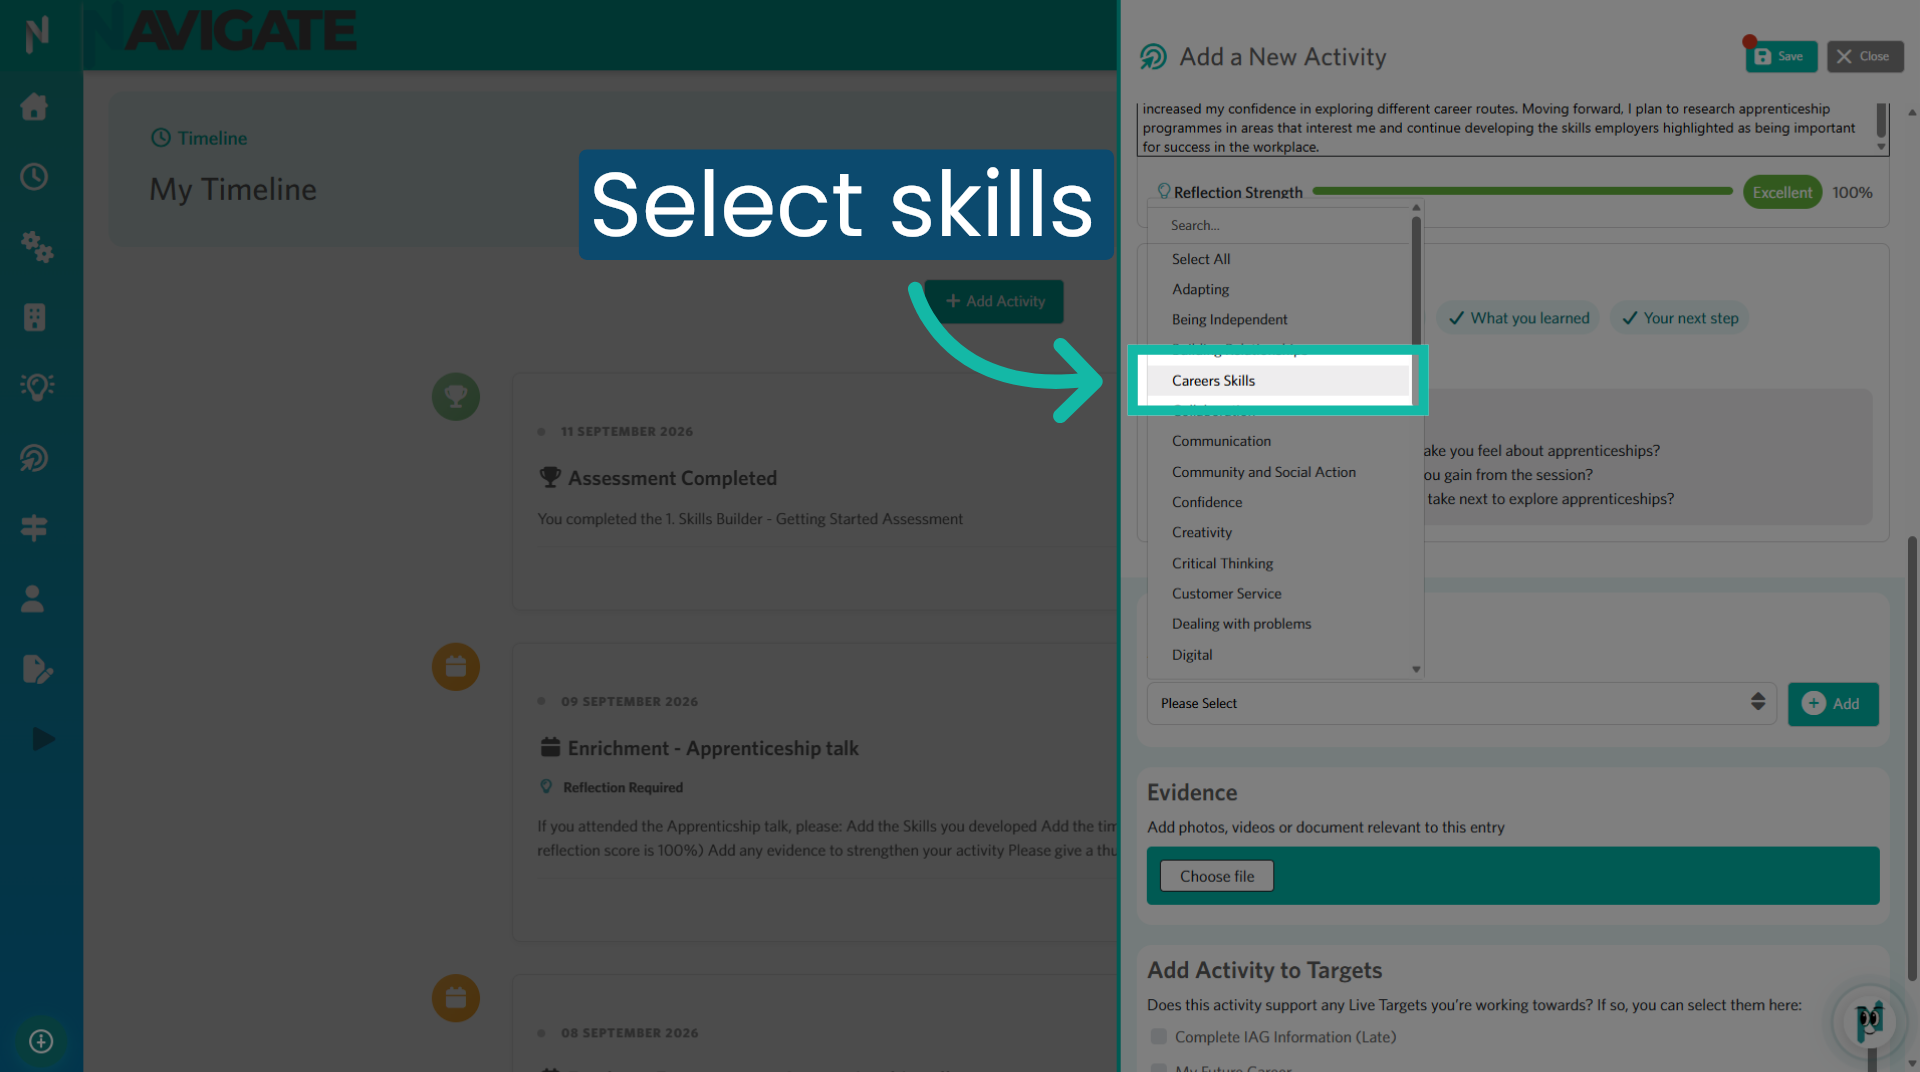
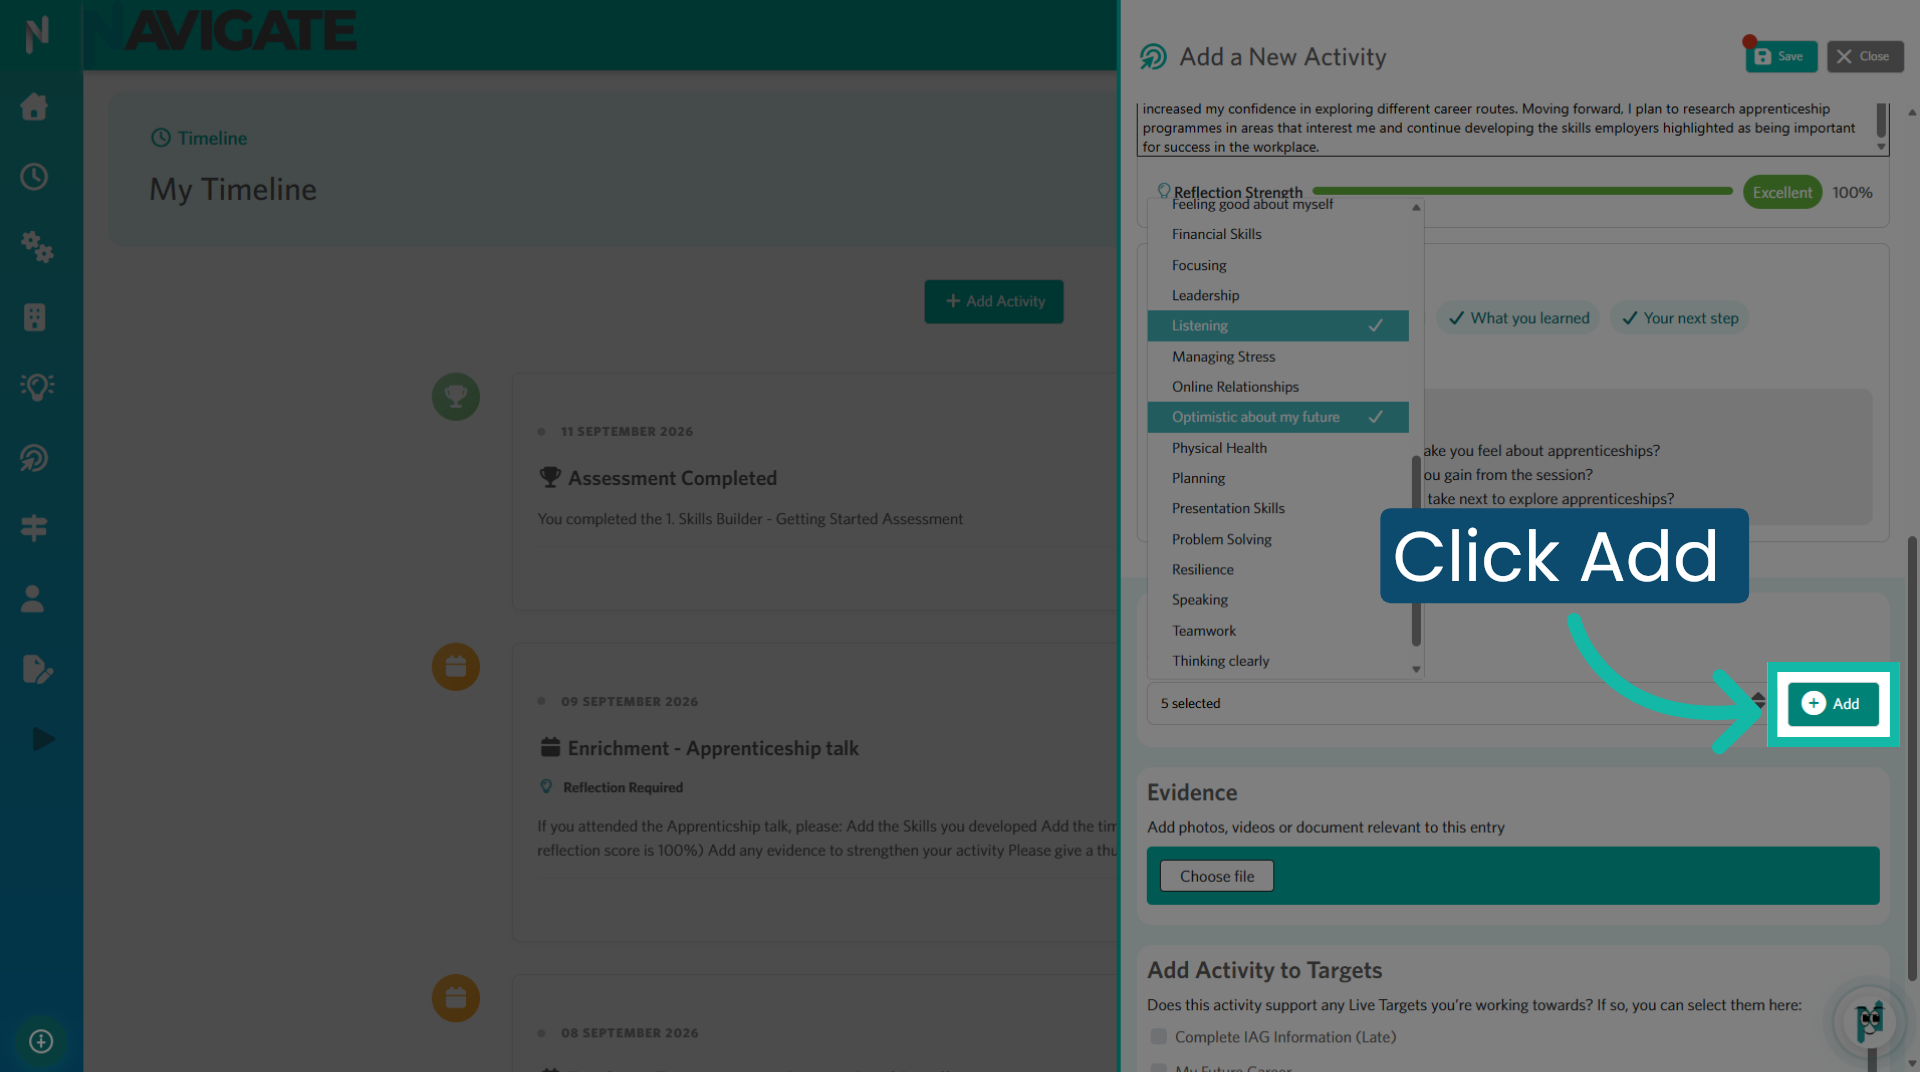
14. Click 'Add'
Once you have selected the skills developed from the dropdown, click 'Add'.
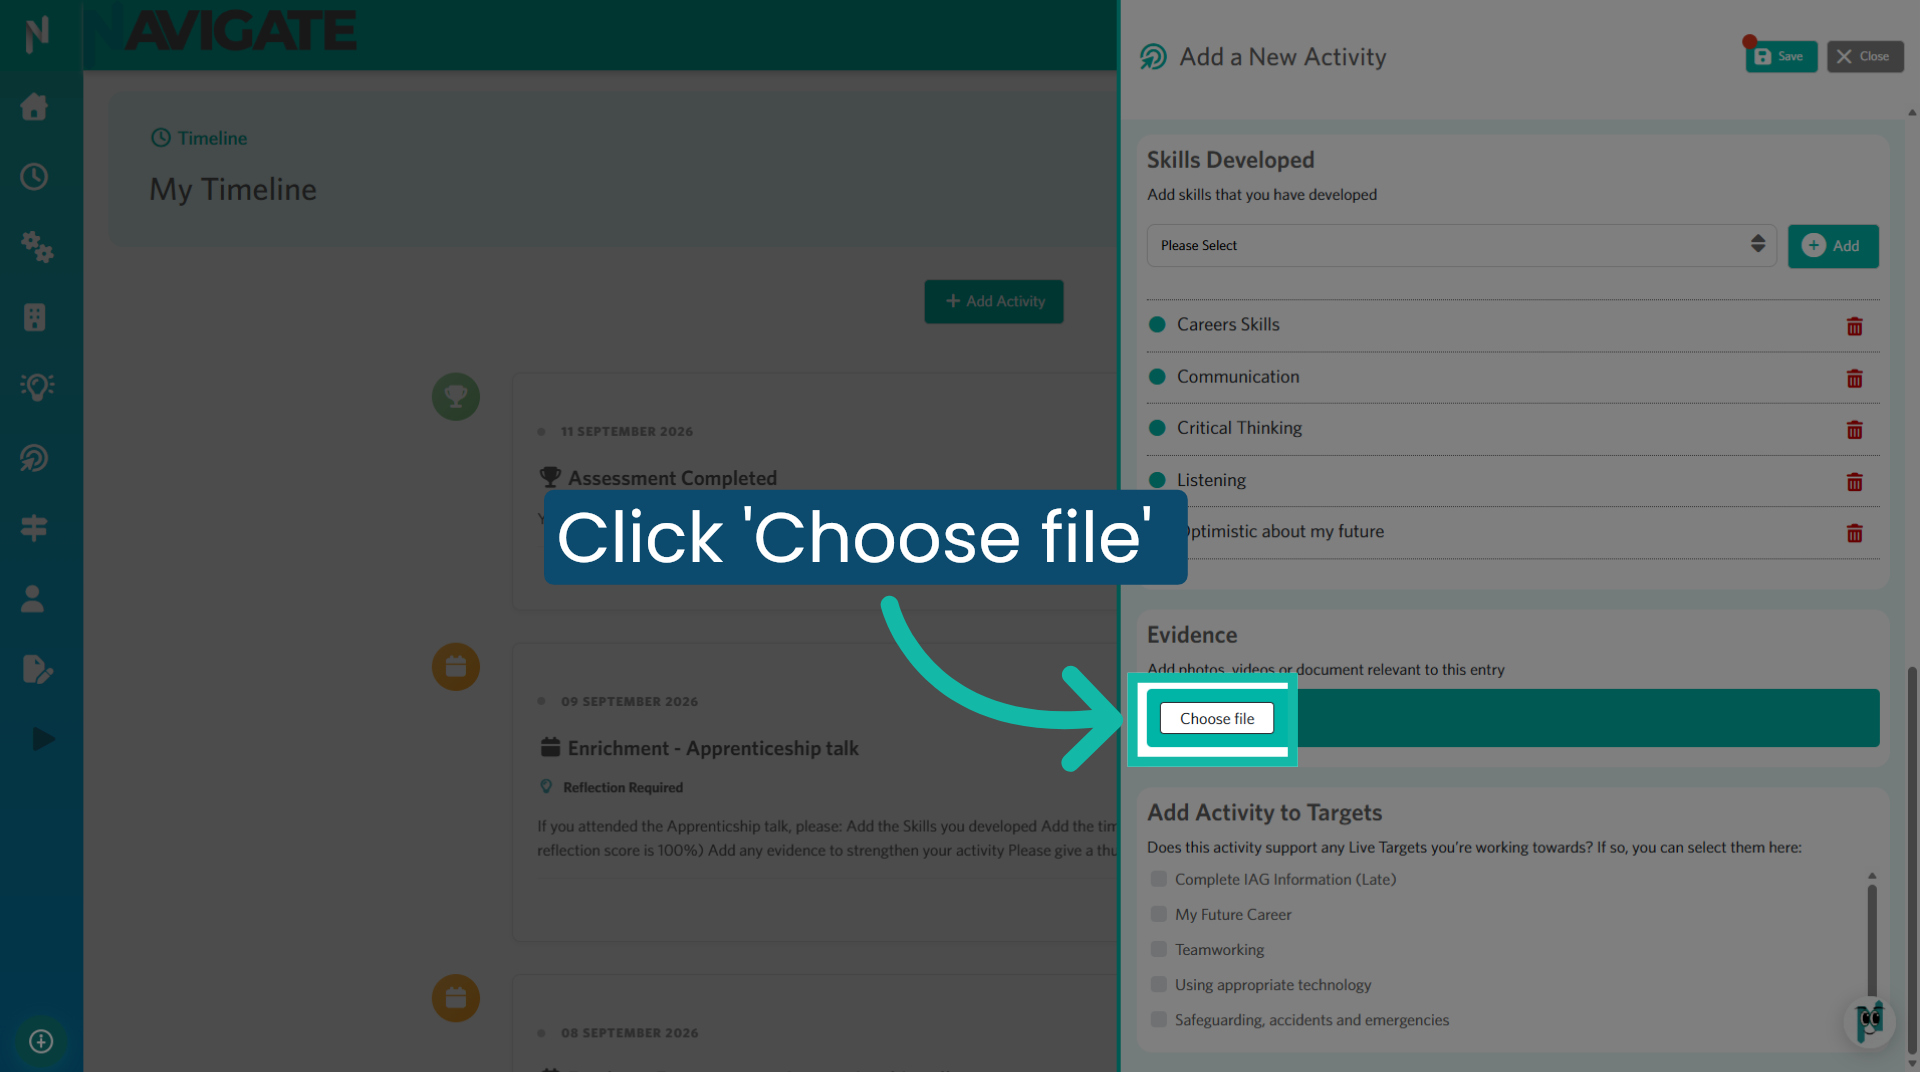
15. Add photos, videos or documents relevant to this activity
Click on 'Choose file' to attach any supporting photos, videos or documents for this activity.
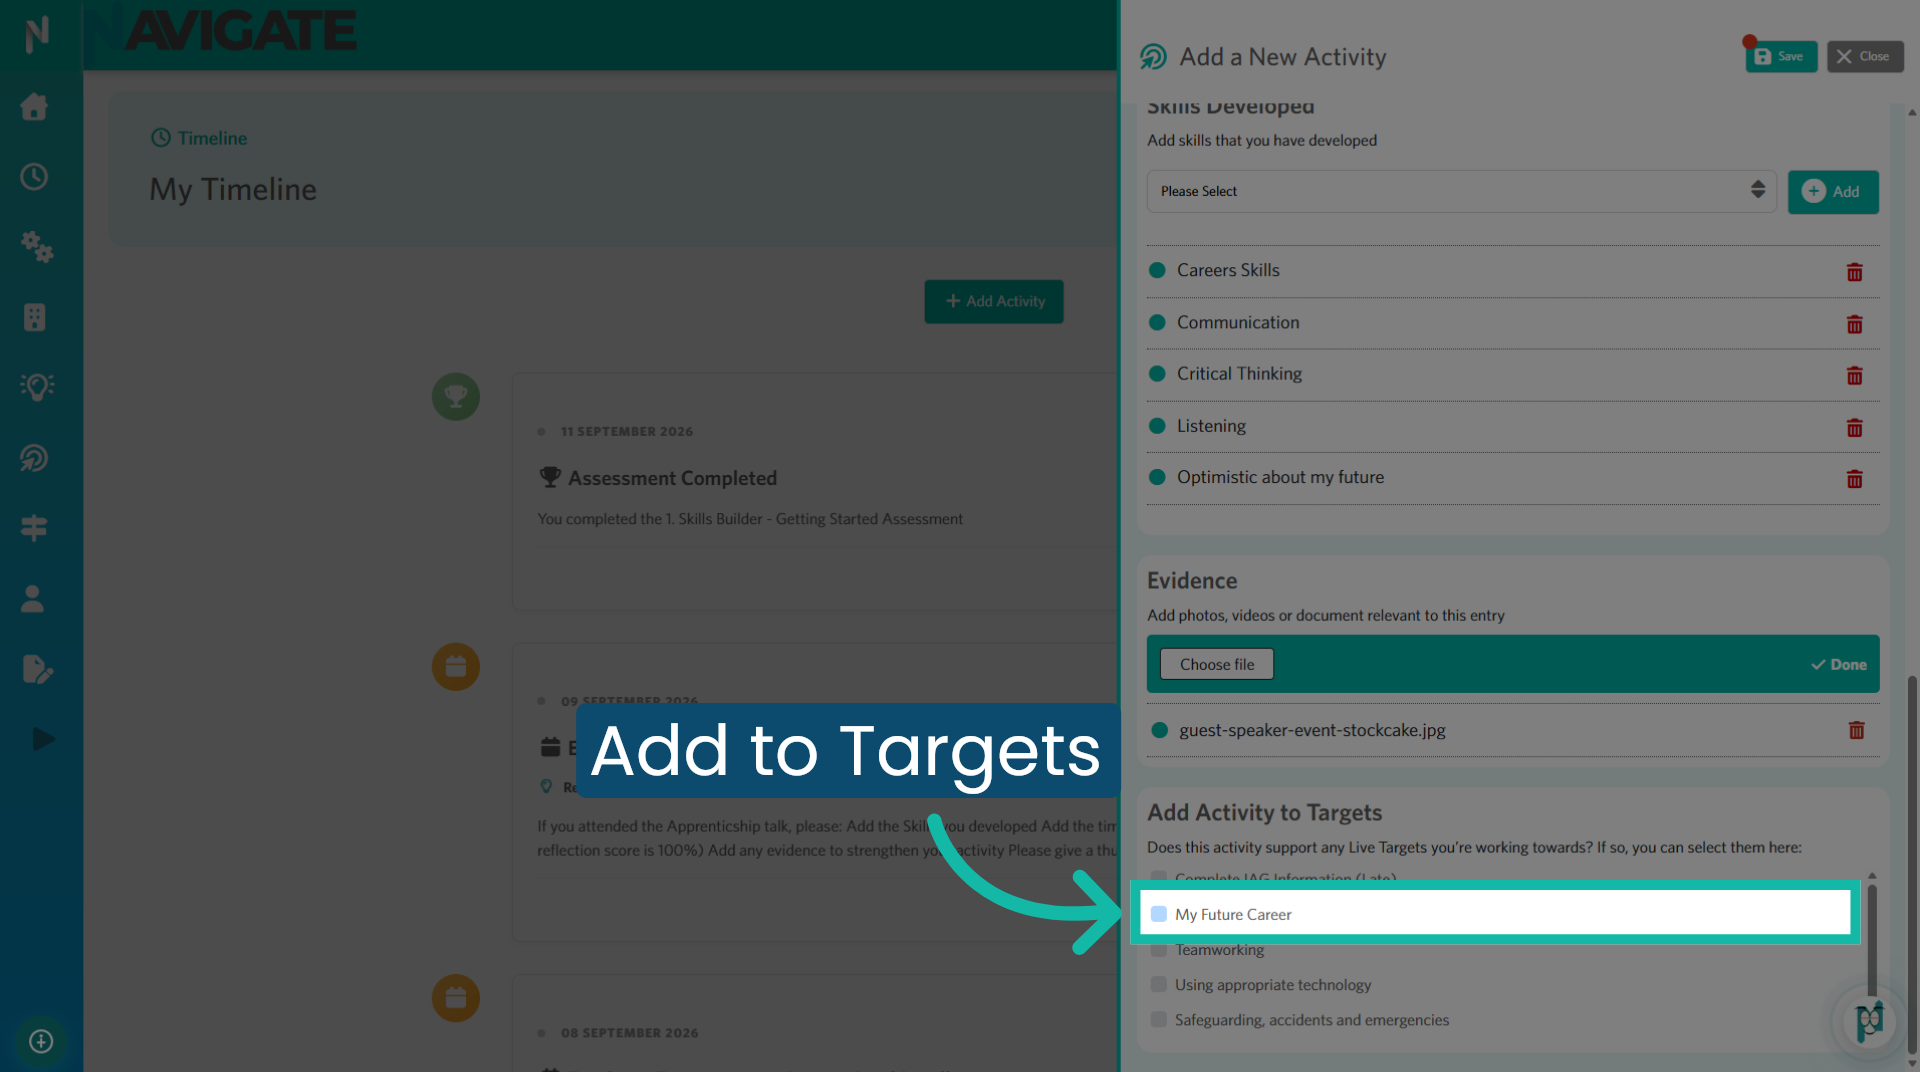
16. Attach this activity to any relevant targets
If applicable, attach this activity to any targets you are working towards by clicking the checkbox next to the target name.
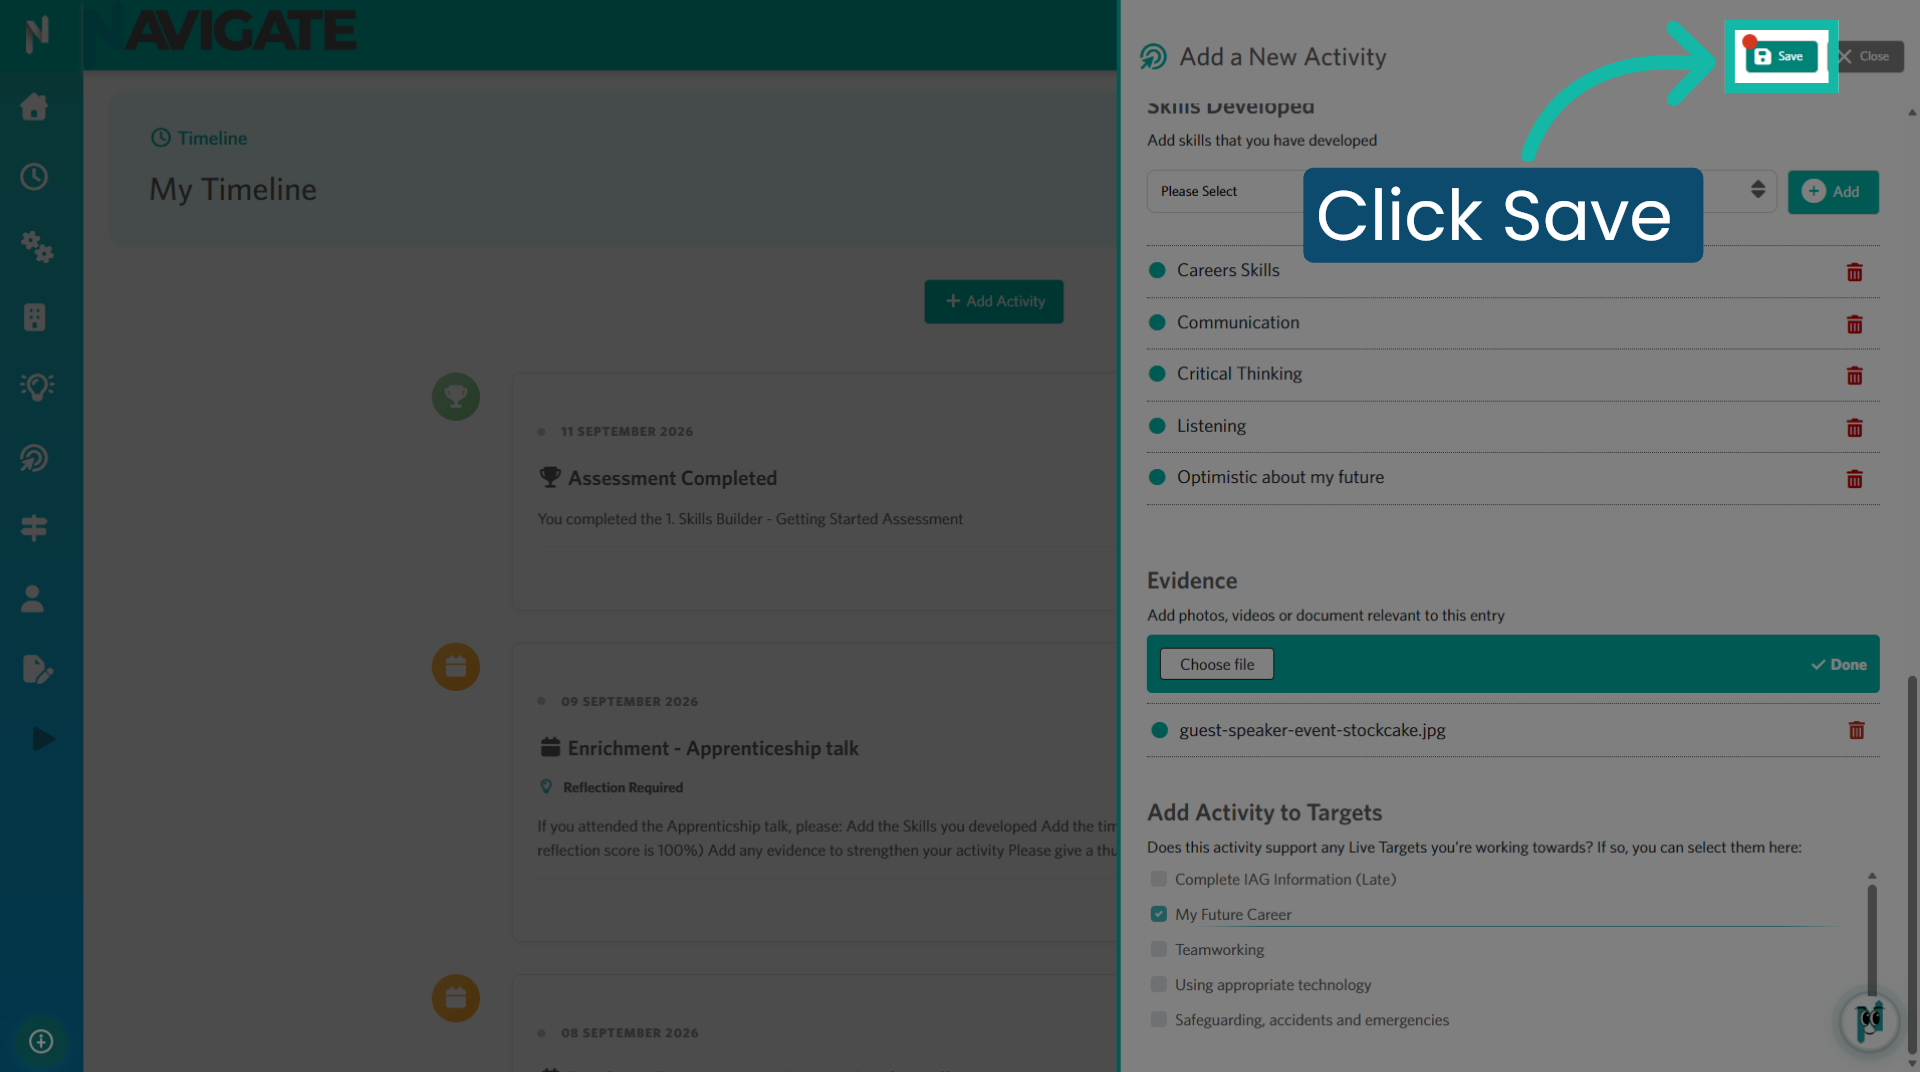
17. Click 'Save'
Once completed, click the 'Save' icon at the top right of the screen.
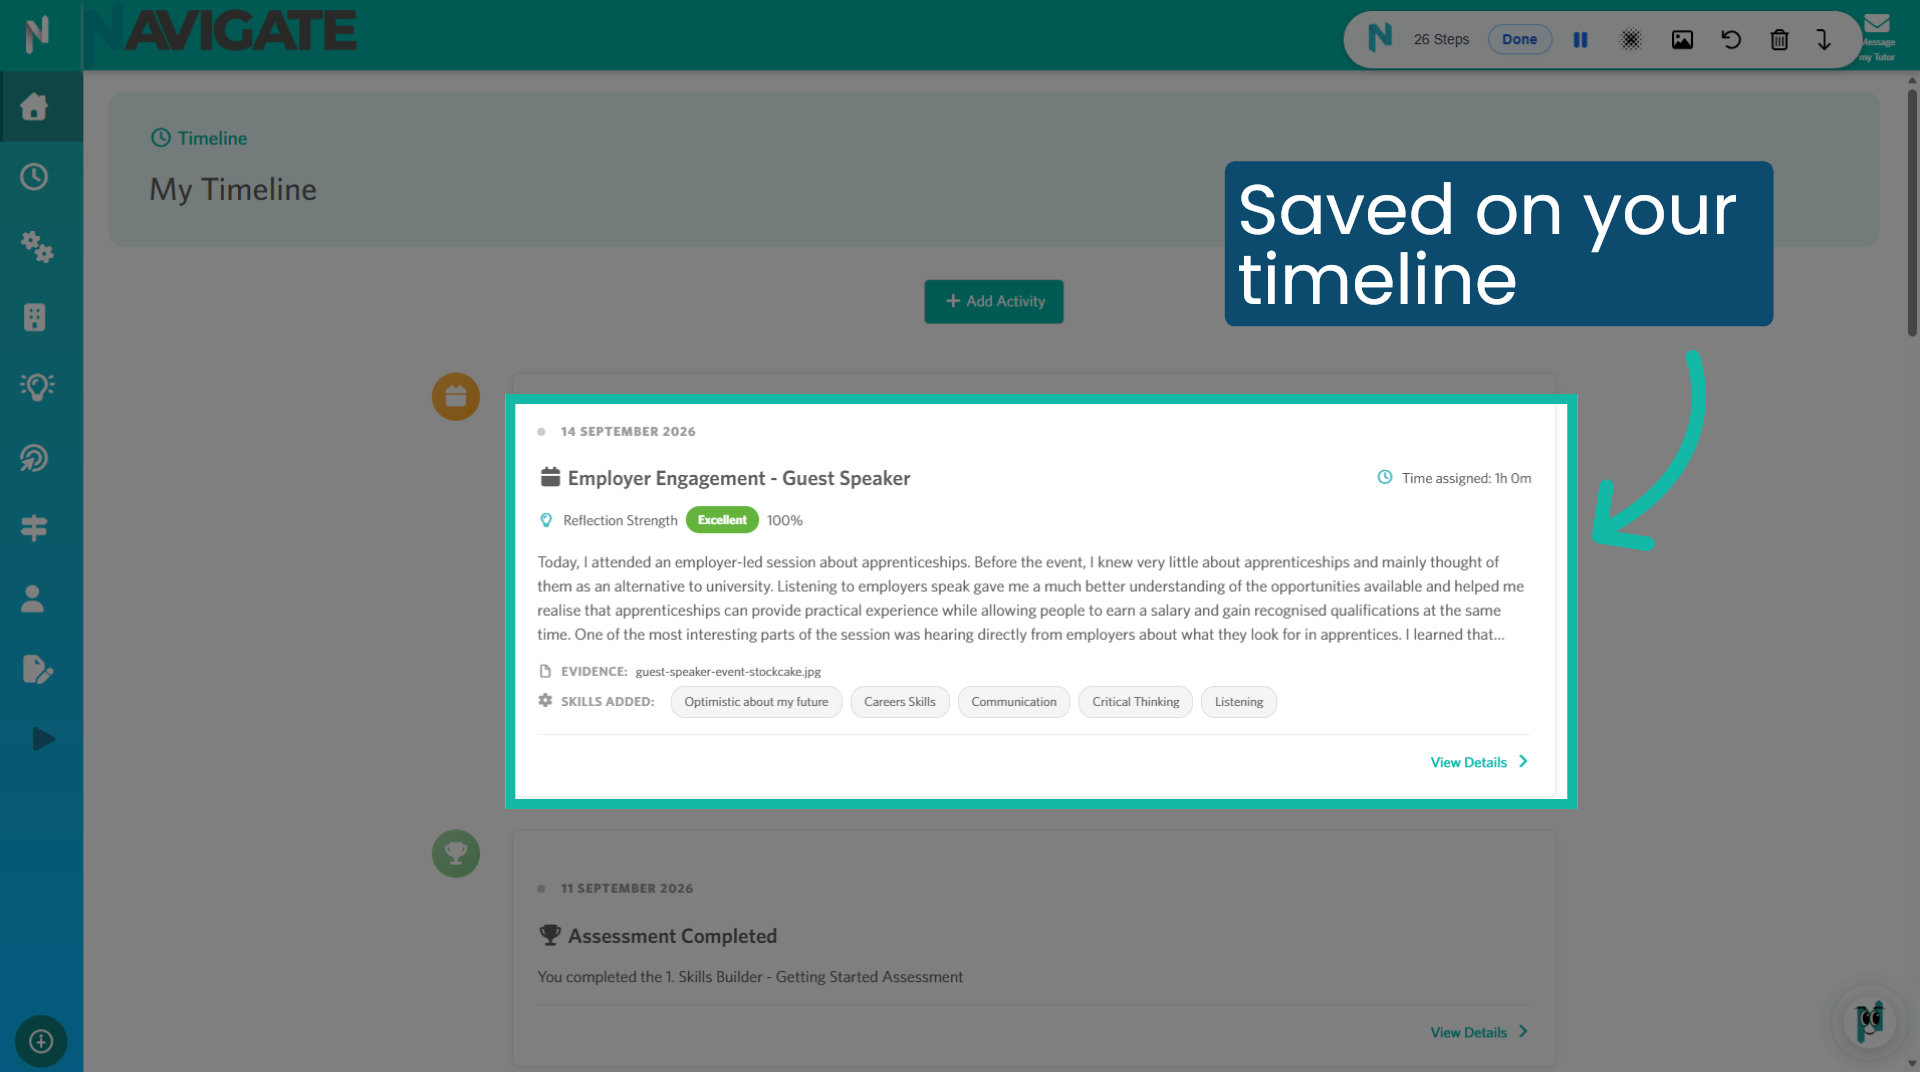
18. Your activity is now saved to your timeline
You can now view your activity on your timeline. At any time, you can edit this activity by clicking 'View Details'. It can also be added to future targets and included in your Digital CV to showcase the activities you have participated in.
19. Click the 'Home' icon to return to main dashboard
Click the 'Home' icon to return to your main dashboard.

Was this article helpful?
That’s Great!
Thank you for your feedback
Sorry! We couldn't be helpful
Thank you for your feedback
Feedback sent
We appreciate your effort and will try to fix the article